
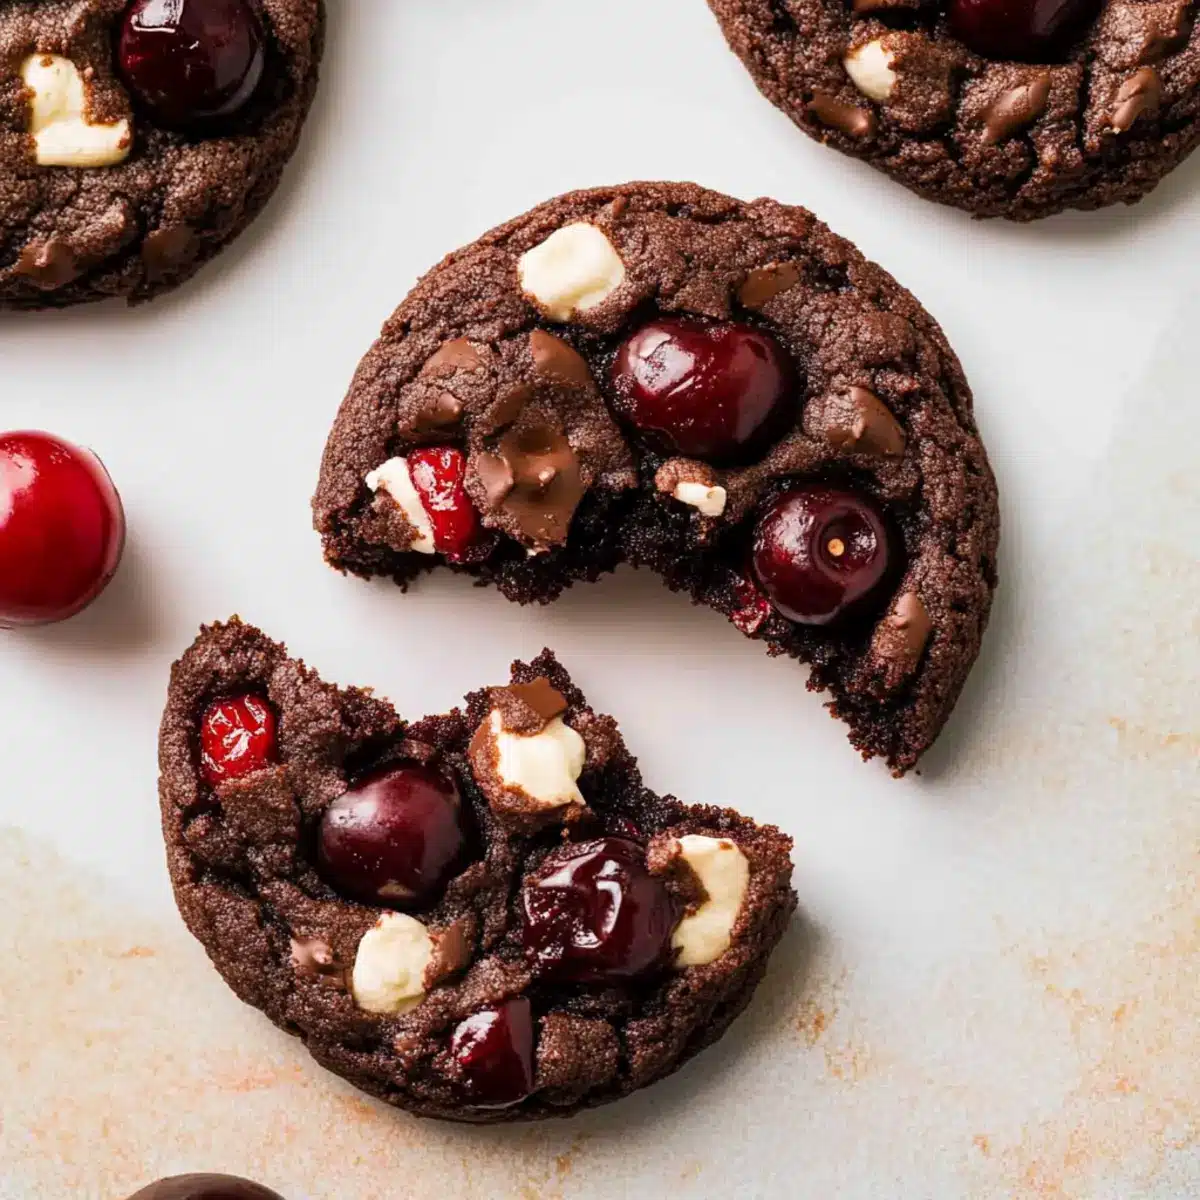
As I cracked open a box of freshly picked cherries, their sweet, tangy aroma filled the kitchen, instantly urging me to create something special. Enter my Chewy Black Forest Cookies with Fresh Cherries! This delightful twist on the classic dessert brings together rich chocolate flavor and chewy goodness, all while incorporating bursts of juicy, fresh cherries. What I love most about this recipe is how quick and easy it is—no chilling required and no electric mixer needed—making it perfect for any home chef eager to whip up a satisfying treat. The crisp edges and soft centers are simply irresistible, and every bite feels like a celebration of cherry season. Ready to indulge in a delicious chocolate cherry experience? Let’s dive into the recipe!
Why are these Black Forest Cookies a must-try?
Simplicity: You won’t believe how easy these cookies are to make! With no chilling required and the absence of electric mixers, they are perfect for any home cook seeking a hassle-free baking experience.
Flavor Explosion: Rich chocolate, combined with bursting fresh cherries, creates a delightful treat that captures the essence of the iconic Black Forest cake in every bite.
Versatility: Not only can you enjoy them warm, but they’re equally delicious paired with a scoop of ice cream or a glass of milk. Check out Soft Maple Cookies for another easy-to-make dessert!
Crowd-Pleaser: These cookies are ideal for gatherings, parties, or just an afternoon treat for loved ones. Everybody will be asking for seconds!
Texture: The chewy centers and crisp edges create a delightful contrast that keeps cookie lovers coming back for more. Each bite is a perfect union of chocolatey goodness and fruity freshness!
Black Forest Cookies Ingredients
Get ready for baking bliss with these delicious Black Forest Cookies!
For the Dough
• All-purpose flour – Provides structure to the cookies; remember to spoon and level for accuracy.
• Unsweetened cocoa powder – Delivers rich chocolate flavor; Dutch process cocoa is recommended for an intense taste.
• Baking powder – A leavening agent that helps the cookies rise; measure accurately for the perfect texture.
• Baking soda – Works with baking powder for a light and fluffy texture; ensure freshness for best results.
• Salt – Enhances flavor and balances the sweetness; just a pinch can make a big difference!
• Unsalted butter – Adds richness; melt it and let it cool to room temperature for smooth mixing.
• Brown sugar – Contributes moisture and chewiness; feel free to substitute with light or dark brown sugar.
• White granulated sugar – Sweetens the cookies and enhances their texture; a crucial component!
• Pure vanilla extract – Adds depth of flavor; opt for high-quality vanilla for the best taste.
• Large eggs – Binds the ingredients together and helps with leavening; let them sit at room temperature for optimal mixing.
For the Chocolatey Goodness
• White chocolate chips – Provide creaminess and sweetness; consider sprinkling extra on top after baking for a delightful finish.
• Semisweet chocolate chips – Intensify the chocolate flavor; adding more on top while warm gives a melty touch.
For the Fruity Touch
• Fresh cherries – Offers a burst of flavor; wash, pit, and cut into quarters before folding them into the dough for that beautiful cherry experience in your Black Forest Cookies.
Step‑by‑Step Instructions for Black Forest Cookies
Step 1: Melt Butter and Prepare Cherries
Start by melting unsalted butter in the microwave until just melted, then allow it to cool to room temperature. While the butter is cooling, wash, pit, and cut fresh cherries into quarters, ensuring they are ready to burst with flavor in your Black Forest Cookies.
Step 2: Preheat Oven and Prepare Baking Sheets
Preheat your oven to 350°F (175°C) and line two cookie sheets with parchment paper to prevent sticking. This step is crucial for achieving perfectly baked Black Forest Cookies with crisp edges while ensuring easy cleanup afterward.
Step 3: Whisk Dry Ingredients
In a medium bowl, combine all-purpose flour, unsweetened cocoa powder, baking powder, baking soda, and salt. Whisk the dry ingredients together until well blended to ensure an even distribution of flavors, which will create the perfect texture for your cookies.
Step 4: Mix Wet Ingredients
In a large bowl, mix the cooled melted butter, brown sugar, white granulated sugar, and pure vanilla extract with a rubber spatula until smooth. Add the large eggs one at a time, stirring well to incorporate; this mixture is the rich foundation of your Black Forest Cookies.
Step 5: Combine Dry and Wet Ingredients
Gradually add the dry ingredient mixture to the wet ingredients, mixing until just combined. Be careful not to overmix—instead, focus on achieving a smooth dough before gently folding in the semisweet chocolate chips and fresh cherries, ensuring every bite is filled with flavor.
Step 6: Scoop the Cookie Dough
Using a large cookie scoop (approximately 3 oz), portion out the cookie dough onto the prepared baking sheets. Space the cookie dough balls about 2 inches apart to allow for spreading during baking, ensuring your Black Forest Cookies will not stick together.
Step 7: Bake the Cookies
Place one batch of cookies in the preheated oven and bake for 13-15 minutes. You’ll know they’re done when the edges are set, and the centers appear slightly soft; this will give you the perfect chewy texture in your delicious Black Forest Cookies.
Step 8: Add Extra Chocolate Chips and Cool
If desired, sprinkle extra semisweet and white chocolate chips on top of the cookies while they are still warm for an indulgent touch. Allow the cookies to cool on the baking sheet for about 10 minutes before carefully transferring them to a cooling rack to finish cooling completely.
Black Forest Cookies Variations & Substitutions
Embrace your creative side with these delightful twists on the classic Black Forest Cookies!
-
Maraschino Cherries: Substitute fresh cherries with maraschino cherries for an easier option; simply drain and chop them before adding for a sweet twist.
-
Dairy-Free: Use coconut oil or dairy-free butter in place of unsalted butter, along with almond milk for a creamy texture; the chocolate will still shine through.
-
Nutty Addition: Fold in chopped walnuts or pecans to add a satisfying crunch; the nuttiness pairs beautifully with the rich chocolate and cherries.
-
Gluten-Free Alternative: Swap all-purpose flour with a 1:1 gluten-free baking mix; ensure the blend includes xanthan gum for perfect texture.
-
Chocolate Variety: Replace semisweet chocolate chips with dark chocolate chunks or milk chocolate for a unique flavor profile; each choice offers a distinct sweetness balance.
-
Spicy Kick: Add a pinch of cayenne or cinnamon to the dry ingredients for a surprising warmth; it elevates the flavors in a delightful way.
-
Extra Chocolate Drizzle: Melt extra white or dark chocolate and drizzle over cooled cookies for a decorative touch that enhances sweetness; it’s an irresistible dressing that takes these cookies to the next level.
-
Ice Cream Sandwiches: Use these cookies as the base for ice cream sandwiches; simply add a scoop of your favorite ice cream in between two cookies for an indulgent treat—perfect for summer!
Each variation allows you to explore new flavors while keeping the essence of those delightful Black Forest Cookies. If you’re looking for other scrumptious desserts, don’t forget to try out Chocolate Chip Cookies or Buttery Spritz Cookies for more baking inspiration!
How to Store and Freeze Black Forest Cookies
Room Temperature: Store cookies in an airtight container at room temperature for up to 5 days. This keeps them fresh and chewy, ready for snacking at any time!
Fridge: If you want them to last a bit longer, you can refrigerate the cookies in an airtight container for up to 7 days. Just be sure to allow them to come to room temperature before enjoying.
Freezer: For longer storage, freeze Black Forest Cookies in a single layer on a baking sheet until solid, then transfer to an airtight container for up to 30 days. Thaw at room temperature before serving.
Reheating: If you prefer warm cookies, simply pop them in the microwave for about 10-15 seconds. This will restore their freshly baked taste and bring back that gooey chocolate charm!
Make Ahead Options
These Chewy Black Forest Cookies are perfect for meal prep lovers! You can prepare the dough up to 24 hours in advance, making it a fantastic solution for busy weeknights. To do this, scoop the cookie dough onto the prepared baking sheets, then cover tightly with plastic wrap and refrigerate. This not only helps the flavors deepen but also retains the cookies’ chewy texture. When you’re ready to bake, simply preheat the oven and bake the chilled dough straight from the fridge for an additional minute. This way, you’ll enjoy fresh, chocolatey goodness with minimal effort, all while saving precious time!
Expert Tips for the Best Black Forest Cookies
-
Measure Carefully: Use the spoon-and-level method for flour to prevent dry and crumbly cookies. Accurate measurements are key to achieving the perfect chewy texture.
-
Room Temperature Eggs: Ensure your eggs sit at room temperature before mixing. This helps create a smoother batter that blends better with the other ingredients, enhancing the cookie’s overall flavor.
-
Avoid Overmixing: Once you combine the wet and dry ingredients, mix until just combined. Overmixing can lead to tough cookies, so gentle folding is your friend!
-
High-Altitude Adjustments: If you’re baking at a higher altitude, remember to increase the flour by 2 tablespoons to maintain the desired texture and rise in your Black Forest Cookies.
-
Cherry Quality: Use fresh, ripe cherries for the best flavor. Pitting and cutting them into quarters ensures they release their juices evenly during baking, boosting the cookie experience.
-
Chill If Needed: If your dough seems too wet, chill it briefly in the refrigerator before scooping. This can help achieve a firmer dough without compromising the final results.
What to Serve with Chewy Black Forest Cookies with Fresh Cherries
Enhance your delightful cookie experience with these perfect pairings, designed to complement the rich chocolate and juicy cherry flavors.
-
Creamy Vanilla Ice Cream: This classic combination offers a luscious contrast to the chewy texture, creating a delightful balance of temperatures. A scoop on the side transforms your dessert into an indulgent treat.
-
Cold Glass of Milk: The refreshing creaminess of milk beautifully cuts through the richness of the cookies, allowing every bite to flourish without overwhelming your palate.
-
Fresh Berry Salad: Tossed with a drizzle of honey, this colorful medley of strawberries, blueberries, and raspberries adds brightness and a touch of tartness that pairs wonderfully with the cookies.
-
Whipped Cream: A dollop of lightly sweetened whipped cream elevates your cookie to a new level of decadence. It adds a fluffy contrast that melds perfectly with the chocolate and cherries.
-
Chocolate Sauce Drizzle: For the chocolate lovers, a warm drizzle on top of the cookies brings an extra layer of richness. It enhances the experience, making each bite even more decadent.
-
Hot Coffee or Espresso: Pairing the cookies with a hot beverage offers a comforting element and helps to balance out the sweetness, creating a cozy treat just perfect for afternoon enjoyment.
Black Forest Cookies Recipe FAQs
What type of cherries should I use for the best flavor?
Absolutely! Fresh, ripe cherries are recommended for that perfect burst of flavor in your Black Forest Cookies. Look for cherries that are firm and vibrant. If fresh cherries aren’t available, you can substitute with maraschino or candied cherries, adjusting the sweetness as needed.
How should I store Black Forest Cookies?
To keep your cookies fresh and delicious, store them in an airtight container at room temperature for up to 5 days. If you want them to last longer, refrigerate them in an airtight container for up to 7 days, but let them return to room temperature for the best taste before enjoying!
Can I freeze Black Forest Cookies?
Yes! To freeze your Black Forest Cookies, first lay them out in a single layer on a baking sheet and freeze until solid. Then, transfer them to an airtight container or freezer bag. They can be stored for up to 30 days. When you’re ready to enjoy, just thaw them at room temperature and savor that delicious chocolate goodness!
What should I do if my cookie dough is too wet?
If you find your dough is too wet, you can gently chill it in the refrigerator for about 15-20 minutes before scooping. This helps firm it up, making it easier to handle while maintaining that delightful chewy texture.
Are there any dietary considerations I should keep in mind?
For those with allergies, this recipe contains common allergens like eggs, dairy, and gluten. If you’re making these Black Forest Cookies for someone with dietary restrictions, you can explore egg substitutes (like applesauce or flaxseed meal) and gluten-free flour options to adapt the recipe. Just be sure to keep all ingredients in mind!
How can I tell if my cookies are done baking?
You’ll know your Black Forest Cookies are ready when the edges are set, and the centers appear slightly soft, usually around the 13 to 15-minute mark. They will continue to firm up as they cool on the baking sheet—so trust your oven timer, but also use your eyes for those perfect cookie edges!
Irresistibly Chewy Black Forest Cookies with Fresh Cherries
Ingredients
Equipment
Method
- Start by melting unsalted butter in the microwave until just melted, then allow it to cool to room temperature.
- Preheat your oven to 350°F (175°C) and line two cookie sheets with parchment paper.
- In a medium bowl, combine all-purpose flour, unsweetened cocoa powder, baking powder, baking soda, and salt and whisk together.
- In a large bowl, mix the cooled melted butter, brown sugar, white granulated sugar, and vanilla extract until smooth. Add the eggs one at a time, stirring well.
- Gradually add the dry mixture to the wet mixture, mixing until just combined. Gently fold in the semisweet chocolate chips and fresh cherries.
- Using a large cookie scoop, portion out the cookie dough onto the prepared baking sheets, spacing them about 2 inches apart.
- Bake for 13-15 minutes until the edges are set and the centers are slightly soft.
- If desired, sprinkle extra chocolate chips on top while still warm. Allow cookies to cool on the baking sheet for 10 minutes before transferring to a cooling rack.
Leave a Reply