
The delightful aroma of baking Yorkshire puddings reminds me of Sunday dinners at my grandmother’s house, where fluffy, golden puffs took center stage alongside roast meats and rich gravy. Creating gluten-free Yorkshire pudding is a breeze with just three easy-to-find ingredients: cornflour, eggs, and milk. Not only does this simple recipe cater to those avoiding gluten, but it also allows for dairy-free variations, making it inclusive for everyone at the table. Imagine the joy of serving these airy treats, perfectly crisped on the outside and soft on the inside, elevating your meals without hours spent in the kitchen. Curious to see how these can transform your next roast dinner? Let’s dive into this easy and adaptable recipe!
Why Are Yorkshire Puddings So Irresistible?
Indulgent, gluten-free delight: These Yorkshire puddings bring the joy of traditional recipes without the gluten, making them accessible for everyone.
Quick and easy: With only three ingredients, you’ll whip these up in no time! Perfect for busy weeknights or festive dinners.
Versatile options: Feel free to swap out traditional milk for a dairy-free alternative, catering to various dietary needs.
Crowd-pleaser: Serve them fresh out of the oven with gravy, and watch your family and friends swoon over this nostalgic favorite.
Perfect for any occasion: Whether it’s a Sunday roast or a casual weeknight dinner, these puddings are a delightful addition, elevating even the simplest meals.
Elevate your cooking skills today with this simple recipe for fluffy Yorkshire puddings that everyone will love!
Yorkshire Pudding Ingredients
• Here’s what you need to create the perfect gluten-free Yorkshire puddings!
For the Batter
- Cornflour (Cornstarch) – Provides structure for a beautiful, light texture since it’s gluten-free; feel free to use a gluten-free flour mix if you prefer.
- Eggs – Essential for binding and creating that puffy rise; while no direct substitutes are recommended, vegan variations exist for those who need them.
- Milk (Dairy-Free if Necessary) – Adds richness and moisture, enhancing flavor and the golden color; switch to any dairy-free milk like almond or soy for an equally delightful result.
For Frying
- Cooking Oil – Ensures a crispy exterior that contrasts beautifully with the airy inside; vegetable oil or sunflower oil work best for that perfect crunch.
Elevate your cooking with this simple yet delectable gluten-free Yorkshire pudding recipe that everyone will adore!
Step‑by‑Step Instructions for Gluten-Free Yorkshire Pudding
Step 1: Preheat the Oven
Begin by preheating your oven to 220°C (425°F). This high temperature is crucial to achieving that perfect puffiness in your gluten-free Yorkshire puddings. Allow the oven to reach the desired temperature, and while it’s heating up, prepare your muffin tray for the next step.
Step 2: Prepare the Muffin Tray
Add about 1 teaspoon of cooking oil to each compartment of a standard muffin tray. Place the tray into the preheated oven for 10-15 minutes until the oil is sizzling hot, creating an ideal frying atmosphere for the batter. The oil should shimmer, indicating it’s ready for the batter.
Step 3: Mix the Batter
In a mixing bowl, crack the eggs and beat them well until they are fully combined. Gradually whisk in the cornflour until the mixture is smooth and free of lumps. This step is essential for a light texture in your Yorkshire pudding, ensuring it rises beautifully when baked.
Step 4: Incorporate the Milk
Slowly add the milk to your egg and cornflour mixture while continuously whisking. This will help ensure that your batter is smooth and homogenous. The batter should be somewhat runny but thick enough to coat the back of a spoon, indicating it’s perfectly blended for gluten-free Yorkshire pudding.
Step 5: Transfer the Batter
Now, pour the batter into a jug or measuring cup for easy pouring. This step makes it simple to fill your muffin tray without making a mess. The liquid batter should have a lovely, creamy consistency, ready to create fluffy Yorkshire puddings.
Step 6: Fill the Muffin Tray
Carefully remove the hot muffin tray from the oven, ensuring to handle it safely to avoid burns. Immediately pour the batter into each muffin hole until they are just under 3/4 full. Listen for the satisfying sizzle as the batter meets the hot oil—this is a great sign for achieving that perfect rise.
Step 7: Bake the Puddings
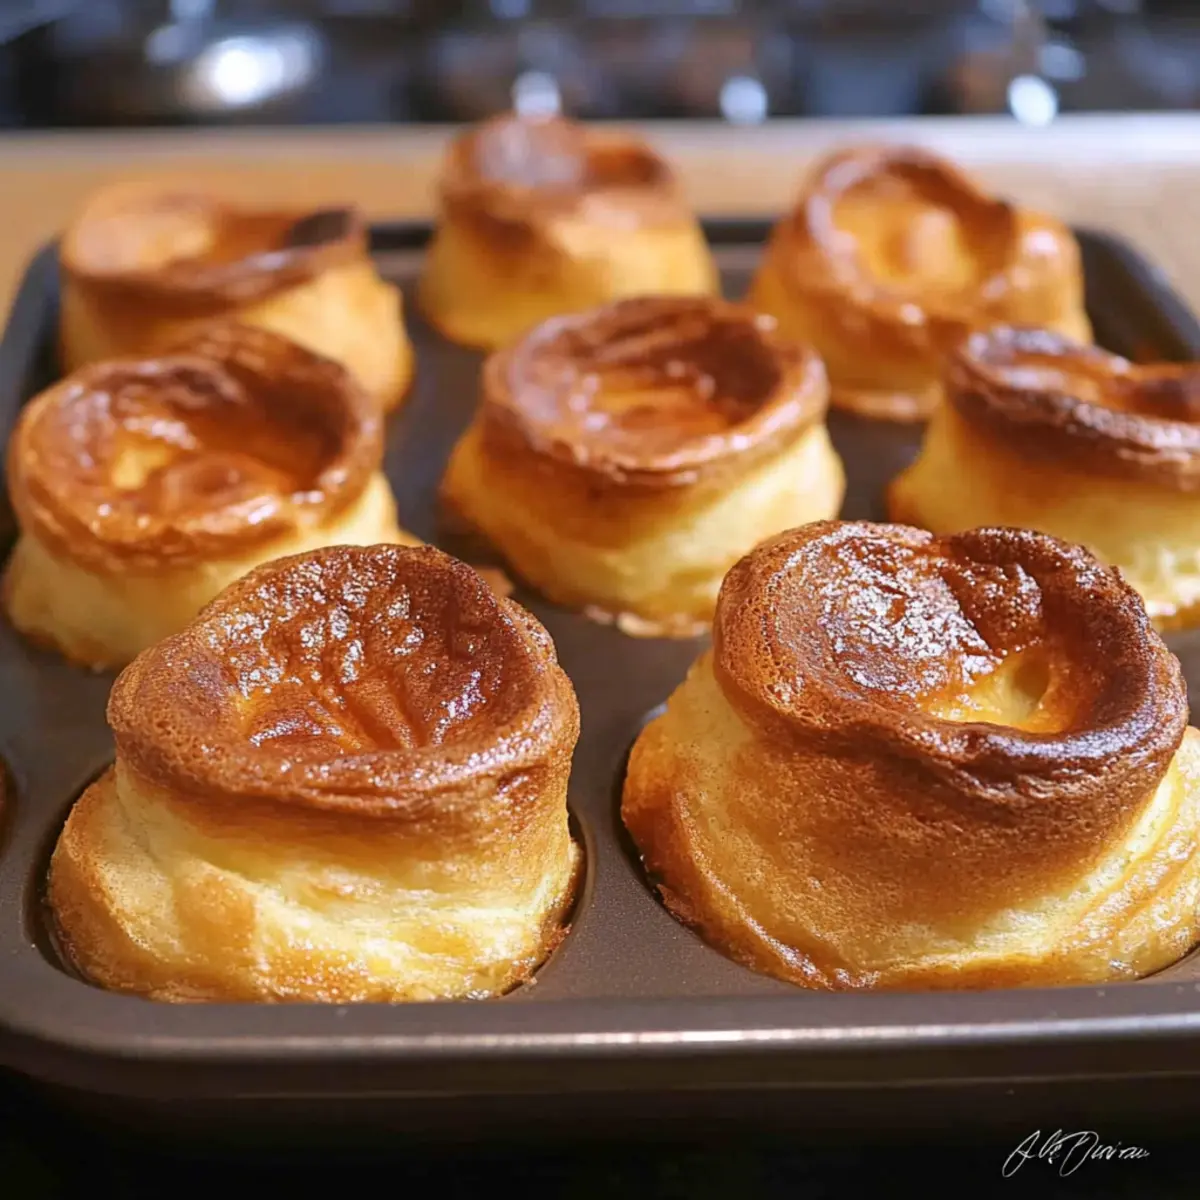
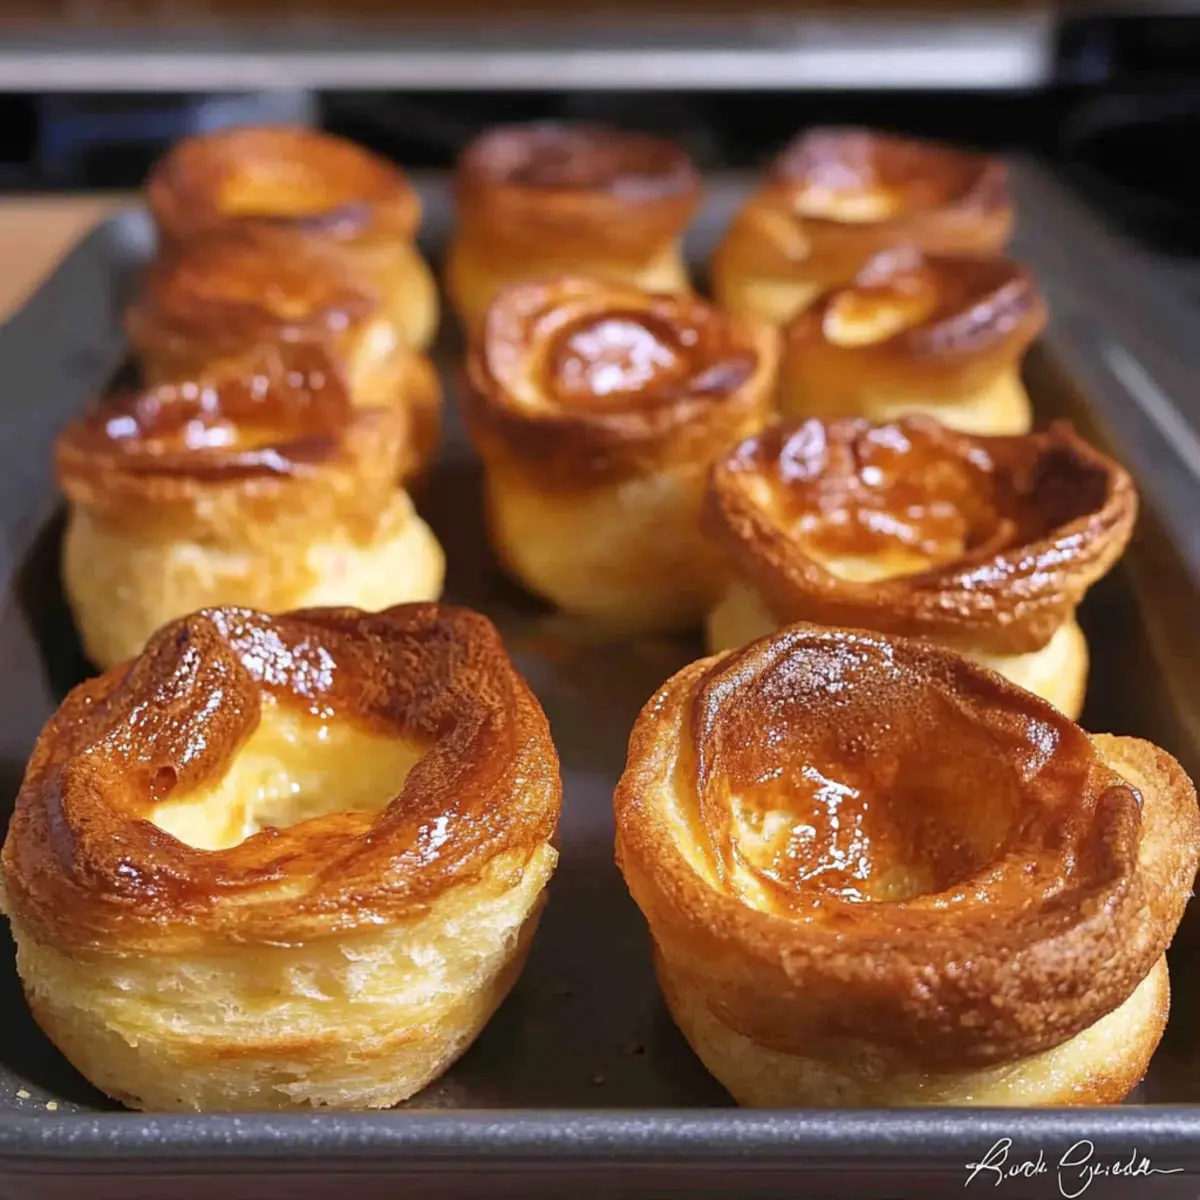
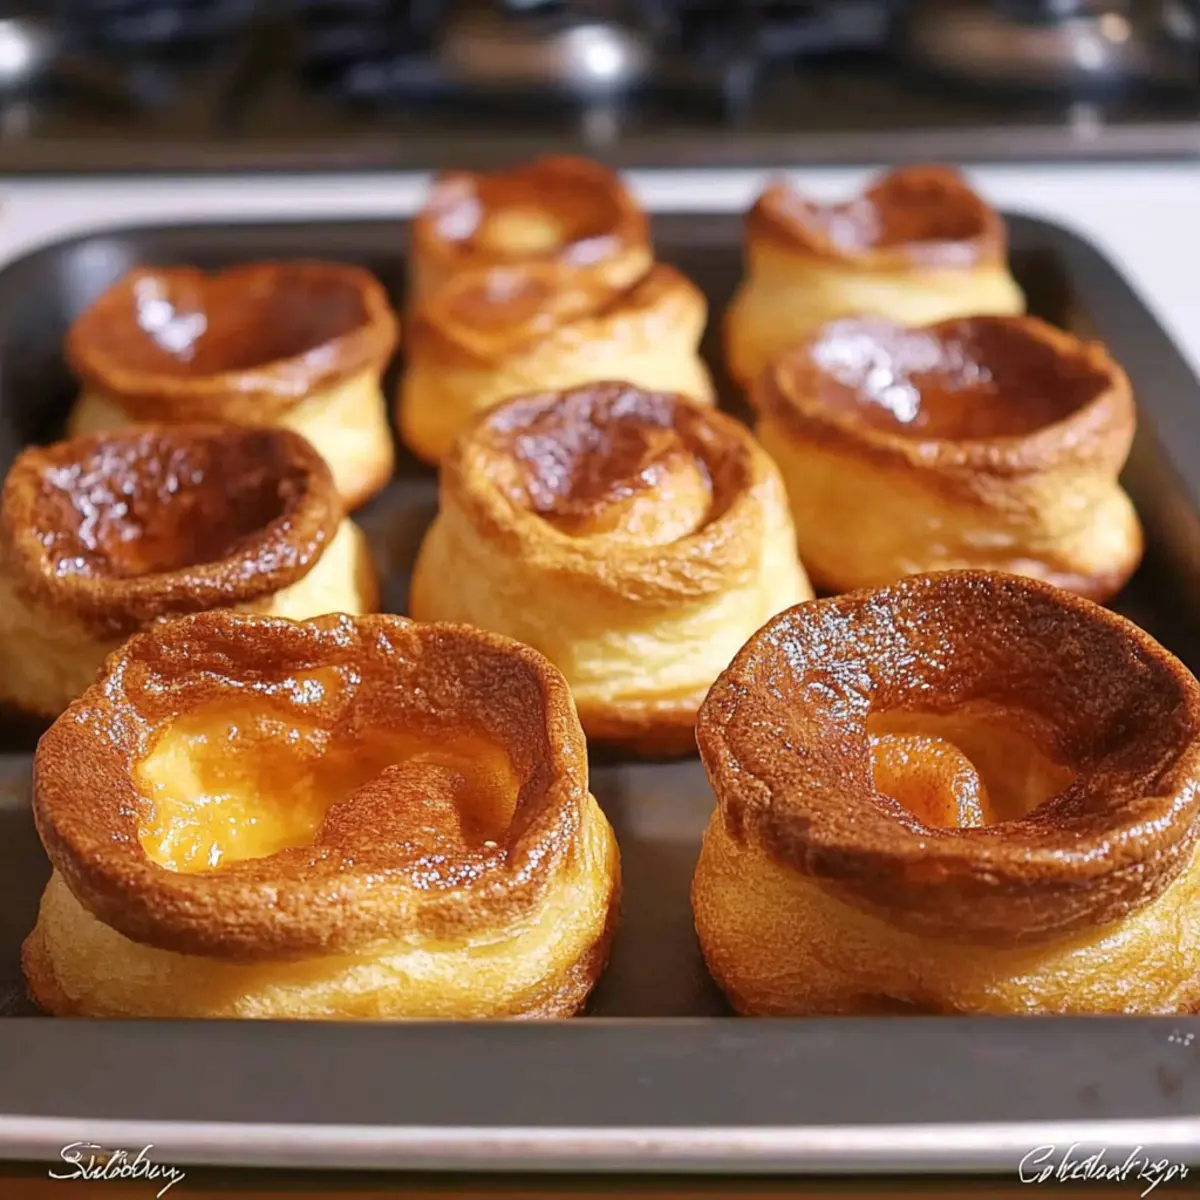
Return the filled muffin tray to the oven and bake for 15-20 minutes without opening the oven door. This is crucial to maintaining the temperature and allowing your Yorkshire puddings to rise properly. Keep an eye on them, and you’ll see them puffing up and turning golden brown in color.
Step 8: Serve the Yorkshire Puddings
Once your Yorkshire puddings are golden and risen, remove them from the oven. Let them cool for just a moment before serving hot alongside gravy and your favorite roast. The crispy exterior and soft, airy interior of these gluten-free Yorkshire puddings make for a delightful addition to any meal!
What to Serve with Gluten-Free Yorkshire Puddings
The joy of a hearty meal is truly incomplete without the perfect accompaniments to enhance those fluffy delights.
- Savory Roast Beef: Rich and tender, the classic pairing elevates the meal, allowing these airy puddings to soak up savory juices.
- Creamy Mashed Potatoes: A comforting, velvety side that balances textures beautifully, complementing the crispy exterior of your Yorkshire puddings.
- Rich Gravy: Drizzle over your puddings for that traditional touch; its savory depth perfectly marries with the fluffiness of the Yorkshire.
- Honey-Glazed Carrots: Sweet and earthy, these vibrant veggies add a touch of color and sweetness, enhancing the meal’s overall flavor profile.
- Steamed Green Beans: Crisp and fresh, they introduce a lively crunch, providing contrast against the soft, delicate puddings.
- Cauliflower Cheese: Creamy and cheesy, this indulgent vegetable dish pairs perfectly, adding richness and a touch of nostalgia.
- Roasted Root Vegetables: The caramelization brings out natural sweetness, offering a hearty side that complements the rustic charm of Yorkshire puddings.
- Light Salad with Vinaigrette: The tangy dressing brightens the plate and balances the richness of your main dishes, serving as a refreshing contrast.
- Mulled Wine: This warm, spiced beverage perfectly complements a comforting meal, enhancing the flavors of your Yorkshire puddings.
- Apple Crumble: Finish off your feast with this warm, sweet dessert; a delightful contrast to the savory flavors of your dinner spread.
Make Ahead Options
These gluten-free Yorkshire puddings are a fantastic choice for meal prep enthusiasts! You can mix the batter and store it in the refrigerator for up to 24 hours to save time on busy days. Alternatively, prepare individual servings by pouring the batter into the muffin tray and covering it tightly with plastic wrap; just ensure the tray is thoroughly chilled. When you’re ready to bake, preheat the oven and add hot oil before filling each compartment with the chilled batter—this helps maintain that coveted rise and crispy edge. Enjoy the convenience of having these delightful Yorkshire puddings ready to finish right before serving, ensuring they stay just as delicious!
Yorkshire Pudding Variations & Substitutions
Customize your Yorkshire pudding experience and discover a world of delicious possibilities with these playful twists!
- Dairy-Free: Use almond milk or oat milk for a lactose-free version that still puffs up beautifully.
- Gluten-Free Flour Blend: If you’ve got it on hand, substitute cornflour with a gluten-free flour blend for a slightly different flavor and texture.
- Vegan Delight: Opt for aquafaba or a commercial egg replacer alongside your favorite dairy-free milk for a plant-based twist.
- Savory Touch: Enhance your batter by mixing in a pinch of garlic powder or dried herbs for a delightful herbal flavor.
- Meat Drippings: For a richer taste, mix in leftover beef drippings if you’re not sticking to a strict gluten-free or vegan diet.
- Cheesy Addition: Try adding nutritional yeast or vegan cheese for an unexpected savory layer in your Yorkshire pudding that cheese lovers will adore.
- Add-Ins: Fold in diced vegetables, like roasted red peppers or leeks, before baking for a burst of flavor and color in every bite.
- Spicy Kick: Incorporate a few shakes of cayenne pepper or smoked paprika to bring a delightful heat to your dish, perfect for adventurous palates.
Feel free to make these adjustments and see how they can elevate your delightful Yorkshire pudding experience!
Expert Tips for Yorkshire Pudding
• Hot Oil Is Key: Ensure the oil is very hot before pouring in the batter; this is essential for maximum rise and crispy edges.
• No Peeking: Avoid opening the oven door while baking, as even a slight drop in temperature can cause your Yorkshire puddings to collapse.
• Measure Carefully: Use a digital scale for accurate ingredient measurements. Consistency in the batter will lead to better results all around.
• Consider Substitutes: If using dairy-free milk, opt for thinner versions like almond or soy to maintain a fluffy structure in your Yorkshire pudding.
• Add Flavor Wisely: Incorporate herbs or spices sparingly; too much can affect the batter’s rise and texture.
How to Store and Freeze Yorkshire Pudding
Fridge: Keep leftover Yorkshire pudding in an airtight container for up to 3 days to maintain moisture and prevent drying out.
Freezer: For longer storage, freeze the Yorkshire puddings after cooling for up to 2 months. Place them in a freezer-safe bag or container to avoid freezer burn.
Reheating: Reheat in a preheated oven at 180°C (350°F) for 5-10 minutes to restore crispiness, ensuring your fluffy treat is as delightful as the first serving.
Gluten-Free Yorkshire Pudding Recipe FAQs
What type of cornflour should I use for gluten-free Yorkshire puddings?
Absolutely! You can use any cornflour (cornstarch) available at your local grocery store, as it is naturally gluten-free. Alternatively, if you prefer a blend, opt for a certified gluten-free flour mix to achieve a similar texture.
How should I store leftover Yorkshire puddings?
To keep your Yorkshire puddings fresh, store them in an airtight container in the fridge for up to 3 days. This way, they retain moisture and stay delicious for your next meal. When reheating, a quick pop in the oven will help restore that irresistible crispiness!
Can I freeze gluten-free Yorkshire puddings?
Yes, you can freeze these delightful puddings! Allow them to cool completely before placing them in a freezer-safe bag or container. They can be frozen for up to 2 months. When you’re ready to enjoy them, simply reheat in a preheated oven at 180°C (350°F) for 5-10 minutes—perfectly crispy and fluffy again!
What should I do if my Yorkshire puddings do not rise?
A couple of factors can affect the rise of your Yorkshire puddings. First, ensure the oil is sizzling hot before adding the batter—this is crucial for puffiness! Avoid opening the oven door during baking, as it can cause them to collapse. If your mixture seems too thick, it can also impede rising; add a bit more milk for a smoother consistency before pouring.
Are there any common allergens in this recipe?
The main allergens in this gluten-free Yorkshire pudding recipe are eggs and potentially dairy, depending on your choice of milk. For those with dairy allergies, using plant-based milk like almond or soy is a great option. If you are concerned about egg allergies, consider using a suitable egg replacement, though the texture might vary.
Can I make Yorkshire puddings dairy-free?
Very much so! Simply substitute the milk with any dairy-free alternative, such as almond, soy, or oat milk. Make sure to choose a thinner version of the milk to maintain the necessary light texture and rise of the pudding. Enjoy creating a delicious dish for everyone!

Fluffy Yorkshire Pudding Recipe You Can't Resist
Ingredients
Equipment
Method
- Preheat your oven to 220°C (425°F).
- Add about 1 teaspoon of cooking oil to each compartment of a standard muffin tray and place it in the oven for 10-15 minutes.
- In a mixing bowl, crack the eggs and beat them well. Gradually whisk in the cornflour until smooth.
- Slowly add the milk to the egg and cornflour mixture while whisking continuously.
- Pour the batter into a jug or measuring cup for easy pouring.
- Carefully remove the hot muffin tray and pour the batter into each muffin hole until just under 3/4 full.
- Return the tray to the oven and bake for 15-20 minutes without opening the door.
- Once golden and risen, remove from the oven and let cool briefly before serving.
Leave a Reply