
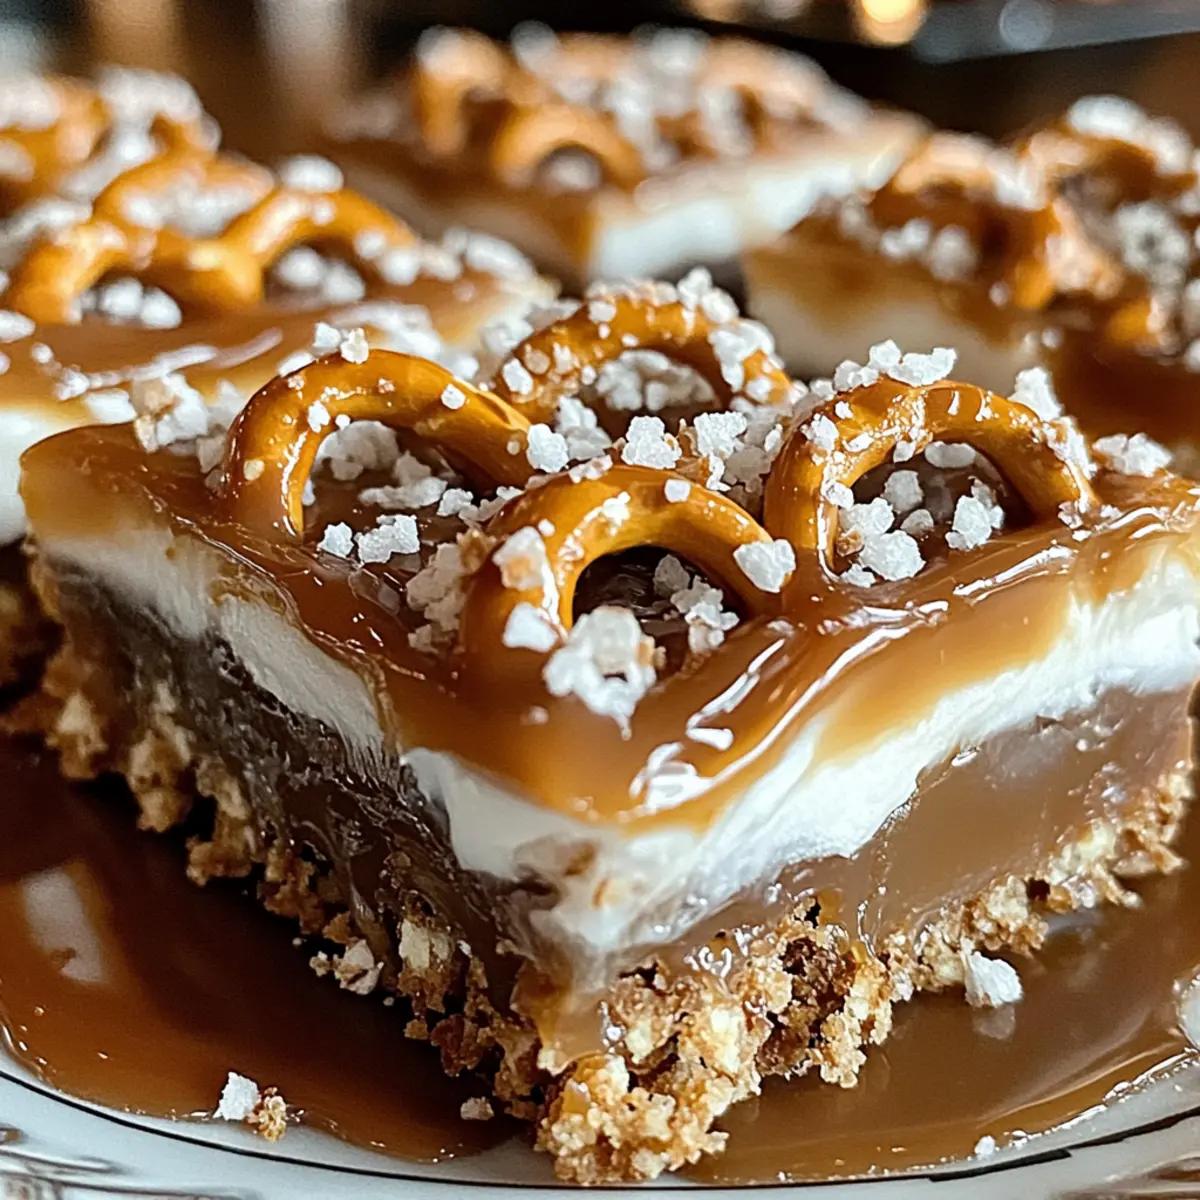
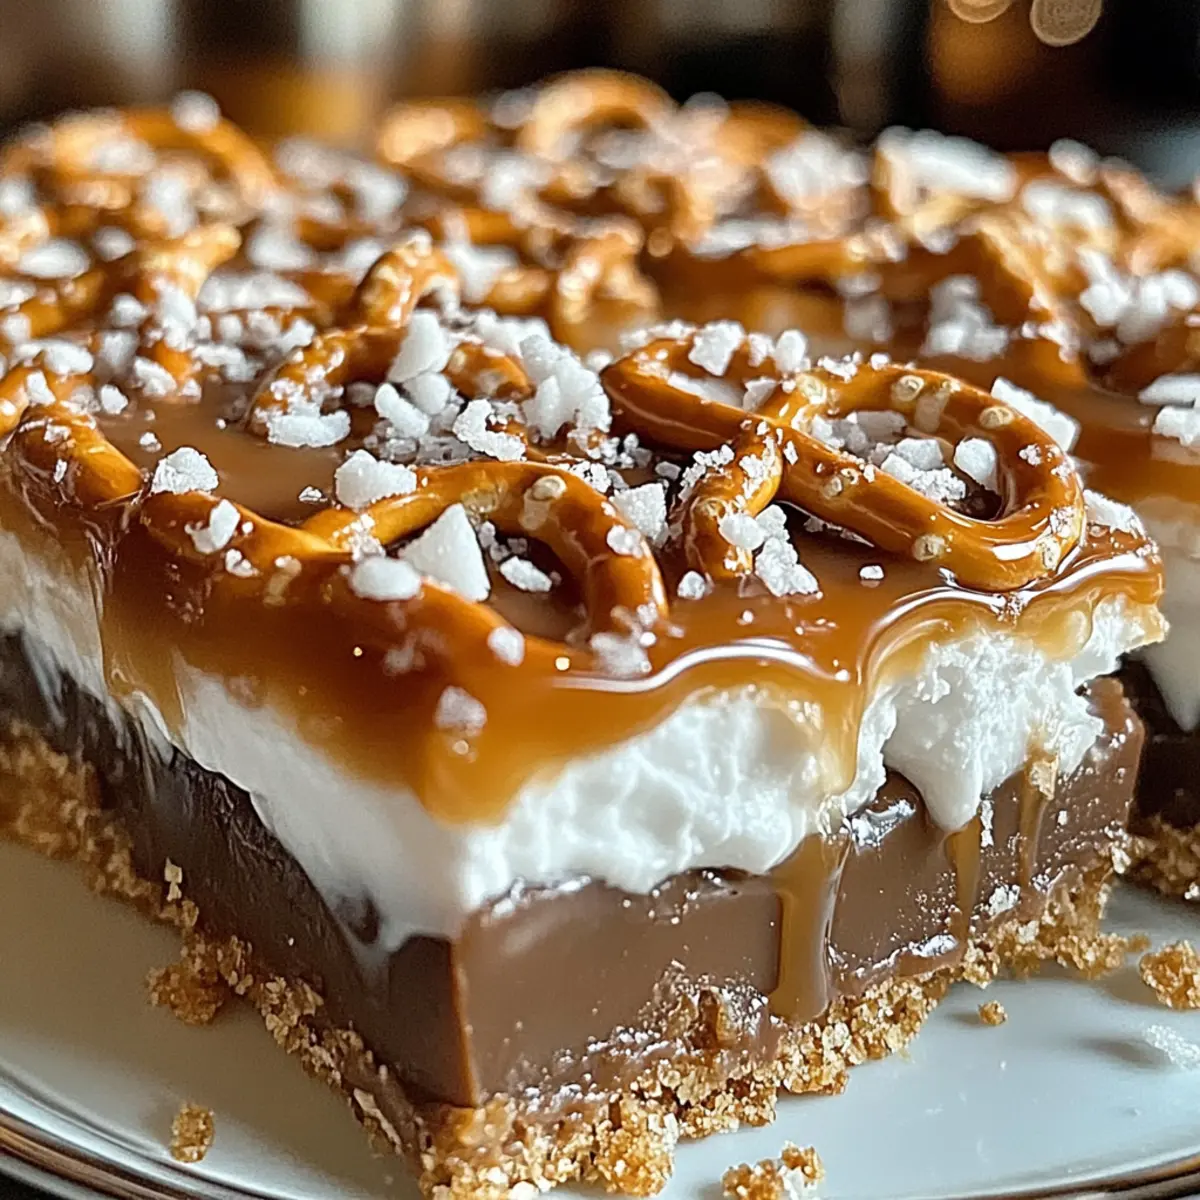
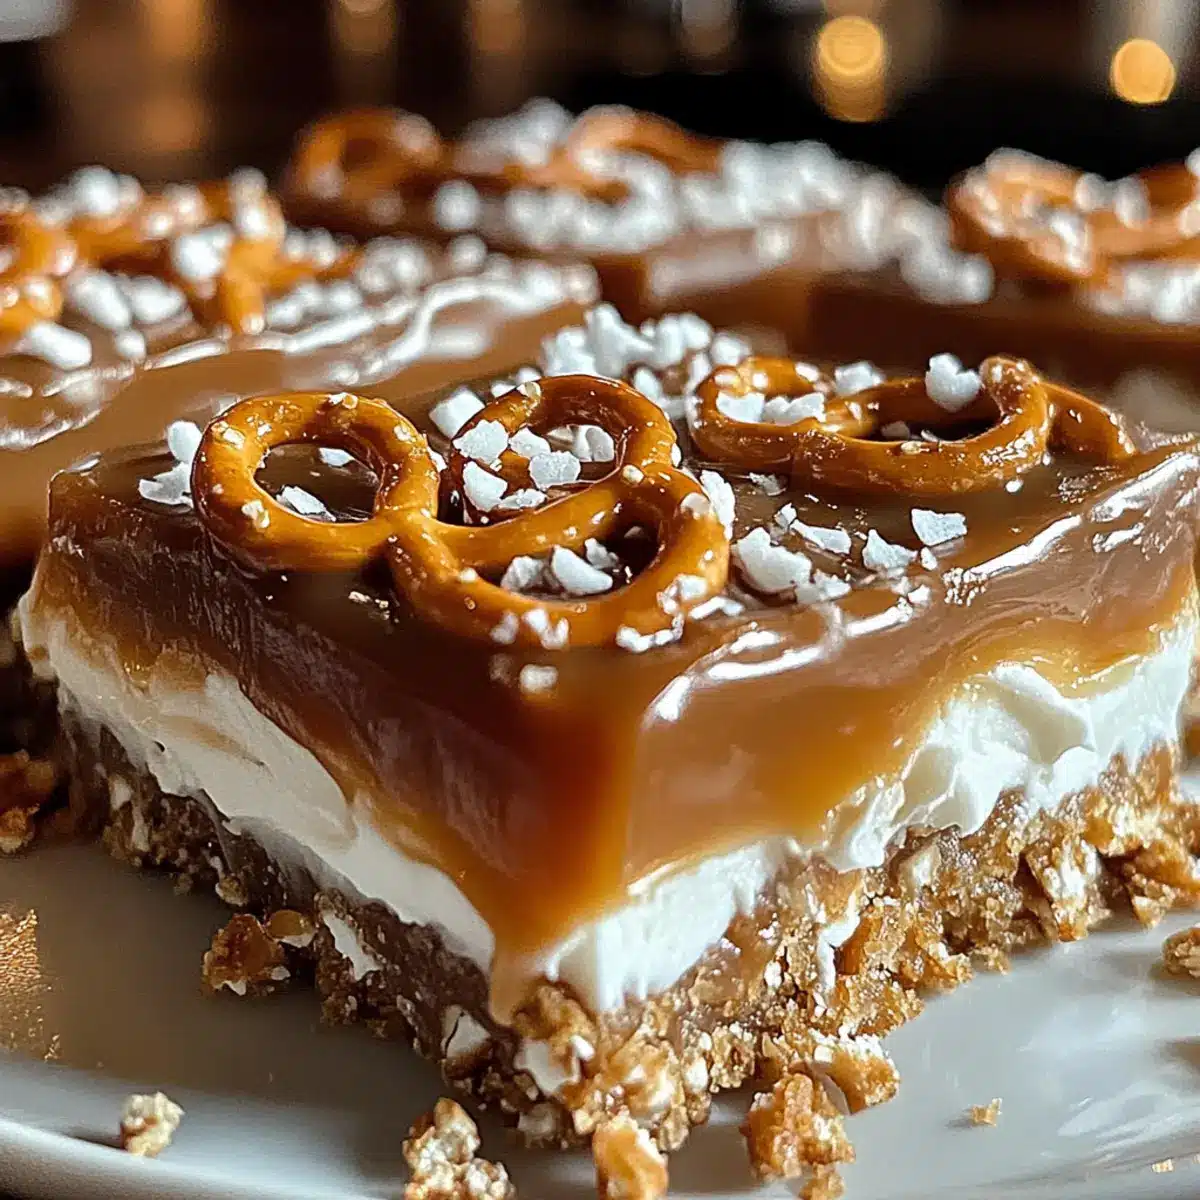
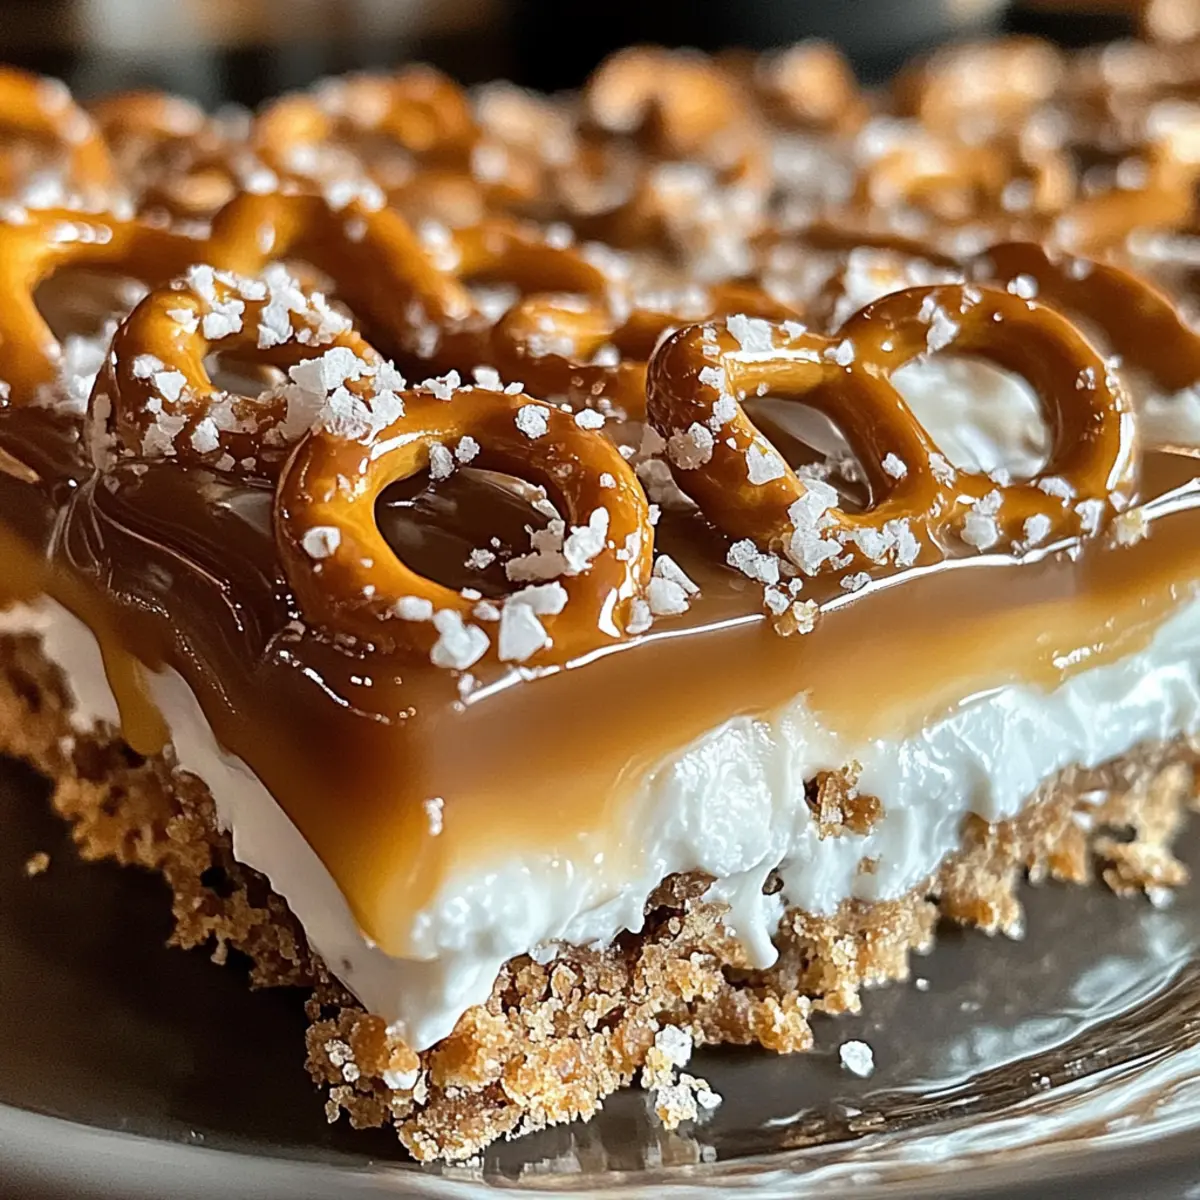
As the afternoon sun dips low, the aroma of melted butter and caramel fills my kitchen, stirring up memories of sweet treats shared among friends. Today, I’m excited to whip up a batch of Quick No-Bake Salted Caramel Pretzel Bars—an indulgent but simple dessert that brilliantly balances sweet and salty flavors. These bars come together without breaking a sweat, making them perfect for last-minute gatherings or just satisfying that weekday sugar craving. Not only are they a crowd-pleaser, but they also satisfy those late-night snack attacks without the need for an oven. Curious to see how easy it is to create this delectable delight? Let’s dive into the recipe!
Why are Salted Caramel Pretzel Bars a Must-Try?
Irresistible Flavor Combination: The delightful clash of sweet and salty makes each bite an explosion of flavor.
Effortless Preparation: No baking is required, so you’ll have these tasty bars ready in no time—perfect for those busy weeknights!
Crowd-Winning Treat: Whether at a party or an afternoon snack, they easily steal the show.
Customizable Delight: Feel free to mix it up with nuts or different chocolate types to suit your taste.
Satisfy Your Cravings: They’re not just a dessert; they’re a fantastic way to satisfy that midday sweet tooth—just like our Salted Honey Pie or Salted Caramel Pretzel.
Salted Caramel Pretzel Bars Ingredients
For the Base
• Pretzels – The crunch you crave; gluten-free pretzels work just as well!
• Salted Caramel Sauce – This sweet and rich sauce brings a luscious depth; store-bought is a convenient choice.
• Butter – Helps bind everything together and adds richness; opt for unsalted for better salinity control.
For the Topping
• Chocolate Chips – Choose dark or milk chocolate for a velvety finish that complements the salty flavor.
Dive into these Salted Caramel Pretzel Bars and enjoy the perfect blend of sweet and salty in every bite!
Step‑by‑Step Instructions for Quick No-Bake Salted Caramel Pretzel Bars
Step 1: Crush the Pretzels
Begin by placing the pretzels in a resealable plastic bag. Use a rolling pin to crush them into small pieces—aim for about the size of a quarter. This step will provide the perfect crunch for your Salted Caramel Pretzel Bars. Set aside the crushed pretzels while you prepare the buttery mixture.
Step 2: Prepare the Mixture
In a medium saucepan, melt 1/2 cup of butter over low heat, stirring frequently to avoid burning. Once melted, remove it from the heat and mix in 1 cup of salted caramel sauce until combined. Add the crushed pretzels to the buttery caramel and stir gently until they are evenly coated, creating a luscious base for your bars.
Step 3: Press the Mixture into a Dish
Line an 8×8-inch baking dish with parchment paper for easier removal later. Transfer the pretzel mixture into the dish, spreading it out evenly. Use a spatula or your hands to press it down firmly, ensuring it is compact to help the bars hold their shape when set. Aim for an even layer for consistent texture across your Salted Caramel Pretzel Bars.
Step 4: Melt the Chocolate
In a microwave-safe bowl, add 1 cup of chocolate chips. Microwave in 30-second intervals, stirring between each, until fully melted and smooth—this usually takes about 1 to 2 minutes. Be careful not to overheat the chocolate; it should be glossy and pourable. This will be the delicious topping for your bars, adding a rich finish to the salted caramel and pretzel base.
Step 5: Pour and Spread the Chocolate
Once the chocolate is melted, carefully pour it over the pressed pretzel mixture in the baking dish. Use a spatula to spread the chocolate evenly across the top, ensuring a smooth layer. Allow the chocolate to cool slightly at room temperature for a few minutes, which will help maintain its glossy appearance.
Step 6: Refrigerate to Set
Cover the baking dish with plastic wrap and place it in the refrigerator for at least 2 hours, or until the bars are firm to the touch. This chilling step is crucial to achieve the best texture for your Salted Caramel Pretzel Bars. Once set, they’ll be easy to cut into perfectly portioned squares.
Step 7: Cut and Serve
After chilling, carefully lift the bars out of the baking dish using the parchment paper. Use a sharp knife to cut them into squares or rectangles—clean the knife between cuts for neat edges. Serve these delectable Salted Caramel Pretzel Bars chilled or at room temperature, and enjoy the delightful balance of sweet and salty flavors!
How to Store and Freeze Salted Caramel Pretzel Bars
Room Temperature: These bars can be kept at room temperature for up to 2 days, but it’s best to store them in a cool, dry place to maintain freshness.
Fridge: Store the Salted Caramel Pretzel Bars in an airtight container in the refrigerator for up to 5 days to keep them deliciously fresh and prevent them from drying out.
Freezer: For longer storage, wrap the bars tightly in plastic wrap, then place them in a freezer-safe container. They can be frozen for up to 2 months. When ready to enjoy, thaw overnight in the fridge.
Reheating: If you prefer a touch of warmth, heat a bar in the microwave for about 10–15 seconds; this will melt the chocolate slightly and enhance its flavor.
Make Ahead Options
These Quick No-Bake Salted Caramel Pretzel Bars are a fantastic choice for meal prep, allowing you to enjoy sweet indulgence any day of the week! You can prepare the pretzel base up to 3 days in advance by mixing the crushed pretzels with the melted butter and caramel sauce, then pressing it into the dish. Simply cover it tightly with plastic wrap to keep it fresh in the refrigerator. When you’re ready to serve, melt the chocolate chips and pour them over the set base; let it cool slightly at room temperature before refrigerating again for at least 2 hours to firm up. This method ensures your bars remain just as delicious and perfect for any occasion without any last-minute stress!
Expert Tips for Salted Caramel Pretzel Bars
-
Press Firmly: Ensure you press the pretzel mixture firmly into the dish. This step is key to helping the Salted Caramel Pretzel Bars hold their shape when cut.
-
Chocolate Cooling: Allow the melted chocolate to cool slightly before pouring it over the pretzel base. This helps achieve a glossy finish instead of a dull layer.
-
Knife Care: Use a sharp knife for cutting the bars and clean it between cuts. This will give you neat, appealing edges for your Salted Caramel Pretzel Bars.
-
Storage Savvy: Store the bars in an airtight container in the refrigerator. This keeps them fresh and ready to satisfy those sweet cravings for up to 5 days.
-
Customize Your Crunch: Don’t hesitate to mix in nuts like almonds or pecans for an extra crunch and delightful flavor twist!
What to Serve with Quick No-Bake Salted Caramel Pretzel Bars
Imagine creating a delightful dessert experience that pairs perfectly with the sweet and salty notes of your bars.
-
Vanilla Bean Ice Cream: The creamy richness of vanilla ice cream beautifully contrasts the crunchy texture of the bars, enhancing their flavor. Each scoop adds a refreshing touch to your dessert plate.
-
Fresh Berries: Raspberries or strawberries offer a burst of tartness that cuts through the sweetness. They not only provide balance but also brighten up the presentation.
-
Coffee: A cup of rich, aromatic coffee complements the sweet and salty flavors perfectly. Enjoying the bars with coffee creates a cozy moment to savor the indulgence.
-
Salted Caramel Sauce Drizzle: For the ultimate indulgence, drizzle extra caramel sauce on top before serving. This adds more depth and makes each bite even more luscious.
-
Nutty Trail Mix: A handful of mixed nuts adds an unexpected crunch and complements the texture of the bars. This pairing can also enhance the salty flavor and create a more complex palate experience.
-
Dark Chocolate Covered Espresso Beans: Keep the party going with a side of dark chocolate-covered espresso beans. Their bold flavor accentuates the bars and adds a delightful pick-me-up.
These pairings ensure your Salted Caramel Pretzel Bars shine at any gathering or cozy night in!
Salted Caramel Pretzel Bars Variations
Feel free to get creative with these bars and tailor them to your taste buds!
- Nutty Crunch: Add chopped pecans or almonds for an extra layer of crunch and a touch of nuttiness.
- Toffee Twist: Swap the salted caramel sauce for toffee sauce for a rich, buttery flavor that’s irresistible.
- White Chocolate Delight: Use white chocolate chips instead of semi-sweet for a sweeter finish that complements the salty pretzels.
- Spiced Up: Sprinkle a pinch of cinnamon into the caramel mixture to introduce a warm flavor twist that elevates your bars.
- Fruity Flair: Mix in dried fruits like cranberries or cherries for a chewy surprise that pairs beautifully with the sweet and salty elements.
- Peanut Butter Bliss: Stir in a couple of tablespoons of creamy peanut butter with the butter for a delightful flavor combination; it adds a rich, nutty depth.
- Spicy Kick: Add a dash of cayenne pepper to the chocolate layer for those who enjoy a spicy-sweet contrast.
- Extra Salty: Top with a sprinkle of flaky sea salt just before the chocolate sets for an intensified salty contrast.
These delightful variations ensure that each batch can be a unique treat, just like our delightful Salted Honey Pie or the easy-to-prepare Salted Caramel Pretzel. Enjoy the creativity!
Salted Caramel Pretzel Bars Recipe FAQs
What type of pretzels should I use for the Salted Caramel Pretzel Bars?
You can use regular pretzels for a classic crunch, or opt for gluten-free pretzels if you prefer a gluten-free version. The key is to choose ones that bring a satisfying texture. I often use pretzel sticks or twists—each type adds its own delightful crunch!
How long can I store these bars, and what’s the best way?
Absolutely! Store the Salted Caramel Pretzel Bars in an airtight container in the refrigerator for up to 5 days. If you want to prolong their lifespan, you can keep them at room temperature for about 2 days, but for optimal freshness, refrigeration is best.
Can I freeze Salted Caramel Pretzel Bars? If so, how?
Yes, you can freeze these bars! First, wrap each bar tightly in plastic wrap to prevent freezer burn. Then, place them in a freezer-safe container. They can be frozen for up to 2 months. When you’re ready to enjoy them, simply thaw overnight in the fridge for the best texture.
What should I do if the bars are too crumbly after cutting?
If your bars turn out crumbly, it’s usually because the mixture wasn’t pressed down firmly enough before chilling. Next time, ensure you compact the mixture well in the baking dish. If it’s already cut, consider serving them in bowls—think of them as a delicious salted caramel granola crumble!
Are there any dietary considerations for the Salted Caramel Pretzel Bars?
Yes! These bars can be made nut-free by avoiding nut toppings or using nut-free chocolate. Always check the labels on your pretzels and chocolate chips to ensure they don’t contain allergens if you’re serving them to guests with dietary restrictions.
Can I use homemade caramel sauce instead of store-bought?
Absolutely! Making your own caramel sauce not only adds a personal touch but also allows you to control the sweetness and flavor. Just ensure that your homemade sauce has a smooth consistency for easy mixing with the pretzels and butter. Enjoy the process; it’s a rewarding step!
Savory Sweet Salted Caramel Pretzel Bars You'll Adore
Ingredients
Equipment
Method
- Crush the pretzels in a resealable plastic bag using a rolling pin until they are small pieces, about the size of a quarter.
- In a medium saucepan, melt 1/2 cup of butter over low heat and stir frequently. Remove from heat and mix in 1 cup of salted caramel sauce.
- Add the crushed pretzels to the buttery caramel and gently stir until evenly coated.
- Line an 8x8-inch baking dish with parchment paper and press the pretzel mixture evenly into the dish.
- In a microwave-safe bowl, melt 1 cup of chocolate chips in 30-second intervals until smooth.
- Pour the melted chocolate over the pressed pretzel mixture and spread it evenly.
- Cover the dish with plastic wrap and refrigerate for at least 2 hours until firm. Cut into squares and serve.
Leave a Reply