
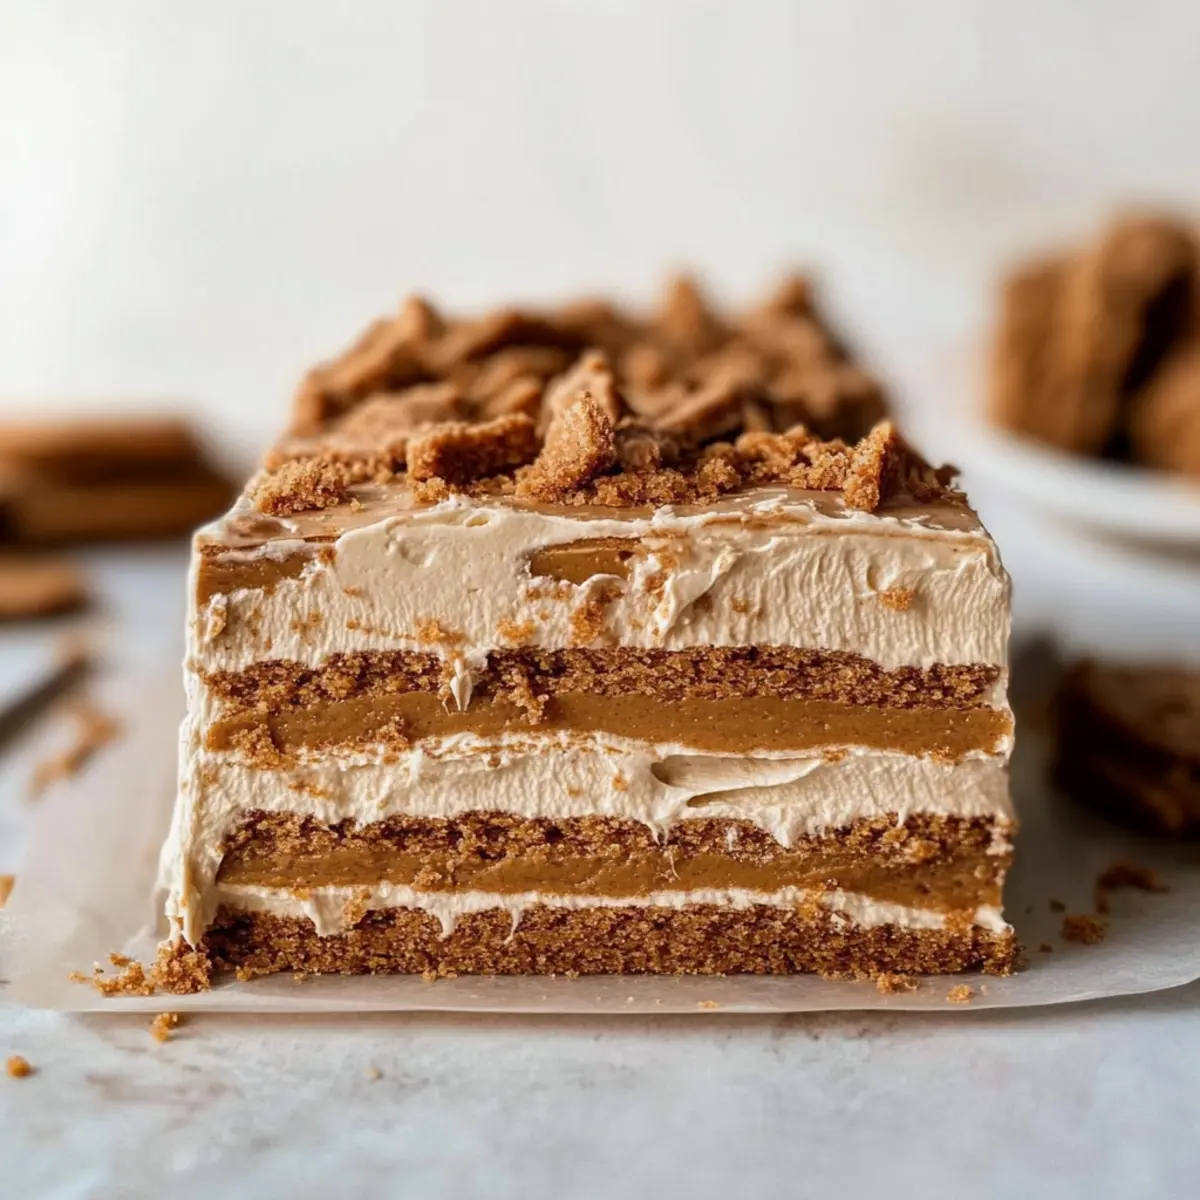
You won’t find a more satisfying dessert to make for gatherings than this No-Bake Cookie Butter Icebox Cake. With creamy layers of dreamy cookie butter whipped cream and the satisfying crunch of Lotus Biscoff cookies, this dessert is a showstopper—easy to assemble and perfect for make-ahead entertaining. Imagine impressing your guests without breaking a sweat in the kitchen! Not only does this treat require no time in the oven, but it also comes together in a snap, leaving you with more time to savor the company of family and friends. Plus, the light, airy texture means it won’t weigh you down, making it the go-to dessert for every occasion. Are you ready to indulge in a sweet escape that will have everyone asking for seconds?
Why Is This Cake a Must-Try?
Effortless Preparation: With no baking required, this cake is as easy to make as it is delicious. Perfect for those who want indulgence without the fuss.
Crowd-Pleasing Delight: Your guests will be raving about this unique dessert, making it a staple for all gatherings. Pair it with some Buttery Spritz Cookies for an added treat!
Versatile Flavor: The cookie butter and Biscoff cookies offer a fantastic flavor combo, while you can easily swap ingredients to suit preferences.
Make-Ahead Convenience: This icebox cake can be prepared up to three days in advance, allowing you to focus on enjoying time with loved ones instead of stressing in the kitchen.
Decadent Yet Light: Its airy texture makes for a luxurious treat that won’t weigh you down. Serve it alongside fresh fruit for a refreshing balance that everyone will love!
No-Bake Cookie Butter Icebox Cake Ingredients
For the Whipped Cream Layer
• Heavy Cream – Creates a rich whipped cream layer; can be substituted with whipping cream for similar results.
• Confectioner’s Sugar – Sweetens the whipped cream; feel free to adjust based on your sweetness preference.
• Vanilla Extract – Enhances flavor depth; no substitutes necessary for a perfect balance.
• Kosher Salt – Balances sweetness; use regular salt in a pinch if needed.
For the Cookie Butter Mixture
• Lotus Biscoff Spread – Provides the signature cookie butter flavor; alternative options include peanut butter or Nutella.
• Mascarpone Cheese – Adds creaminess and richness; can be replaced with room-temperature cream cheese (add extra sugar if needed).
For the Cake Structure
• Lotus Biscoff Cookies – Essential for structure and flavor; can replace with graham crackers or chocolate wafers if desired.
This No-Bake Cookie Butter Icebox Cake is not just a treat; it’s your ticket to impressing your guests with minimal effort. Happy baking!
Step‑by‑Step Instructions for No-Bake Cookie Butter Icebox Cake
Step 1: Whip the Cream
In a stand mixer fitted with the whisk attachment, pour 2 cups of cold heavy cream. Whip on medium speed until medium peaks form, which should take about 3-5 minutes. The cream should be thick and hold its shape but still have a smooth texture. This luscious whipped cream will be the cornerstone of your No-Bake Cookie Butter Icebox Cake.
Step 2: Prepare the Biscoff Cream
In a large mixing bowl, combine ½ cup of Lotus Biscoff spread, ⅓ cup of mascarpone cheese, 1 teaspoon of vanilla extract, a pinch of kosher salt, and 2 tablespoons of confectioner’s sugar. Use a spatula to gently fold and mix the ingredients until fully incorporated and creamy, taking care not to deflate the whipped cream you just made. This Biscoff cream adds the signature flavor to your icebox cake.
Step 3: Assemble the Cake
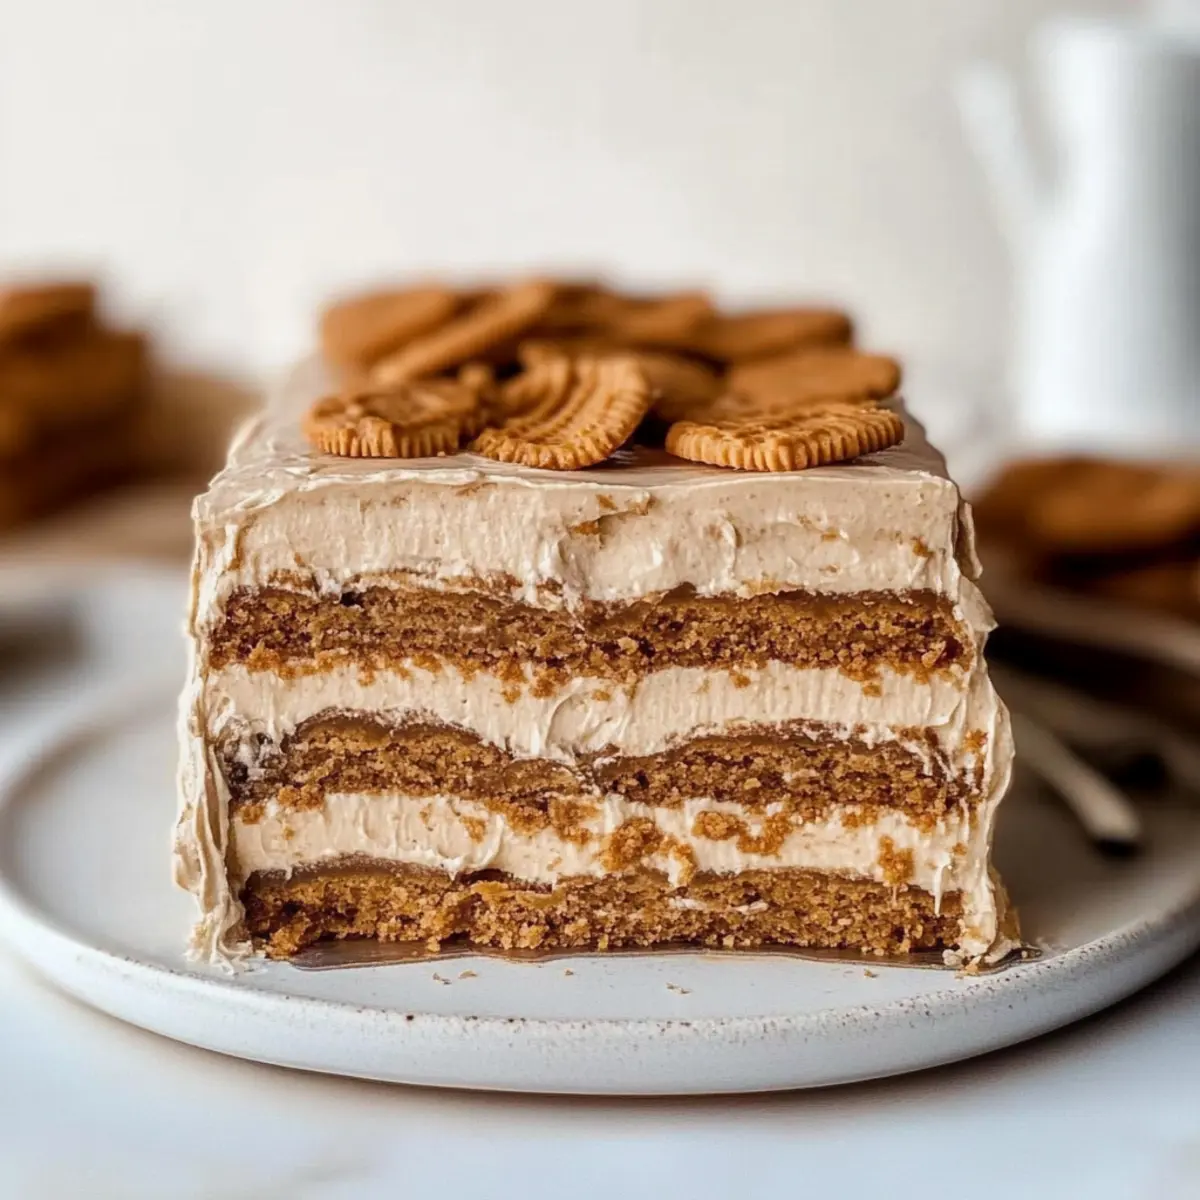
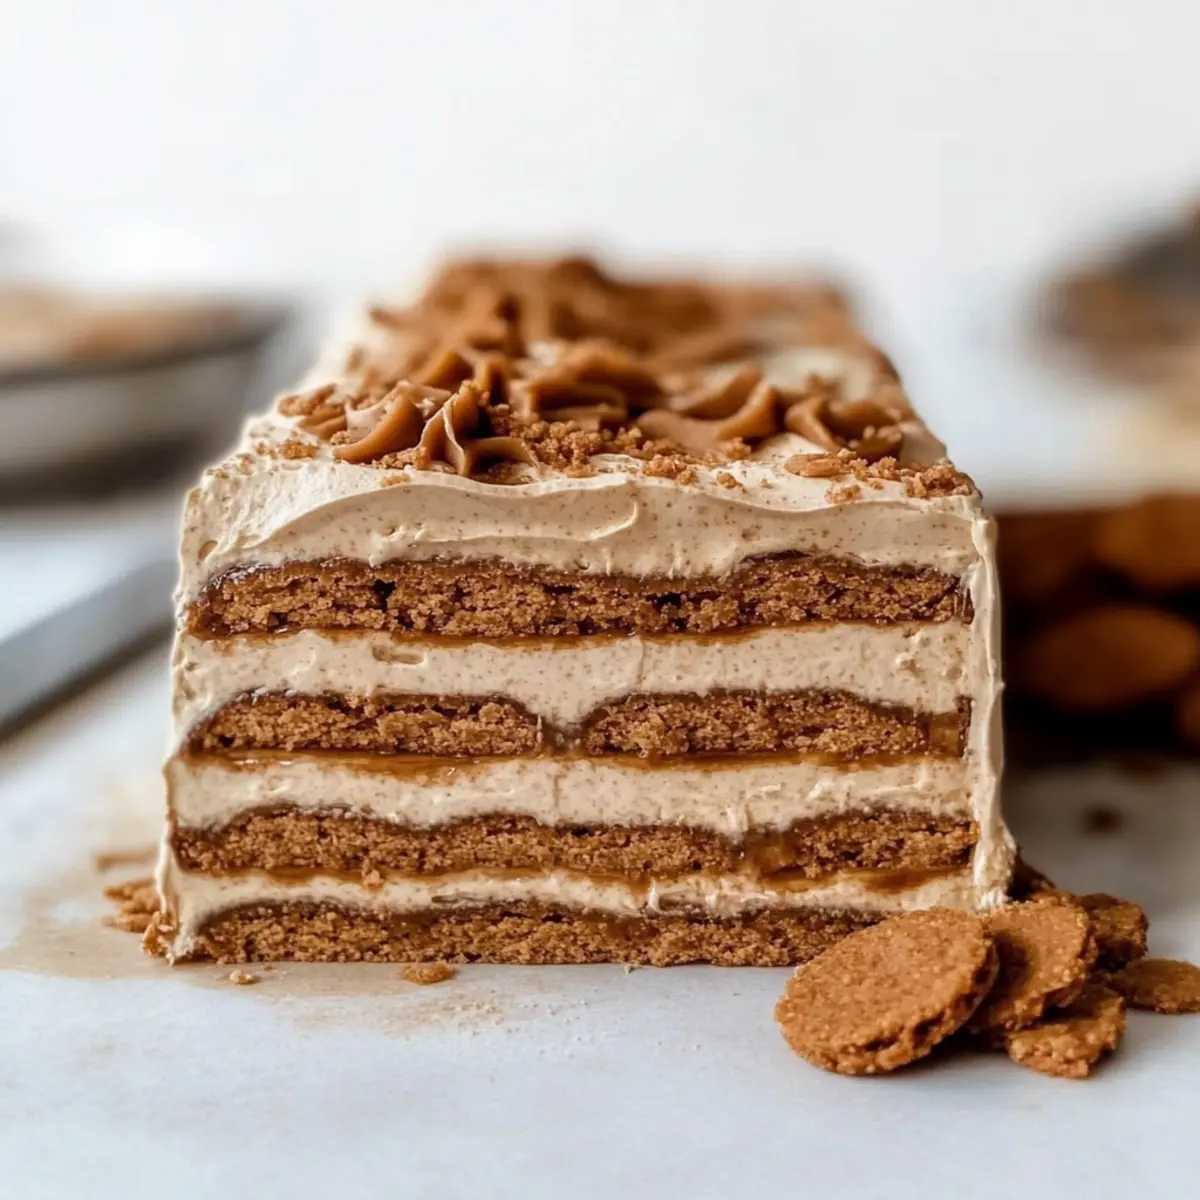
Line a 9×5-inch loaf pan with plastic wrap, leaving some overhang to easily remove the cake later. Begin by placing a layer of Lotus Biscoff cookies at the bottom of the pan. Next, spread a generous layer of the Biscoff cream mixture on top of the cookies. Repeat the layering process until you fill the pan, finishing with a layer of cookies for a beautiful presentation.
Step 4: Refrigerate
Once assembled, cover the cake loosely with plastic wrap to prevent any moisture from forming. Place the cake in the refrigerator and let it chill for at least 24 hours. This resting time allows the flavors to meld and the cookies to soften, resulting in a delightfully creamy No-Bake Cookie Butter Icebox Cake that holds its structure.
Step 5: Serve
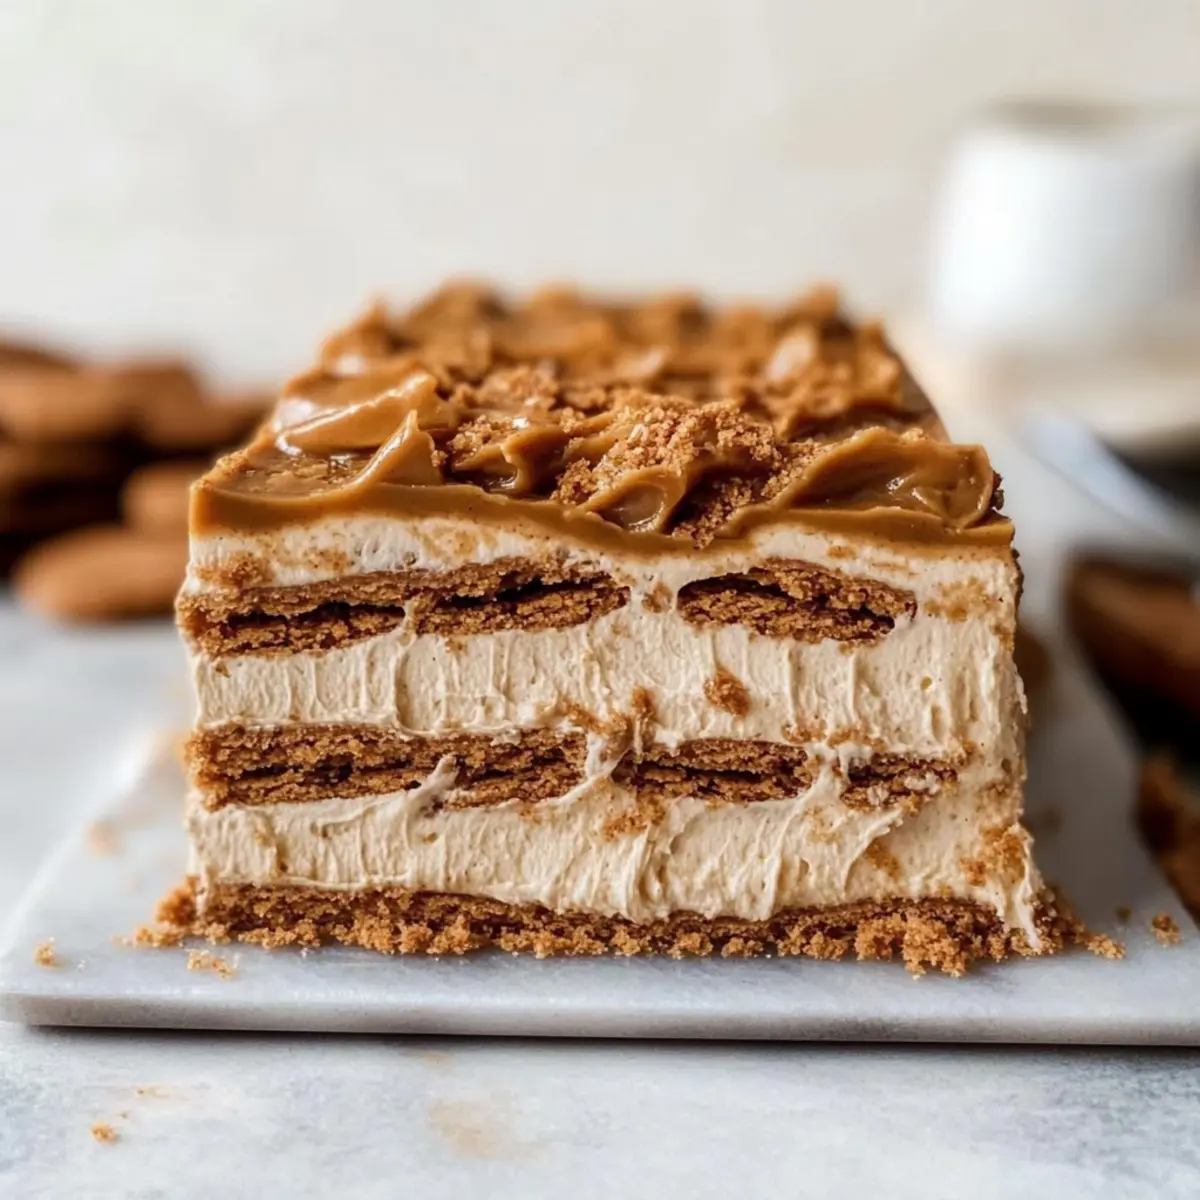
After the chilling period, carefully unmold the cake onto a serving plate by lifting the plastic wrap. Drizzle warmed Lotus Biscoff spread over the top, letting it cascade beautifully. For an added crunch and flair, sprinkle crushed Lotus Biscoff cookies on top. Cut into slices and serve, inspiring awe from your guests with this effortless yet indulgent dessert!
What to Serve with No-Bake Cookie Butter Icebox Cake
This delightful cake pairs beautifully with various side dishes and drinks, enhancing its creamy allure.
- Fresh Berries: The tartness of strawberries or raspberries offers a refreshing contrast to the rich cake, balancing the sweetness perfectly.
- Chocolate Sauce: Drizzling warm chocolate over each slice adds a decadent touch that chocolate lovers will adore—velvety indulgence combined!
- Whipped Cream: A dollop of freshly whipped cream intensifies the fluffiness of the icebox cake, providing a classic accompaniment that never disappoints.
- Ice Cream: Vanilla bean or caramel ice cream complements the flavors while adding a fun, creamy texture; it’s a great choice for summer gatherings.
- Coffee: A cup of rich, robust coffee enhances the cake’s sweetness, rounding out your dessert experience with warmth and depth.
- Spiced Nuts: For a textural twist, serve a small bowl of spiced nuts alongside. Their crunch and flavor contrast delightfully with the soft cake.
- Mint Sprigs: A few sprigs of fresh mint not only beautify your plate but also add a refreshing note that brightens every bite of the cookie butter icebox cake.
- Caramel Sauce: Warm caramel drizzled over the cake introduces a luscious sweetness, making each slice even more indulgent and inviting.
- Sparkling Water: A bubbly drink, such as sparkling mineral water with a twist of lemon, refreshes the palate and balances the rich cake perfectly!
Expert Tips for No-Bake Cookie Butter Icebox Cake
-
Chill Your Ingredients: Ensure your heavy cream is very cold before whipping for the best volume and stability in your whipped cream layer.
-
Perfect Layering: When assembling the cake, use a gentle hand and avoid over-packing the layers so that the cake remains airy and light.
-
Room Temperature: Let the cake sit for about 10 minutes at room temperature before slicing. This enhances the creamy texture, making it easier to cut and serve.
-
Storage Savvy: Store any leftovers in an airtight container for up to 3 days in the fridge. For longer preservation, freeze but remember to thaw overnight in the refrigerator before serving.
-
Taste Adjustment: Feel free to adjust the amount of sugar based on your preference. The cookie butter can be sweet, so balance it according to your taste while preparing the No-Bake Cookie Butter Icebox Cake.
Make Ahead Options
This No-Bake Cookie Butter Icebox Cake is perfect for busy home cooks looking to save time! You can prepare the entire cake up to 3 days in advance. Simply assemble the cake, cover it tightly with plastic wrap, and refrigerate to let the flavors meld. The cookies will soften, creating that delightful creamy texture while maintaining structure. When you’re ready to serve, simply unmold the cake and drizzle it with warmed Biscoff spread. For an impressive finish, add a sprinkle of crushed Lotus Biscoff cookies on top. This makes your dessert just as delicious, and you’ll have more time to enjoy with family and friends!
No-Bake Cookie Butter Icebox Cake Variations
Feel free to mix and match these ideas to create your perfect version of this delightful cake!
-
Chocolate Lovers: Replace the Lotus Biscoff cookies with chocolate wafers for a rich and indulgent twist. Chocolate and cookie butter are a match made in heaven!
-
Peanut Butter Bliss: Swap the Biscoff spread with creamy peanut butter for a nutty flavor. This variation adds a delightful undercurrent that peanut butter fans will adore!
-
Dairy-Free Delight: Use coconut cream and dairy-free chocolate spread to create a vegan version. The creamy texture of coconut will still deliver divine richness without any dairy.
-
Fruity Freshness: Top the cake with fresh berries such as strawberries or raspberries for a vibrant burst of flavor. This added acidity lifts the dessert beautifully!
-
Nut Crunch: Add crushed nuts like walnuts or pecans between the layers to introduce a satisfying crunch. They bring a delightful texture contrast that’s simply irresistible.
-
Spice it Up: Incorporate a dash of cinnamon or pumpkin spice into the whipped cream for an autumnal flair. It’s a cozy twist that transforms this dessert into a seasonal delight.
-
Additional Layers: Elevate the cake by adding a layer of banana slices between the cookies for a creamy texture and subtle sweetness. It’s like a cookie-banana combo that everyone will love!
-
Gourmet Drizzle: Instead of just drizzling warmed Biscoff spread, try a mix of caramel sauce for a sumptuous finish. The blend of flavors will leave everyone asking for the recipe!
Each of these variations can make your No-Bake Cookie Butter Icebox Cake uniquely yours. Whether you fancy a crunchy element or a fruity finish, there’s plenty of room for creativity! And if you want to keep the indulgence going, consider pairing your masterpiece with some delightful Soft Maple Cookies or a slice of Sugar Cookie Cheesecake. Happy baking!
How to Store and Freeze No-Bake Cookie Butter Icebox Cake
Fridge: Store any leftovers in an airtight container for up to 3 days to maintain freshness and texture.
Freezer: For longer storage, this No-Bake Cookie Butter Icebox Cake can be frozen. Wrap it tightly in plastic wrap and foil for added protection, then freeze for up to 2 months.
Thawing: When ready to enjoy, thaw the cake overnight in the fridge to retain its creamy consistency and flavors.
Reheating: This dessert is best served cold, so no reheating is needed. Just slice and serve straight from the fridge!
No-Bake Cookie Butter Icebox Cake Recipe FAQs
How do I choose ripe ingredients for this recipe?
For the best results, be sure to select fresh ingredients like heavy cream that is not nearing its expiration date. Check that the mascarapone cheese is smooth and creamy—avoid any with grainy texture as that can affect the flavor.
How should I store the No-Bake Cookie Butter Icebox Cake?
Store any leftovers in an airtight container in the fridge for up to 3 days. This will keep the cake fresh while maintaining its delightful texture, allowing you to enjoy it as a comforting treat!
Can I freeze the No-Bake Cookie Butter Icebox Cake?
Absolutely! For longer storage, this cake can be frozen. Wrap it tightly in plastic wrap and foil to prevent freezer burn, and it will stay fresh for up to 2 months. Remember to thaw it overnight in the fridge before serving to restore its creamy texture.
What if my whipped cream doesn’t thicken properly?
If your whipped cream isn’t reaching medium peaks after 3-5 minutes, it could be due to warm cream or not enough mixing. Make sure your cream is super cold, and try increasing the mixing speed. If it remains too liquid, consider adding a tablespoon of powdered sugar to stabilize it further.
Are there any dietary considerations for this recipe?
Yes, if you’re accommodating allergies or dietary restrictions, the No-Bake Cookie Butter Icebox Cake can be made with alternatives like coconut cream for a dairy-free version or you can use no added sugar cookie spreads for a healthier treat. Be sure to check all labels for potential allergens!
Can I make modifications to the flavor?
Very! Feel free to swap the Lotus Biscoff spread for other flavors like chocolate hazelnut spread or even almond butter for a twist. It’s all about adapting to your taste preferences, so get creative!
Indulge in No-Bake Cookie Butter Icebox Cake Heaven
Ingredients
Equipment
Method
- Whip the cream in a stand mixer until medium peaks form.
- Prepare the Biscoff cream by mixing the ingredients in a bowl.
- Assemble the cake by layering cookies and Biscoff cream in a loaf pan.
- Cover and refrigerate for at least 24 hours.
- Serve the cake with a drizzle of warmed Biscoff spread and crushed cookies.
Leave a Reply