
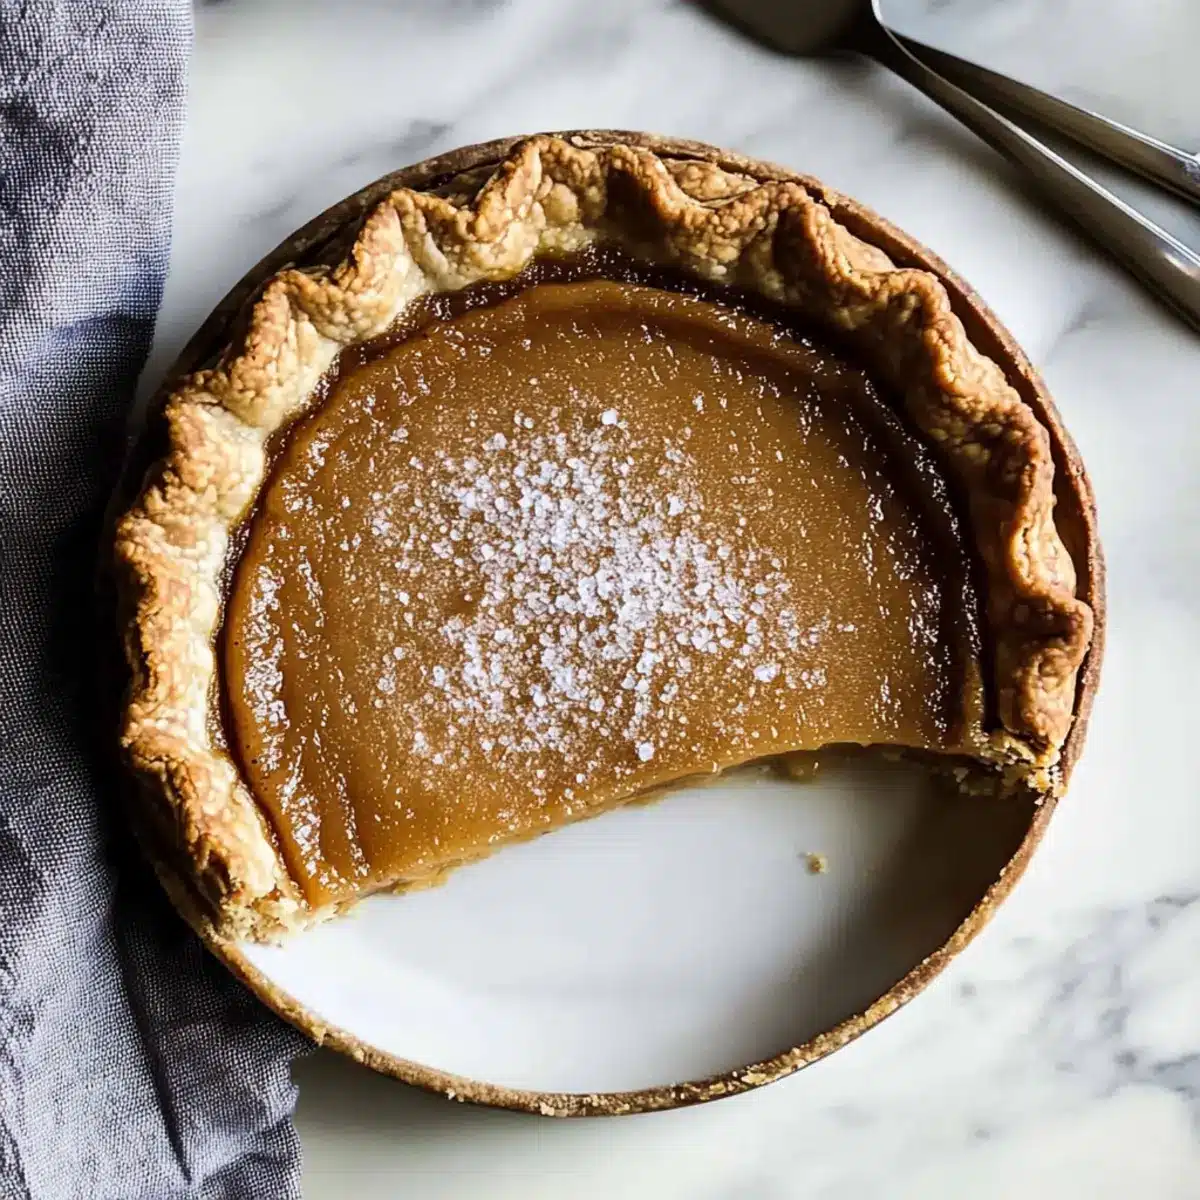
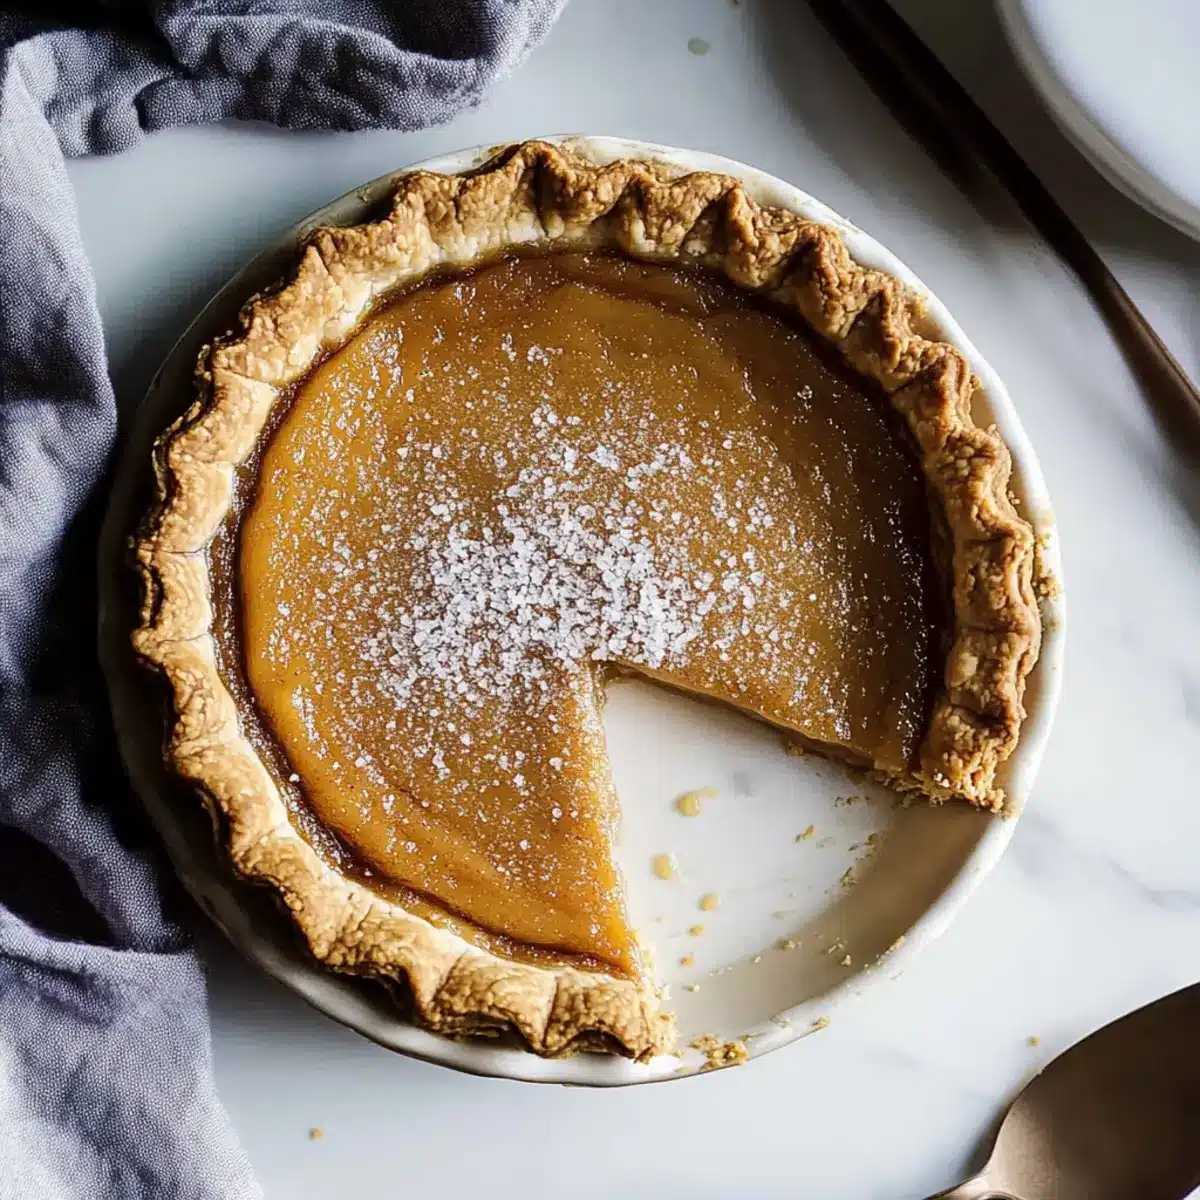
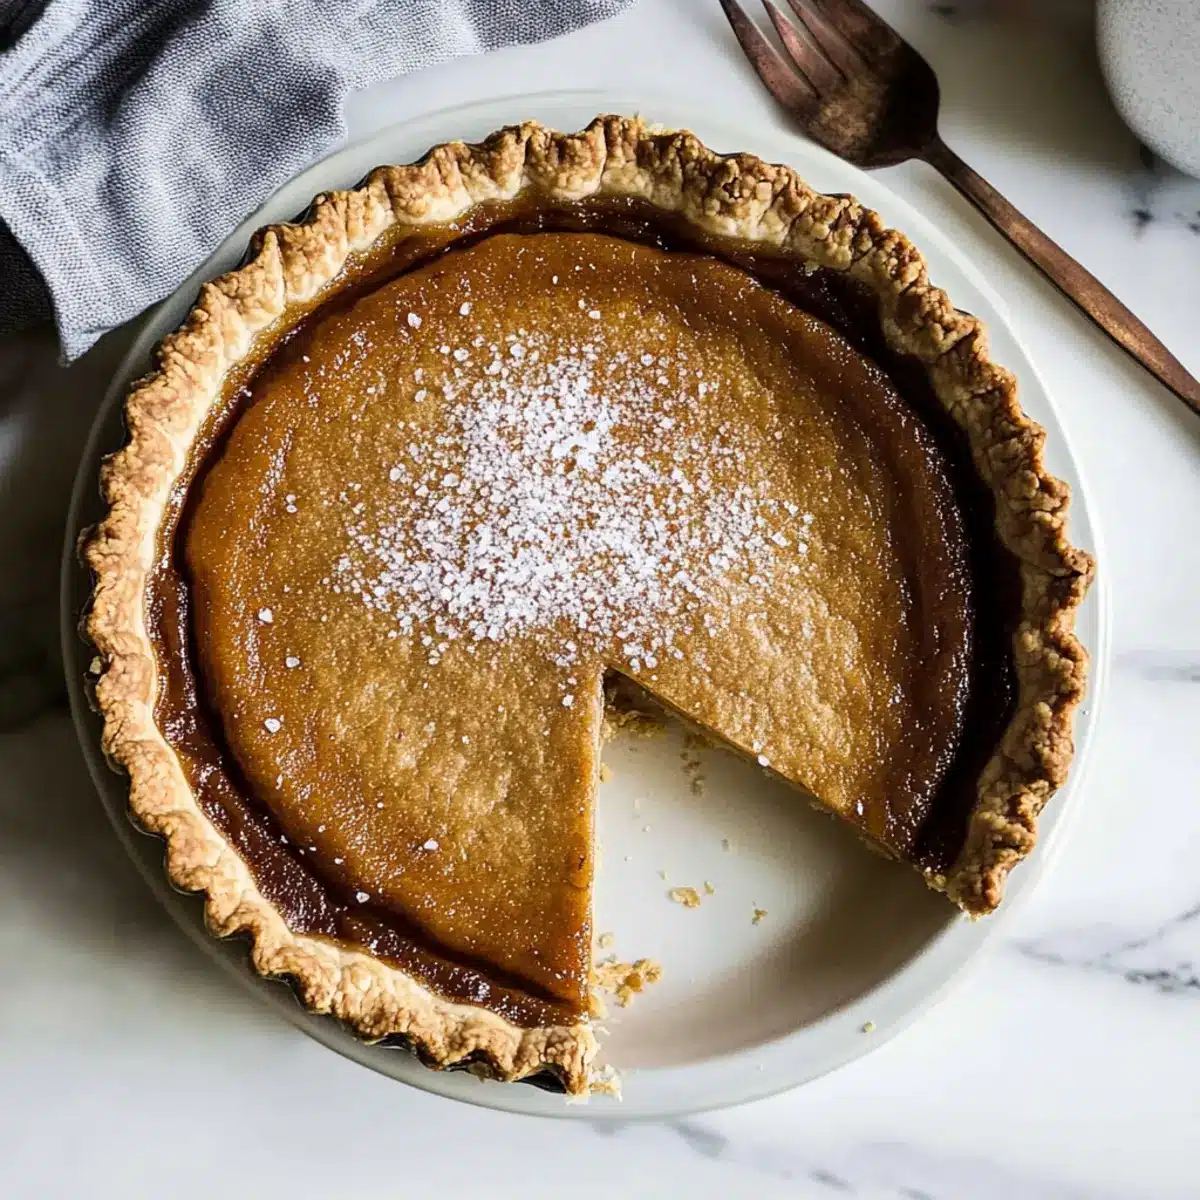
As the crisp autumn air settles in, I find myself drawn to the cozy aromas wafting from my kitchen, whispering promises of indulgent treats. That’s when my mind drifts to a slice of Salted Maple Pie, a delightful blend of sweet and salty flavors that truly embodies the spirit of the season. This classic pie recipe features a luscious, gooey filling made with Grade B maple syrup, nestled in a buttery, flaky crust that contrasts beautifully. Not only is it a heartwarming comfort food, but it’s also a spectacular crowd-pleaser perfect for fall gatherings. Ready to elevate your dessert game? Let’s dive into this cozy masterpiece and explore how to make your own Salted Maple Pie that will leave everyone asking for seconds!
Why is Salted Maple Pie a Must-Try?
Comforting, Heartwarming Flavor: The blend of sweet Grade B maple syrup and a touch of flaky sea salt creates an irresistible balance that warms the soul.
Simple Yet Elegant: With easy-to-follow instructions, even beginners can create this standout pie without breaking a sweat—perfect for impressing your guests!
Versatile Option: Serve it warm with a scoop of vanilla ice cream or at room temperature with a dollop of whipped cream; the possibilities are endless.
Fall Favorite: Ideal for autumn gatherings, this pie becomes the star of the dessert table, making every bite a cherished memory.
Inspired by Tradition: This recipe captures the essence of small-town bakeries, inviting you to share a delightful slice with friends and family, much like a classic Salted Honey Pie.
Salted Maple Pie Ingredients
For the Crust
• Unsalted Butter – 1/2 cup plus 2 tablespoons, melted and cooled for a rich flavor; European-style butter is ideal for extra flakiness.
• 9-inch All-Butter Pie Dough – Blind baked and cooled to hold the delicious filling for our Salted Maple Pie.
For the Filling
• Grade B Maple Syrup – 1 cup, providing the distinct sweetness and signature maple flavor; Grade A can be a substitute but may yield a milder taste.
• Light Brown Sugar – 3/4 cup, packed for deeper sweetness and added complexity; can be replaced with coconut sugar, though flavor will vary.
• Fine Yellow Cornmeal – 1/4 cup enhances texture and stability in the filling; you can use finely ground oats for a gluten-free alternative.
• Kosher Salt – Heaping 1/4 teaspoon, balancing the sweetness and intensifying flavors.
• Large Eggs – 3 at room temperature, plus 1 large egg yolk for added creaminess and structure; no substitutes recommended.
• Heavy Cream – 3/4 cup at room temperature, enriching the filling; use coconut cream for a dairy-free version if desired.
• Pure Vanilla Extract – 1-1/4 teaspoons, lending depth to the overall flavor.
For the Finish
• Beaten Egg – 1 for brushing on the crust, giving it a beautiful, shiny finish.
• Flaky Sea Salt – A sprinkle on top before serving, adding an essential touch of salty goodness that elevates the pie’s flavor.
Step‑by‑Step Instructions for Salted Maple Pie
Step 1: Preheat the Oven
Begin by preheating your oven to 350°F (175°C). This step is crucial for ensuring your Salted Maple Pie bakes evenly. While the oven heats, gather your ingredients and tools, including a mixing bowl and whisk for the filling.
Step 2: Prepare the Filling
In a medium bowl, whisk together the melted, cooled butter and Grade B maple syrup until well combined. Next, stir in the packed light brown sugar, fine yellow cornmeal, and heaping kosher salt, blending everything smoothly. This mixture should have a glossy sheen and a rich, sweet aroma that sets the tone for your pie.
Step 3: Combine Wet Ingredients
In a separate bowl, whisk the three large eggs, egg yolk, heavy cream, and pure vanilla extract until fully blended. Gradually pour this egg mixture into your maple-sugar blend, stirring continuously until just combined. Be careful not to overmix; you want a creamy texture with minimal air bubbles to ensure a luscious filling.
Step 4: Fill the Pie Shell
Once your filling is ready, place your blind-baked, cooled pie shell on a parchment-lined baking sheet for easy handling. Brush the edges of the crust with the beaten egg for a beautiful, glossy finish. Carefully pour the maple mixture into the shell, filling it to just below the rim; the rich filling should look smooth and inviting.
Step 5: Bake the Pie
Slide your filled Salted Maple Pie into the preheated oven and bake for 45 minutes to 1 hour. Watch closely as the edges puff up, while the center should jiggle slightly when done. The filling will become a deep, golden hue, signaling that it’s ready to come out of the oven.
Step 6: Cool the Pie
Once baked, remove your pie from the oven and let it cool on a wire rack for 4 to 6 hours. This cooling period is crucial for the filling to set properly, ensuring that each slice retains its shape and creamy texture. Trust the process—aromas will fill your kitchen, enticing everyone nearby.
Step 7: Finish and Serve
When the pie has fully cooled, sprinkle a light dusting of flaky sea salt over the top to enhance the flavor of your delicious Salted Maple Pie. Slice generously and serve with a dollop of whipped cream or a scoop of vanilla ice cream for that extra touch of sweetness. Enjoy the warmth and joy this cozy dessert brings to your autumn gatherings!
Expert Tips for Salted Maple Pie
• Use High-Quality Ingredients: Start with fresh, high-quality Grade B maple syrup and European-style butter for a flavor that truly shines in your Salted Maple Pie.
• Perfect Your Crust: Blind bake your pie crust until it’s a light golden brown. This prevents sogginess and ensures a flaky finish that complements the gooey filling.
• Cooling is Key: Allow your pie to cool for at least 4 to 6 hours. This helps the filling to set properly, ensuring neat slices and a wonderful texture.
• Watch Baking Time: Keep an eye on the baking time, as it may vary depending on your oven and pie dish color. The edges should puff, and the center should jiggle slightly.
• Salted Finish: Don’t skip the flaky sea salt sprinkle on top! It elevates the dish, intensifying the flavor of your Salted Maple Pie and creating that delightful sweet-salty contrast.
Salted Maple Pie Variations & Substitutions
Feel free to get creative with this Salted Maple Pie—there’s always room for a delicious twist to make it uniquely yours!
-
Nutty Delight: Add 1/2 cup chopped toasted nuts like pecans or walnuts for a delightful crunch that complements the filling’s gooey texture.
-
Bourbon Infusion: Incorporate 1 tablespoon of bourbon into the filling for a warm, rich flavor that enhances the maple syrup beautifully.
-
Maple Flavor Boost: For intensified maple notes, use an extra 1 tablespoon of maple extract without altering the main ingredients; it’s a simple way to elevate the taste.
-
Dairy-Free Option: Swap the heavy cream for coconut cream and ensure a dairy-free treat that retains all the lusciousness of the original version.
-
Sweet and Salty Topping: Before serving, sprinkle a layer of crumbled bacon on top for an unexpected twist that harmonizes the sweet and salty aspects of the pie deliciously.
-
Gluten-Free Crust: Use a store-bought gluten-free pie crust or make your own with almond flour and coconut oil for a gluten-free version that still tastes fantastic.
-
Chocolate Drizzle: Add a light drizzle of melted dark chocolate over the top just before serving for a luxurious finish that pairs perfectly with the maple filling.
-
Fall Spice Twist: Mix in 1 teaspoon pumpkin spice with the filling for a seasonal flavor profile that brings warm autumn vibes with every bite.
These variations invite you to explore different flavors and textures, allowing for a personalized experience that will impress anyone at your table! And if you’re in the mood for something equally delightful but different, consider trying my recipe for Salted Honey Pie or Bake Salted Caramel.
What to Serve with Salted Maple Pie
As you prepare to delight your guests with this indulgent treat, consider these comforting pairings that elevate the experience.
- Whipped Cream: A dollop of freshly whipped cream adds a light, airy texture that contrasts beautifully with the rich filling.
- Vanilla Ice Cream: Creamy vanilla ice cream provides a refreshing coolness, balancing the warm flavors of the pie perfectly.
- Toasted Nuts: Incorporate crushed toasted pecans or walnuts for a delightful crunch that complements the gooey filling nicely.
- Fresh Apples: Serve thinly sliced tart apples on the side for a crisp, refreshing bite to cut through the pie’s sweetness.
Crisp, fresh apples provide a wonderful contrast to the warm pie, creating a perfect harmony of flavors.
- Coffee or Espresso: The bold, rich flavors of coffee or espresso enhance the sweetness of the pie, making for an elegant dessert experience.
A good cup of coffee can elevate the entire meal, enticing guests to linger a little longer at the table.
- Caramel Sauce: Drizzle warm caramel over each slice for an extra layer of decadence that enhances the sweet-salty contrast of the pie.
Make Ahead Options
These Salted Maple Pies are absolutely perfect for busy home cooks looking to save time without sacrificing flavor! You can prepare the filling up to 24 hours in advance—simply blend the melted butter, maple syrup, and other ingredients, then store it in an airtight container in the refrigerator. For even more convenience, blind-bake your pie crust up to 3 days ahead of time; this helps maintain its flakiness for the final bake. When you’re ready to finish, just pour the chilled filling into the cooled crust and bake as directed. With these make-ahead tips, you’ll have a stunning dessert ready to impress without the rush!
How to Store and Freeze Salted Maple Pie
Room Temperature: Store the pie at room temperature for up to 3 days. Ensure it’s thoroughly covered to maintain freshness and protect it from drying out.
Fridge: If you prefer a chilled dessert, refrigerate the pie, covered, for up to a week. Allow it to come to room temperature before serving for the best flavor.
Freezer: Freeze leftover pie slices for up to one month. Wrap slices tightly in plastic wrap and then in aluminum foil. Thaw in the refrigerator before serving.
Reheating: To reheat, place slices in a preheated oven at 350°F for about 10-15 minutes until warmed through. Enjoy the deliciousness of your Salted Maple Pie!
Salted Maple Pie Recipe FAQs
How do I choose the right maple syrup for this recipe?
Absolutely! For the best flavor, I recommend using Grade B maple syrup, as it has a fuller, richer taste compared to Grade A. If you find Grade B unavailable, Grade A can be used, but the flavor will be milder.
How should I store leftover Salted Maple Pie?
To keep your pie at its best, store it at room temperature for up to 3 days, thoroughly covered with plastic wrap or aluminum foil. If you prefer it chilled, refrigerate the pie, where it will last for up to a week. Just remember to allow it to come back to room temperature before serving for the best flavor!
Can I freeze slices of Salted Maple Pie?
Absolutely! To freeze, wrap each slice tightly in plastic wrap, then place them in a zip-top freezer bag or aluminum foil. It will keep well in the freezer for up to one month. Thaw the slices in the refrigerator overnight before serving, or pop them in a preheated oven at 350°F for about 10-15 minutes to warm through.
What do I do if my filling doesn’t set properly?
If your filling doesn’t set, it could be due to underbaking or not cooling long enough. Ensure you bake until the edges puff and the center jiggles slightly—this usually takes 45 minutes to 1 hour. After baking, let it cool completely on a wire rack for 4 to 6 hours. If all else fails, you can try returning the pie to the oven for a short time, keeping an eye on it to avoid overbaking.
Are there any dietary considerations I should keep in mind for this recipe?
Great question! If you’re catering to dietary restrictions, you can substitute heavy cream with coconut cream for a dairy-free option. For a gluten-free crust, consider using a gluten-free pie crust or finely ground oats instead of cornmeal. Always double-check ingredient labels if allergies are a concern.
Can I modify the flavor profile of my Salted Maple Pie?
Very! To personalize your pie, try adding a splash of bourbon or maple flavoring into the filling. Chopped toasted nuts can add texture and crunch, while a sprinkle of crumbled bacon on top brings a delightful sweet-salty twist. The more the merrier!

Salted Maple Pie: Comforting Sweet and Salty Bliss
Ingredients
Equipment
Method
- Preheat your oven to 350°F (175°C). Gather your ingredients and tools.
- Whisk together melted, cooled butter and Grade B maple syrup until combined. Stir in brown sugar, cornmeal, and kosher salt.
- In a separate bowl, whisk eggs, egg yolk, heavy cream, and vanilla extract until blended. Pour into the maple-sugar blend and mix gently.
- Place the blind-baked pie shell on a baking sheet. Brush edges with beaten egg and fill with the maple mixture.
- Bake for 45 minutes to 1 hour until edges puff and the center jiggles slightly. The filling should be golden.
- Cool the pie on a wire rack for 4 to 6 hours to let the filling set.
- Sprinkle flaky sea salt over the top before serving. Slice and serve with whipped cream or vanilla ice cream.
Leave a Reply