
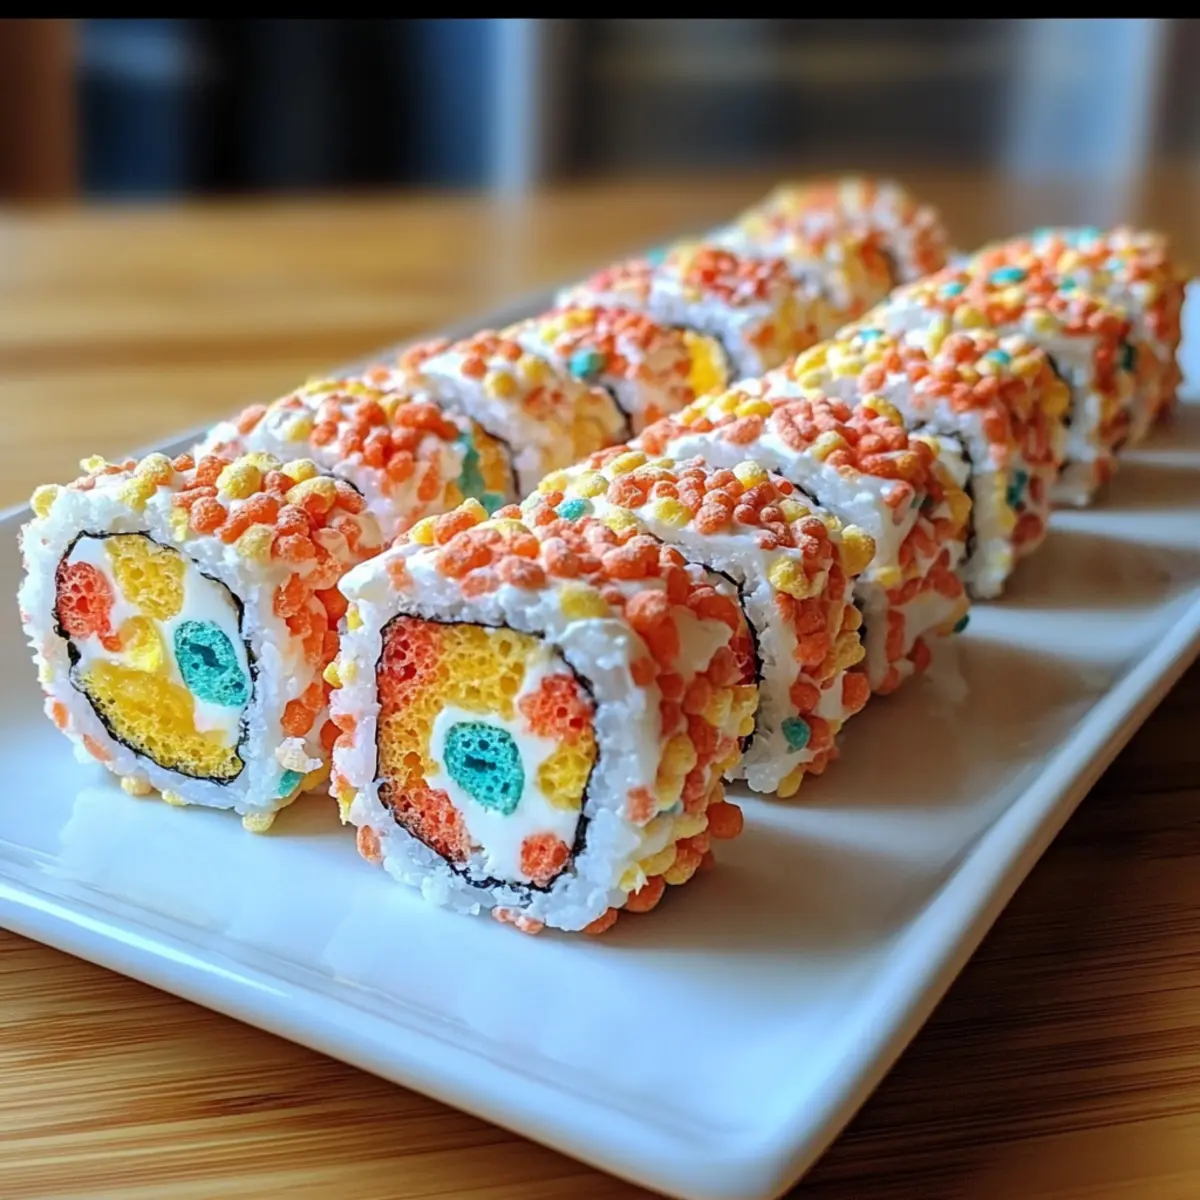
As I mixed the bright colors of Fruity Pebbles with gooey marshmallows, I couldn’t shake off the childhood excitement bubbling within me. This No-Bake Fruity Pebbles Sushi brings a playful twist to snack time, turning an ordinary treat into a vibrant escape. Not only is this recipe a breeze to whip up, but it also invites creativity with customizable fillings and toppings, making it the perfect activity for families or a fun gathering. Imagine surprising friends with these delightful, bite-sized rolls that are both gluten-free and utterly enchanting! Ready to roll up some sweet memories? Let’s dive into this fun and colorful culinary adventure!
Why is Fruity Pebbles Sushi a Must-Try?
Nostalgic Delight: Combining classic cereal flavors with a modern twist, this recipe brings back childhood memories in every colorful bite.
No-Bake Fun: No need to fire up the oven—this treat is quick, easy, and perfect for kids to help with!
Customizable Fillings: Get creative! Swap in chocolate spread, mini marshmallows, or your favorite candy for endless variations.
Perfect for Gatherings: Whether it’s a birthday party or a rainy day, these delightful rolls are a hit, sure to impress both kids and adults.
Gluten-Free Option: By checking labels, you can easily make this treat suitable for everyone in your circle.
Quick to Prepare: In just a few steps, you can whip up this fun dessert, leaving plenty of time for enjoying it!
Fruity Pebbles Sushi Ingredients
For the Sushi Base
• Fruity Pebbles Cereal – A colorful and crunchy base that makes this dessert truly pop; can be swapped for Cocoa Pebbles for a chocolatey twist.
• Marshmallows – These act as a delicious binding agent, giving your sushi its signature gooey texture; choose fresh for the best flavor.
• Butter (for greasing) – Just a little prevents everything from sticking and makes assembly a breeze.
For the Filling (optional)
• Gummy Sweets – Adds extra flavor and fun to the inside; consider using chocolate chips for a different treat altogether.
• Chocolate Spread (optional) – A delightful addition for those with a sweet tooth, making each bite even more indulgent.
Embrace the fun and creativity with these key ingredients for making your colorful and playful Fruity Pebbles Sushi!
Step‑by‑Step Instructions for Fruity Pebbles Sushi
Step 1: Prepare the Marshmallow Mixture
In a medium saucepan over low heat, melt 4 cups of marshmallows with 2 tablespoons of butter, stirring continuously until smooth and glossy, about 4–5 minutes. Be attentive to avoid burning; once fully melted, remove from heat and let the mixture cool slightly for easier handling.
Step 2: Mix in the Fruity Pebbles
Add 5 cups of Fruity Pebbles to the warm marshmallow mixture, ensuring every piece is well coated. Using a spatula or large spoon, gently fold the cereal in for about 1-2 minutes, until the cereal is evenly mixed, and the colors pop vibrantly.
Step 3: Prepare the Rolling Surface
Lay out a large piece of wax paper or parchment paper on a clean countertop to prevent sticking. Lightly grease the surface with butter, making sure the paper is coated so it will be easy to flatten and shape the Fruity Pebbles mixture without it clinging.
Step 4: Assemble the Sushi Layers
Transfer the Fruity Pebbles mixture onto the greased wax paper, spreading it out with your hands or a spatula to form a rectangle roughly 1-inch thick. If you’re adding gummy sweets or chocolate spread, layer them in the center of the rectangle, leaving space at the edges for rolling.
Step 5: Roll into a Log Shape
Carefully pick up one edge of the wax paper and begin to roll the mixture away from you, gently but tightly forming it into a log. Use the wax paper to help you keep it compact, rolling until you reach the opposite edge, making sure all fillings are enclosed.
Step 6: Chill to Set
Wrap the rolled Fruity Pebbles sushi tightly in the wax paper and place it in the refrigerator for about 20-30 minutes, allowing it to chill and firm up. This cooling period is essential for achieving that delightful sushi-like texture and shape.
Step 7: Slice and Serve
After chilling, unwrap the sushi roll and place it on a cutting board. Use a sharp knife to slice it into bite-sized pieces, resembling sushi rolls. Aim for slices around 1 inch thick for a perfect handheld treat, then arrange on a platter for sharing or enjoying yourself.
How to Store and Freeze Fruity Pebbles Sushi
Room Temperature: Keep leftover Fruity Pebbles Sushi in an airtight container at room temperature for up to 3 days; layer with parchment paper to prevent sticking.
Refrigerator: If you prefer a cooler treat, store the sushi in the fridge for up to 5 days, but be cautious, as this may affect the texture—best enjoyed at room temperature.
Freezer: For longer storage, freeze the sliced sushi in an airtight container for up to 2 months; ensure each piece is separated by parchment paper to maintain shape and avoid sticking.
Reheating: If you chilled the sushi, allow it to thaw at room temperature for about 30 minutes before serving for the best taste and texture.
What to Serve with Fruity Pebbles Sushi?
Indulge in a playful culinary experience by pairing these delightful rolls with delicious complements that enhance their whimsical charm.
- Fresh Fruit Salad: A medley of seasonal fruits adds a refreshing contrast to the sweetness, complementing the vibrant flavors beautifully.
- Vanilla Ice Cream: Creamy and rich, this classic dessert pairs wonderfully with the crunchy sushi for a delightful textural experience.
- Chocolate Sauce Drizzle: Elevate the fun factor by drizzling warm chocolate sauce over the sushi, creating a decadent twist with every bite.
- Yogurt Parfait: Layering Fruity Pebbles Sushi with yogurt and berries creates a fun, breakfast-inspired treat that everyone will love.
- Sparkling Lemonade: A zesty, fizzy drink enhances the playful nature of the sushi, making it a perfect addition for gatherings or parties.
- Whipped Cream: A dollop of fluffy whipped cream alongside the sushi provides lightness and mellows out the sweetness for a balanced bite.
Combine several of these ideas for an unforgettable dessert platter that keeps the fun and flavors rolling!
Make Ahead Options
Fruity Pebbles Sushi is a fantastic treat that can be prepped ahead of time, perfect for busy home cooks looking to save some time! You can prepare the sushi rolls up to 24 hours in advance. Simply follow the assembly steps, but instead of slicing, wrap the log tightly in wax paper and store it in an airtight container at room temperature. To maintain their delightful texture, avoid refrigerating as it can make the marshmallow mixture too firm. When you’re ready to serve, just slice the sushi into pieces and enjoy the colorful, nostalgic flavor, just as delicious as if made fresh!
Expert Tips for Fruity Pebbles Sushi
• Work Quickly: Once the marshmallow mixture is ready, move quickly to prevent it from hardening. Speed is key for a good texture!
• Grease Hands: Use butter or non-stick spray on your hands when handling the sticky mixture; this will make it easier to manage.
• Even Cutting: For evenly-sized sushi pieces, use a sharp knife and clean it between cuts to avoid sticking.
• Cool Down: Allow the sushi roll to cool completely before cutting; this ensures a firmer texture for slicing.
• Storage Tips: Keep any leftover Fruity Pebbles Sushi in an airtight container at room temperature, with parchment paper in between slices to prevent sticking.
Fruity Pebbles Sushi Variations & Substitutions
Feel free to personalize this delightful recipe and make it your own, adding a dash of creativity to your Fruity Pebbles Sushi!
- Chocolate Twist: Substitute Fruity Pebbles with Cocoa Pebbles for a rich and chocolatey twist that’s equally fun and delicious.
- Nutty Delight: Add chopped nuts, like almonds or peanuts, for extra crunch. Just sprinkle them into the mixture before rolling for a delightful texture contrast.
- Fruit Fusion: Incorporate fresh fruit slices or dried fruit in the filling for a burst of flavor—think strawberries or banana chips for a refreshing touch!
- Mini Marshmallows: Swap out regular marshmallows for mini ones. This gives a more evenly distributed sweetness throughout the sushi base.
- Holiday Cheer: Customize your sushi for holidays by using colored sprinkles or themed candy, making them festive for any occasion, like red and green for Christmas!
- Spicy Kick: Add a hint of spice by mixing in a dash of cayenne pepper in the marshmallow mixture for an unexpected but delightful heat that balances the sweetness.
- Creamy Addition: Drizzle chocolate or caramel sauce over the sliced sushi before serving for an indulgent finish that enhances every bite.
- Vegan Option: Use vegan marshmallows and plant-based butter for a dairy-free treat that everyone can enjoy, maintaining the fun and flavor without compromise.
Each variation opens up a world of possibilities, so invite family and friends to invent their own creations. For more treat inspirations, check out my chocolate-covered strawberries for a delicious dessert or explore how to make rice crispy treats for another nostalgic favorite!
Fruity Pebbles Sushi Recipe FAQs
How do I pick the best Fruity Pebbles cereal?
Absolutely! When selecting Fruity Pebbles, check the package for freshness and avoid boxes with crushed cereal. The colors should be vibrant without significant fading or dark spots, indicating freshness and optimum flavor.
How should I store leftover Fruity Pebbles Sushi?
The more the merrier! Store any leftovers in an airtight container at room temperature for up to 3 days. To prevent sticking, layer pieces with parchment paper. If you prefer, you can refrigerate for up to 5 days, though be aware this might change the texture a bit.
Can I freeze Fruity Pebbles Sushi?
Certainly! For freezing, slice your sushi and place individual pieces in an airtight container, separated by parchment paper. This will keep them from sticking together. They can be frozen for up to 2 months. When you’re ready to enjoy, just thaw them at room temperature for about 30 minutes.
What should I do if the marshmallow mixture hardens too quickly?
No worries! If you see your marshmallow mixture beginning to harden while preparing, you can gently reheat it on low until it becomes pliable again. Just be careful not to overheat, as this can cause the marshmallows to become too sticky.
Are there any dietary considerations for Fruity Pebbles Sushi?
Very important! While most components of Fruity Pebbles Sushi can be gluten-free, always check the labels on your marshmallows and any fillings (like gummy sweets) to ensure they meet gluten-free standards and your dietary needs. For pet safety, avoid sharing with pets due to the high sugar content.
Can I customize the fillings for Fruity Pebbles Sushi?
Absolutely! The fun part about this recipe is that you can get creative with the fillings. I often use mini chocolate chips or Nutella, but you can also try dried fruits, other candies, or even a mix of sweet and savory flavors. The options are endless!
Fruity Pebbles Sushi: A Fun No-Bake Twist for Everyone!
Ingredients
Equipment
Method
- In a medium saucepan over low heat, melt marshmallows with butter, stirring continuously until smooth and glossy, about 4–5 minutes.
- Add Fruity Pebbles to the warm marshmallow mixture and gently fold the cereal until evenly mixed for about 1-2 minutes.
- Lay out a large piece of wax paper, lightly greasing it with butter.
- Transfer the Fruity Pebbles mixture onto the greased wax paper, spreading to form a rectangle roughly 1-inch thick.
- Carefully roll the mixture away from you using the wax paper to keep it compact until you reach the opposite edge.
- Wrap the rolled sushi tightly in wax paper and chill in the refrigerator for 20-30 minutes.
- Unwrap and slice the chilled sushi roll into bite-sized pieces of about 1 inch thick.
Leave a Reply