
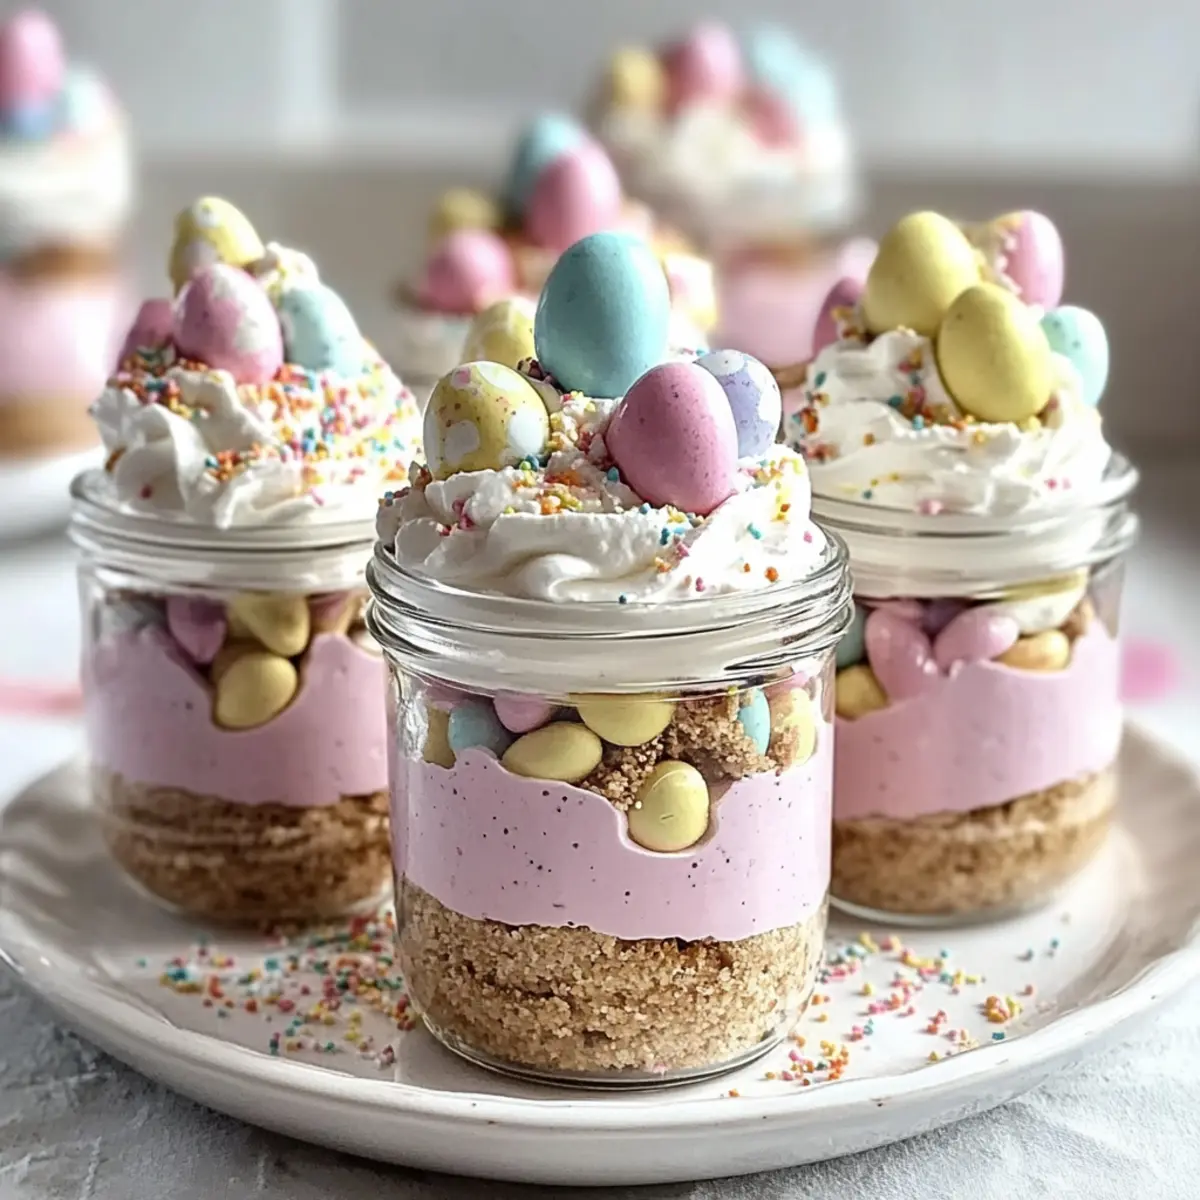
As I scooped and swirled the creamy filling into jars, the vibrant colors reminded me of spring blossoms bursting to life. These delightful Easter Egg Cheesecake Jars are not just eye candy; they’re a no-bake sensation that’s perfect for your upcoming celebrations. With a rich and velvety cheesecake layered between a crunchy graham cracker crust, they deliver a delightful balance of textures and tastes that everyone will adore. Whether you’re hosting a festive brunch or looking to impress at a family gathering, these jars are quick to assemble and easy to customize for any palate. Are you ready to whip up a dessert that will bring smiles to your table?
Why will you love these cheesecake jars?
No-Bake Convenience: These Easter Egg Cheesecake Jars eliminate the hassle of baking while providing a fun and interactive dessert experience.
Endless Customization: You can easily personalize them with different flavors, colors, or toppings to suit any celebration.
Crowd-Pleasing Appeal: With their vibrant colors and playful presentation, these jars are guaranteed to impress and delight your guests.
Perfect for Spring: The festive look and creamy texture make these treats ideal for any spring gathering or Easter brunch.
Time-Saving Treat: You can prepare them a day in advance, allowing you to spend more time celebrating and less in the kitchen!
Ready for more sweet inspiration? Check out our delightful Pumpkin Cheesecake Balls or indulge in a classic Chocolate Cheesecake Decadent.
Easter Egg Cheesecake Jars Ingredients
• For the Crust
- Graham Cracker Crumbs – Provides structure and a crunchy base; substitute with crushed Oreos or shortbread cookies for a unique twist.
- Granulated Sugar – Adds sweetness to the crust; optional to adjust based on personal preference.
- Unsalted Butter – Binds the crust together; can be replaced with coconut oil for a dairy-free version.
• For the Cheesecake Layer
- Cream Cheese – Forms the base of the cheesecake layer, contributing a rich, creamy texture; ensure it is fully softened for easy mixing.
- Powdered Sugar – Sweetens the cheesecake filling; can use less for a less sweet dessert.
- Vanilla Extract – Enhances the flavor profile; almond extract can be used for a different flavor note.
- Heavy Cream – Creates a light and fluffy texture when whipped; substituting with a plant-based cream is an option for dairy-free adaptations.
- Pink Gel Food Coloring (optional) – For adding pastel color to one layer; can replace with freeze-dried strawberry powder for a natural coloring alternative.
• For the Topping
- Whipped Cream – Used for topping; homemade is preferred, but store-bought whipped cream is acceptable.
- Pastel Candy Eggs – Decorative element, 2-3 per jar; use chocolate eggs or other themed candies as alternatives.
- Rainbow or Pastel Sprinkles – For decoration, adding visual appeal; substitute with edible glitter for a shimmering finish.
Embrace the sweet vibrancy of Easter Egg Cheesecake Jars and let your celebrations bloom this spring!
Step‑by‑Step Instructions for Easter Egg Cheesecake Jars
Step 1: Prepare the Crust
In a mixing bowl, combine graham cracker crumbs, granulated sugar, and melted unsalted butter until the mixture resembles damp sand. This should take about 2-3 minutes of mixing. Use a fork to ensure everything is well blended, avoiding any dry spots that could disrupt your crust.
Step 2: Build the Base
Spoon the crumb mixture into the bottom of your serving jars, pressing down firmly to create an even layer. Aim for a thickness of about 1/2 inch, using the back of a spoon for an even finish. Set these jars aside while you prepare the cheesecake filling.
Step 3: Make the Cheesecake Filling
In a large mixing bowl, beat the softened cream cheese using an electric mixer on medium speed until smooth and fluffy, about 2-3 minutes. Don’t forget to scrape down the sides of the bowl to incorporate any lumps. This will create a rich and creamy base for your Easter Egg Cheesecake Jars.
Step 4: Sweeten the Cream Cheese
Add sifted powdered sugar and vanilla extract to the cream cheese mixture, mixing on low speed until everything is well combined and airy. This part should take around 1-2 minutes. The final texture should be smooth without any noticeable lumps, ensuring each jar is decadent and delightful.
Step 5: Whip the Heavy Cream
In a separate bowl, whip the heavy cream with clean beaters until stiff peaks form. This process will take approximately 3-5 minutes. The whipped cream should hold its shape well and look light and fluffy. Gently fold this into your cheesecake mixture in two additions, taking care to preserve the airy texture.
Step 6: Color and Layer the Filling
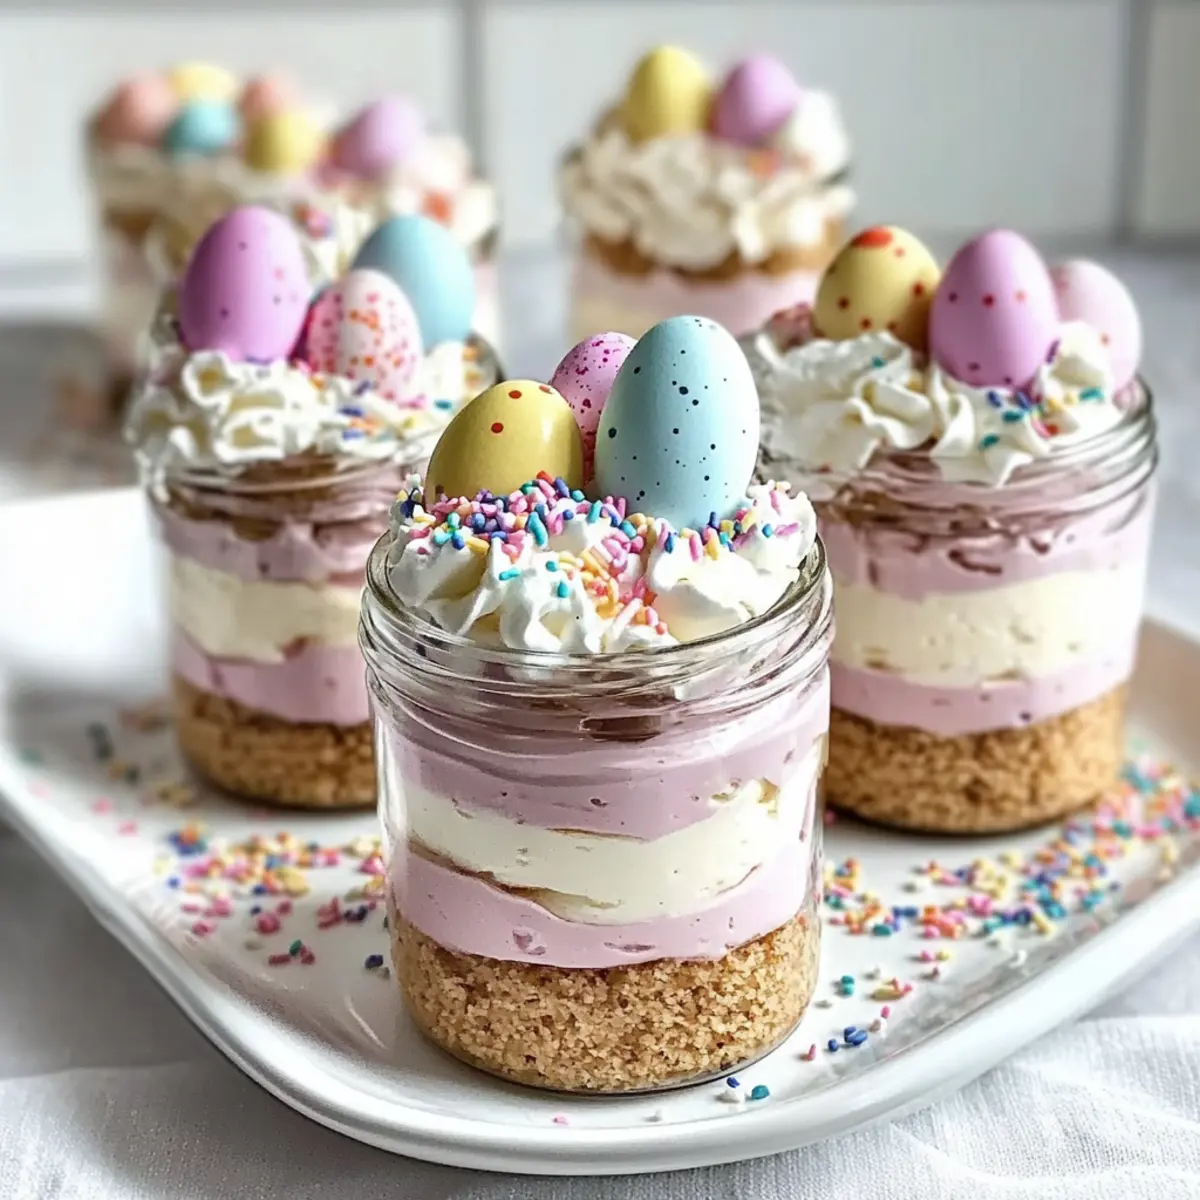
If desired, divide the filling into two bowls, tinting one with pink gel food coloring. With a piping bag, carefully layer the pink filling first, piping around the edges of the jars, followed by the uncolored cheesecake filling. Aim for a beautiful contrast in color, creating a lovely visual effect in your Easter Egg Cheesecake Jars.
Step 7: Add the Topping
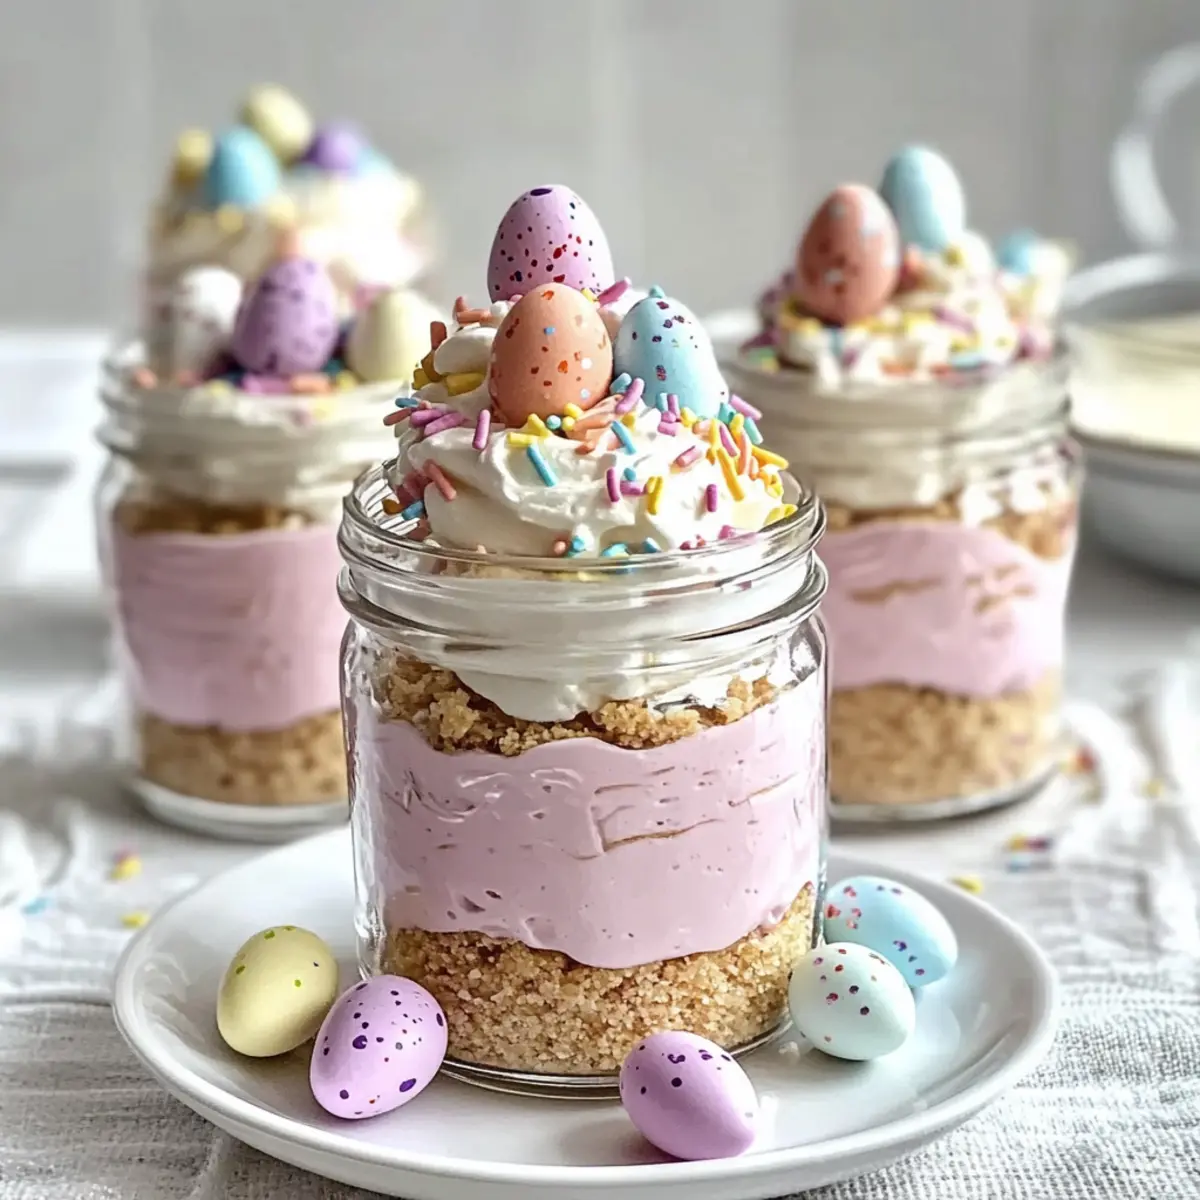
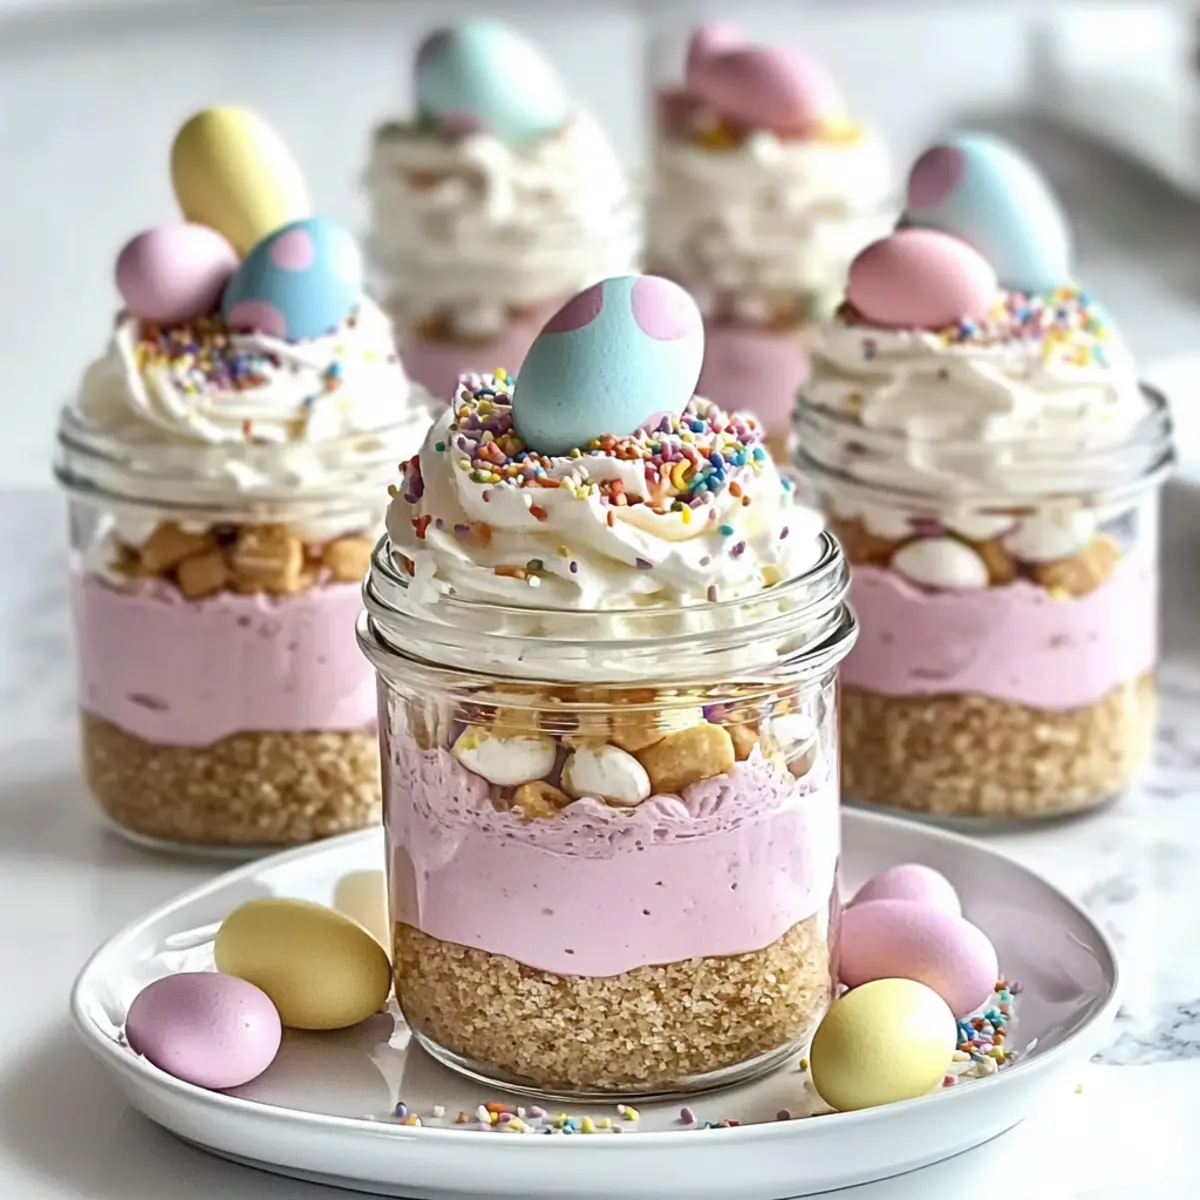
Top each jar with a generous dollop of whipped cream, making it look luscious and inviting. Sprinkle rainbow or pastel sprinkles and carefully place 2-3 pastel candy eggs on top. This final decorative touch brings the jars to life, ready for festive presentation.
Step 8: Chill and Serve
Refrigerate the assembled Easter Egg Cheesecake Jars for at least 2 hours to allow the layers to set beautifully. This chilling time enhances the flavor and texture. When ready to serve, present these colorful jars to your guests, delighting them with a charming dessert that captures the spirit of spring celebrations.
Make Ahead Options
These delightful Easter Egg Cheesecake Jars are perfect for busy home cooks looking to save time! You can prepare the graham cracker crust and cheesecake filling up to 24 hours in advance. Simply combine graham cracker crumbs, sugar, and melted butter for the crust, and mix the cream cheese, powdered sugar, and whipped cream for the cheesecake layer. Store the crust in an airtight container and refrigerate the filling. Then, when you’re ready to serve, layer them into jars and add whipped cream and festive toppings. This way, you’ll have a charming dessert that’s just as delicious, allowing you to focus more on enjoying the celebration!
How to Store and Freeze Easter Egg Cheesecake Jars
-
Fridge: Store the jars in the refrigerator for up to 3 days, covered with plastic wrap or a lid to keep them fresh and flavorful.
-
Freezer: If you’d like to freeze the jars, they can be kept for up to 1 month. Make sure to leave some space at the top of the jars for expansion and cover tightly.
-
Thawing: To enjoy frozen Easter Egg Cheesecake Jars, transfer them to the refrigerator to thaw overnight before serving for the best texture.
-
Reheating: These jars are best served cold; avoid reheating to maintain their creamy consistency and delightful presentation.
What to Serve with Easter Egg Cheesecake Jars
Elevate your spring gatherings by pairing delightful sides and beverages with these charming cheesecake jars.
-
Fresh Berry Salad: A medley of strawberries, blueberries, and raspberries adds a refreshing, tart contrast to the creamy sweetness.
-
Zesty Lemonade: Bright and invigorating, this tangy drink complements the rich layers of cheesecake, enhancing the overall dining experience.
-
Mini Quiches: Savory bites filled with veggies or cheese balance the sweetness of your dessert, making for an enjoyable meal.
-
Chocolate-Covered Strawberries: Indulgent yet light treats that marry well with the creamy texture of the cheesecake jars, offering a burst of flavor.
-
Scone Platter: Serve an assortment of scones with clotted cream and jam; the crumbly texture pairs excellently with the soft cheesecake.
-
Sparkling Water with Mint: A bubbly, refreshing drink to cleanse the palate between bites, it brightens your table’s overall feel.
-
Vanilla Ice Cream: A classic choice that enhances the dessert experience, melting creamy goodness onto those sweet layers.
-
Carrot Cake Bites: These mini delights echo the festivity of spring, providing a warm spice flavor that nicely complements the cheesecake.
-
Fruit-Infused Iced Tea: A sophisticated yet simple drink option, infused with herbs or fruits to match the glorious taste of spring.
-
Easter-themed Cookies: Cute and colorful, these cookies serve as a fun, crunchy sidekick, brightening your dessert table even more.
Expert Tips for Easter Egg Cheesecake Jars
-
Use Room Temperature Ingredients: Ensure your cream cheese and heavy cream are at room temperature for a smooth texture. Cold ingredients can lead to lumps in your cheesecake filling.
-
Chill Before Serving: Don’t skip the chilling step! Letting the jars refrigerate for at least 2 hours ensures the layers set properly, enhancing flavor and presentation.
-
Piping Precision: For clean layers, use a piping bag when layering the cheesecake filling. This technique keeps the colors distinct and elevates the visual appeal of your Easter Egg Cheesecake Jars.
-
Decorate Last Minute: To maintain freshness and texture, add the whipped cream and toppings just before serving. This keeps the whipped cream from wilting and the candy from getting soggy.
-
Flavor Variations: Feel free to experiment! Try adding a dash of lemon zest for brightness, or incorporate cocoa powder for a chocolate layer. The versatility of this recipe invites creativity!
Easter Egg Cheesecake Jars Customization
Feel free to get creative with your Easter Egg Cheesecake Jars—your unique twists will make them even more special!
-
Dairy-Free: Substitute cream cheese with coconut cream or vegan cream cheese for a creamy, plant-based dessert.
-
Crust Alternatives: Use crushed chocolate cookies for a cookies-and-cream flavor, or shortbread crumbs for a buttery alternative. Each variation brings a different delightful crunch.
-
Flavor Infusion: Mix in a tablespoon of fruit puree, like raspberry or mango, into the cheesecake layer for a fruity twist that sings of spring.
-
Coloring Options: Skip the food coloring for a natural look, or try matcha powder for a beautiful green hue that’s both festive and healthful.
-
Sweetener Swap: Use maple syrup or honey instead of granulated sugar for a different sweetness profile; it adds a lovely depth of flavor.
-
Topping Variations: Instead of pastel candy eggs, consider topping with fresh berries or edible flowers to bring a touch of elegance to your dessert.
-
Additional Layers: Add a layer of chocolate ganache or fruit compote between the cheesecake layers for extra indulgence and surprise with every spoonful.
-
Heat Level: For a contrast in flavor, a dash of cayenne pepper or chili powder can be mixed into the cheesecake filling, giving it an adventurous kick.
Your Easter Egg Cheesecake Jars can be as vibrant as spring itself, so let your creativity bloom! And if you’re looking for more delicious ideas, try our festive Sugar Cookie Cheesecake for another delightful dessert option.
Easter Egg Cheesecake Jars Recipe FAQs
What type of cream cheese should I use for the cheesecake layer?
For the best flavor and texture, I recommend using full-fat cream cheese, as it provides a rich, creamy base. Make sure it’s fully softened before mixing to avoid lumps and achieve a smooth consistency. You can also opt for reduced-fat cream cheese if you prefer a lighter version, but the texture and taste may vary slightly.
How long can I store Easter Egg Cheesecake Jars in the fridge?
You can store these delightful Easter Egg Cheesecake Jars in the refrigerator for up to 3 days. Just make sure to keep them covered with plastic wrap or a lid to prevent any drying out or absorbing other odors from the fridge. I often prepare them a day ahead to make entertaining a breeze, allowing flavors to meld beautifully.
Can I freeze the cheesecake jars for later use?
Absolutely! These jars can be frozen for up to 1 month. To do so, ensure you leave some space at the top of the jars for expansion as the filling freezes. Cover them tightly with plastic wrap or airtight lids. When you’re ready to enjoy, simply transfer the jars to the refrigerator and let them thaw overnight.
What if my whipped cream doesn’t hold its shape?
If your whipped cream isn’t holding its shape, it may not have been whipped to stiff peaks. To troubleshoot, chill your mixing bowl and beaters before whipping again, as this helps incorporate air and stabilize the cream. If fixing it isn’t working, you can try adding a teaspoon of unflavored gelatin dissolved in water to stabilize whipped cream for future layers and presentations.
Can I customize the ingredients for dietary restrictions?
Definitely! If you have dietary considerations, you can adapt this recipe. Use dairy-free cream cheese and whipped cream if you’re looking for a vegan option. For gluten-free diets, opt for gluten-free graham cracker crumbs or alternative crusts made from nuts or oats. Adjustments can also be made for sugar substitutes if you’re watching your sugar intake. The versatility of these Easter Egg Cheesecake Jars makes them enjoyable for everyone!
Delightful Easter Egg Cheesecake Jars Perfect for Spring Celebrations
Ingredients
Equipment
Method
- In a mixing bowl, combine graham cracker crumbs, granulated sugar, and melted unsalted butter until the mixture resembles damp sand, about 2-3 minutes of mixing.
- Spoon the crumb mixture into the bottom of your serving jars, pressing down firmly to create an even layer, about 1/2 inch thick.
- In a large mixing bowl, beat the softened cream cheese using an electric mixer on medium speed until smooth and fluffy, about 2-3 minutes.
- Add sifted powdered sugar and vanilla extract to the cream cheese mixture, mixing on low speed until well combined, around 1-2 minutes.
- In a separate bowl, whip the heavy cream with clean beaters until stiff peaks form, approximately 3-5 minutes.
- Gently fold the whipped cream into your cheesecake mixture in two additions, preserving the airy texture.
- If desired, divide the filling and tint one with pink gel food coloring, then layer it in the jars using a piping bag.
- Top each jar with a dollop of whipped cream, sprinkle with rainbow or pastel sprinkles, and add 2-3 pastel candy eggs.
- Refrigerate the assembled jars for at least 2 hours before serving.
Leave a Reply