
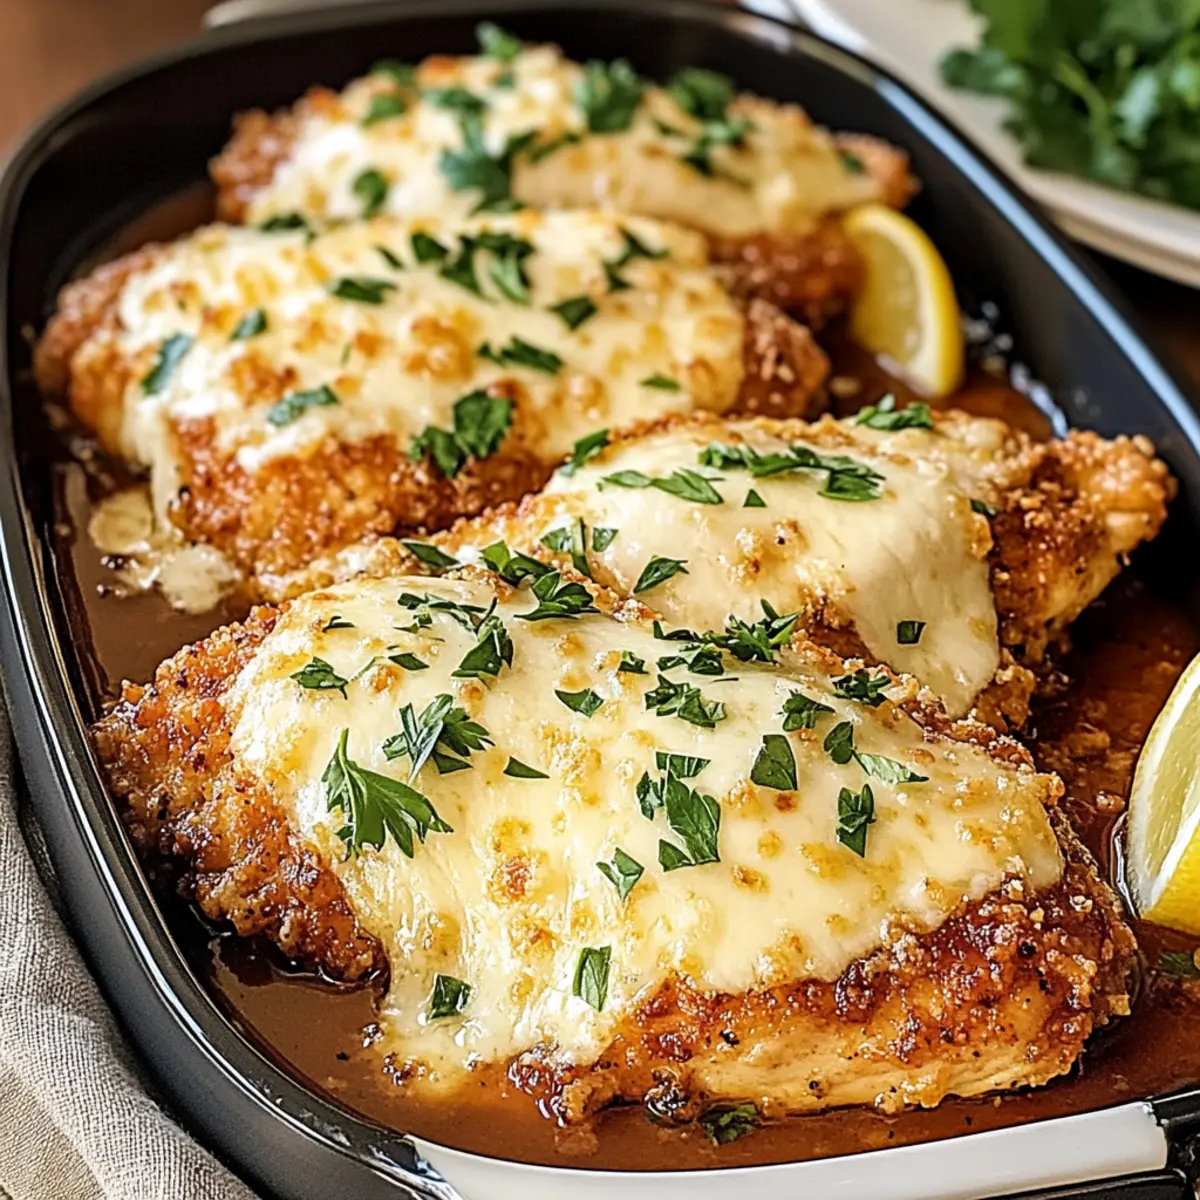
As I stood in my kitchen, the delightful sound of sizzling chicken filled the air, instantly whisking me away to an Italian trattoria. This is where my love for comfort food takes shape, especially with this Crispy Chicken Romano recipe. Featuring tender chicken breasts enveloped in a crunchy crust of Romano cheese and breadcrumbs, this dish offers both an irresistible texture and deeply satisfying flavor. Not only is it a quick weeknight dinner that yields incredible results in just 40 minutes, but it also makes for an impressive dish to share at gatherings. With its simple ingredients and endless variations—from gluten-free adaptations to lighter baked options—Chicken Romano is sure to become a cherished go-to in your culinary repertoire. Ready to transform your dinner routine? Let’s dive into this delicious journey!
Why is Chicken Romano a must-try?
Irresistible Crunch: Each bite delivers a perfect crispy coating that’s golden brown and enticing.
Flavor Explosion: The Romano cheese creates a savory richness that elevates the dish beyond a typical chicken dinner.
Quick Meal Solution: Ready in just 40 minutes, it’s ideal for busy weeknights or spontaneous dinner parties.
Versatile Variations: Whether you prefer a gluten-free option or a lighter baked version, this recipe adapts to your needs.
Crowd-Pleasing Delight: Serve it with a side of pasta or a fresh salad, and watch your family and friends rave about it! For more comforting options, check out my delicious Chicken Enchiladas Comfort or the mouthwatering Cowboy Butter Chicken.
Chicken Romano Ingredients
• The key to a perfect Chicken Romano lies in its simple yet flavorful ingredients!
For the Chicken
- Boneless, Skinless Chicken Breasts – Choose high-quality chicken for the best flavor.
- Salt – Adjust to taste; enhances the overall dish.
- Black Pepper – Freshly cracked adds a nice kick.
For the Coating
- All-Purpose Flour – Acts as the base for the coating; can be substituted with almond or whole wheat flour.
- Large Eggs – The binding agent that keeps the coating intact.
- Milk – Adds moisture to the egg wash; feel free to use dairy-free alternatives!
- Grated Romano Cheese – Offers a sharp, rich flavor; substitute with Parmesan if you prefer a milder taste.
- Italian-Style Breadcrumbs – Provides a satisfying crunch; swap for gluten-free breadcrumbs if needed.
Flavor Enhancers
- Garlic Powder – Adds a savory depth; fresh garlic can be used for a more intense flavor.
- Paprika – Optional but recommended for added sweetness and beautiful color.
- Olive Oil – Essential for frying and contributes to crispiness; avocado oil can also be used.
- Unsalted Butter – Adds richness; more olive oil can be used for a dairy-free option.
For Garnish
- Fresh Parsley – Brightens the dish and adds a pop of color.
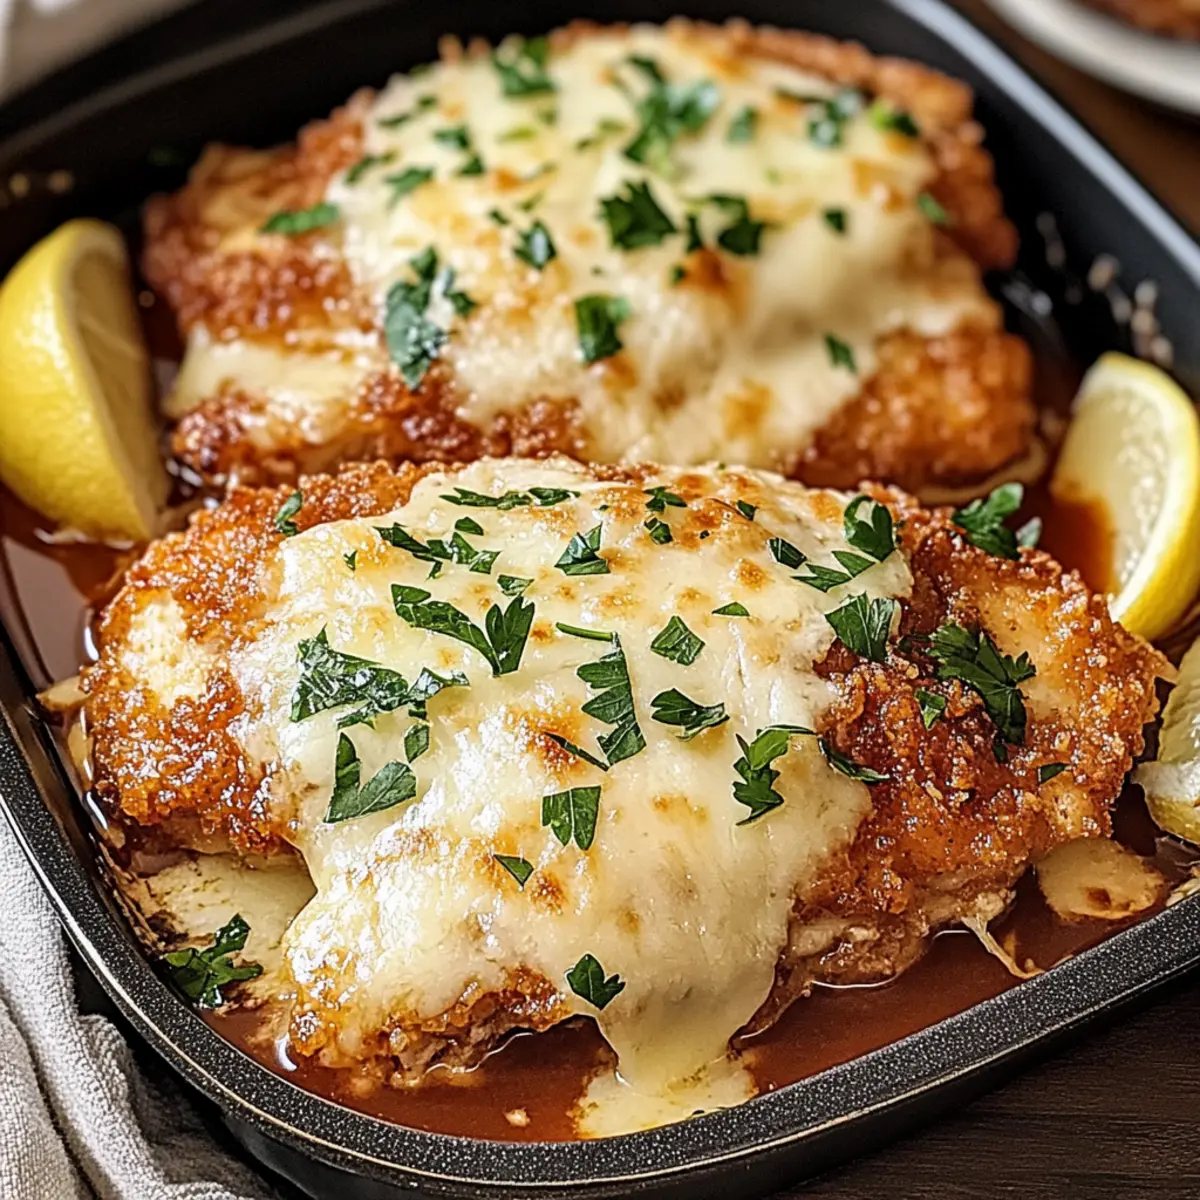
- Lemon Wedges – Enhances flavor with bright acidity, making every bite refreshing!
With these ingredients, you’re on your way to making an unforgettable Chicken Romano that will be the talk of the dinner table!
Step‑by‑Step Instructions for Chicken Romano
Step 1: Prepare the Chicken
Start by slicing the boneless, skinless chicken breasts into ½-inch thick cutlets for even cooking. Next, place each slice between two sheets of plastic wrap and gently pound them with a meat mallet until evenly flattened. This process ensures that your Chicken Romano cooks uniformly and remains tender and juicy.
Step 2: Set Up Dredging Stations
Create a dredging station by setting up three shallow bowls: one for all-purpose flour seasoned with salt and pepper, the second for a mix of egg and milk, and the third for a combination of grated Romano cheese and Italian-style breadcrumbs. Organizing your station makes the process smooth, helping you coat the chicken efficiently for that irresistible crunch.
Step 3: Dredge Chicken
Take each chicken cutlet and first coat it with the seasoned flour, shaking off any excess. Next, dip it into the egg wash, ensuring it is fully immersed for proper adhesion, and finally, press it firmly into the cheese-breadcrumb mixture. This step creates that golden, crispy exterior that defines a good Chicken Romano.
Step 4: Pan-Fry
Heat a generous amount of olive oil in a large skillet over medium heat until it reaches around 350°F (175°C). Carefully place the breaded chicken cutlets in the skillet, avoiding overcrowding. Fry them for 3–4 minutes per side or until golden brown and crispy. Flip them gently to maintain the perfect crust, and adjust the heat as necessary to avoid burning.
Step 5: Bake
Once the Chicken Romano is golden and crispy, transfer it to a baking sheet lined with parchment paper. Preheat your oven to 375°F (190°C) and bake the chicken for an additional 10 minutes. This step ensures the chicken is completely cooked through and allows the flavors to meld beautifully.
Step 6: Rest & Serve
After baking, remove the Chicken Romano from the oven and let it rest for a few minutes. This is crucial as it allows the juices to redistribute, making each bite tender. Garnish with freshly chopped parsley for a hint of color and serve with lemon wedges for a zesty kick that beautifully enhances the flavors of your Chicken Romano.
Storage Tips for Chicken Romano
Fridge: Store leftover Chicken Romano in an airtight container for up to 3 days. Ensure it’s cooled completely before sealing to maintain freshness.
Freezer: If you want to keep Chicken Romano longer, freeze the cooked pieces for up to 2 months. Wrap each piece tightly in plastic wrap and store in a freezer-safe bag.
Reheating: For best results, reheat the chicken in the oven at 375°F (190°C) for about 10 minutes. This helps retain its crispy texture, unlike microwaving, which can make it soggy.
Meal Prep Tip: Breaded and un-cooked chicken can be refrigerated for up to 12 hours, making it easy to prepare Chicken Romano quickly on a busy weeknight!
Chicken Romano Variations & Substitutions
Feel free to get creative with your Chicken Romano—there’s so much room for customization to delight your taste buds!
-
Dairy-Free: Substitute Romano cheese with nutritional yeast and use panko breadcrumbs for a crunchy, cheesy flavor without the dairy.
-
Lighter Version: Bake instead of fry by using almond flour and whole wheat breadcrumbs. This offers a guilt-free, crispy experience!
-
Gluten-Free: Replace all-purpose flour and breadcrumbs with gluten-free alternatives like almond or coconut flour and certified gluten-free breadcrumbs.
-
Spicy Kick: Add a pinch of cayenne pepper or crushed red pepper flakes to your breadcrumbs for a zesty twist that lifts the flavor profile.
-
Herb-Infused: Mix finely chopped fresh herbs like basil or oregano into the breadcrumbs for an aromatic experience, adding freshness to each bite.
-
Mediterranean Twist: Serve with a warm, roasted red pepper sauce on top for a vibrant addition that complements the crunchy chicken beautifully.
-
Sandwich Option: Layer Chicken Romano on ciabatta with arugula and roasted garlic mayo for a gourmet twist that makes any lunch special.
-
Wrap Variation: Slice the chicken and wrap it in a tortilla with fresh greens and a lemon-garlic yogurt sauce for a delightful on-the-go meal.
For a comforting dinner paired with classic flavors, you might also enjoy my Chicken Enchiladas Comfort or try something zesty like the Honey Lime Chicken. Happy cooking!
Make Ahead Options
These Chicken Romano are perfect for meal prep enthusiasts! You can bread the chicken and store it in the refrigerator for up to 12 hours before cooking, ensuring maximum freshness and flavor. Simply follow the dredging steps, then cover the breaded cutlets with plastic wrap to prevent drying out. Additionally, you can prepare the dredging stations (flour, egg wash, and cheese-breadcrumb mixture) up to 24 hours in advance by sealing them in airtight containers. When you’re ready to serve, just pan-fry and bake the chicken as instructed for that same crispy texture and delicious taste that you love. Enjoy a stress-free mealtime with this delightful Chicken Romano ready at your fingertips!
What to Serve With Crispy Chicken Romano
As you prepare to enjoy your Crispy Chicken Romano, envision a delightful spread that enhances every flavorful bite and creates a memorable dining experience.
-
Garlic Mashed Potatoes: Creamy, buttery mashed potatoes provide a comforting side that perfectly complements the crispy exterior of Chicken Romano. The tangy notes of garlic meld beautifully with the cheese crust, creating a harmonious balance.
-
Roasted Italian Vegetables: A colorful mix of zucchini, bell peppers, and red onions roasted until caramelized enhances the dish’s freshness. Their slight sweetness contrasts with the savory chicken, adding layers of flavor to your plate.
-
Classic Caesar Salad: Crisp romaine, crunchy croutons, and a creamy dressing elevate your meal with a refreshing crunch. The sharpness of the Parmesan and the tang of the dressing pair beautifully with the rich flavors of Chicken Romano.
-
Crispy Polenta: Golden, crispy polenta rounds offer a delightful twist, adding a unique texture to your dining experience. This Italian classic is perfect for soaking up any sauce or juices from the chicken.
-
Lemon-Garlic Green Beans: Tender green beans sautéed with fresh lemon juice add brightness to the meal. Their crispness and zesty flavor provide a complementary counterpoint to the richness of the chicken.
-
Decadent Tiramisu: For dessert, indulge in classic tiramisu. The layers of coffee-soaked ladyfingers and creamy mascarpone offer a sweet ending that pairs delightfully with the savory qualities of your Chicken Romano dinner.
Each of these options will elevate your table and transform a simple dinner into an unforgettable feast!
Expert Tips for Chicken Romano
• Oil Temperature: Ensure the frying oil reaches 350°F for a crispy exterior; use a breadcrumb test to check readiness.
• Crust Adherence: Firmly press breadcrumbs onto the chicken to ensure they stick during cooking; avoiding loose coating helps prevent falling off.
• Avoid Overcrowding: Fry chicken in batches to prevent steaming; overcrowding lowers the temperature of the oil and results in soggy coating.
• Rest After Baking: Allow the Chicken Romano to rest for a few minutes before slicing; this helps redistribute juices for maximum tenderness.
• Meal Prep: For quick weeknight dinners, you can store un-cooked breaded chicken in the fridge for up to 12 hours; simply fry when ready.
Chicken Romano Recipe FAQs
How do I choose the best chicken for this recipe?
Absolutely! When selecting boneless, skinless chicken breasts, look for those that are plump and firm, with no dark spots or discoloration. Opting for organic or free-range chicken can elevate the flavor profile of your Chicken Romano. Using high-quality chicken will ensure a juicy and tender result.
What’s the best way to store leftover Chicken Romano?
Certainly! Refrigerate any leftovers in an airtight container for up to 3 days. Make sure to let the chicken cool completely before sealing it. For best reheating results and to retain that crispy texture, preheat your oven to 375°F (190°C) and heat for about 10 minutes. Avoid using the microwave, as it can make the coating soggy.
Can I freeze Chicken Romano?
Yes, you can! To freeze Chicken Romano, first ensure it is fully cooled. Wrap each piece tightly in plastic wrap and then place them in a freezer-safe bag. This will help prevent freezer burn. You can store it for up to 2 months. When ready to enjoy, thaw in the refrigerator overnight and reheat in the oven.
What if the coating doesn’t stick to the chicken?
Very! If you find the coating is not sticking properly, there are a couple of things you can do. First, make sure you’re pressing the breadcrumbs firmly onto the chicken after dipping it in the egg wash. If the egg wash is too thin, it may not adhere well. To improve adherence, you can also let the coated chicken sit for about 10 minutes before frying; this allows the coating to set properly.
Are there any dietary considerations for Chicken Romano?
Absolutely! For those following a gluten-free diet, you can substitute regular breadcrumbs with gluten-free alternatives, such as almond flour or gluten-free panko breadcrumbs. For a dairy-free version of Chicken Romano, swap the Romano cheese for nutritional yeast combined with a bit of olive oil to mimic that cheesy flavor.
Can I prepare Chicken Romano ahead of time?
Absolutely! For easy weeknight dinners, you can bread the chicken and keep it in the fridge for up to 12 hours before cooking. Just make sure to store it in an airtight container. When you’re ready to cook, simply fry and bake as directed for delicious and effortless meals!
Crispy Chicken Romano: Your New Weeknight Favorite Recipe
Ingredients
Equipment
Method
- Slice the boneless, skinless chicken breasts into ½-inch thick cutlets for even cooking and pound each slice with a meat mallet until evenly flattened.
- Set up three shallow bowls: one with seasoned flour, the second with a mix of egg and milk, and the third with grated Romano cheese and breadcrumbs.
- Coat each chicken cutlet in seasoned flour, dip in the egg wash, and press into the cheese-breadcrumb mixture.
- Heat olive oil in a skillet over medium heat and fry the breaded chicken cutlets for 3-4 minutes per side until golden brown.
- Transfer the fried chicken to a baking sheet, preheat the oven to 375°F, and bake for an additional 10 minutes.
- Remove from oven, let the chicken rest for a few minutes, garnish with parsley, and serve with lemon wedges.
Leave a Reply