
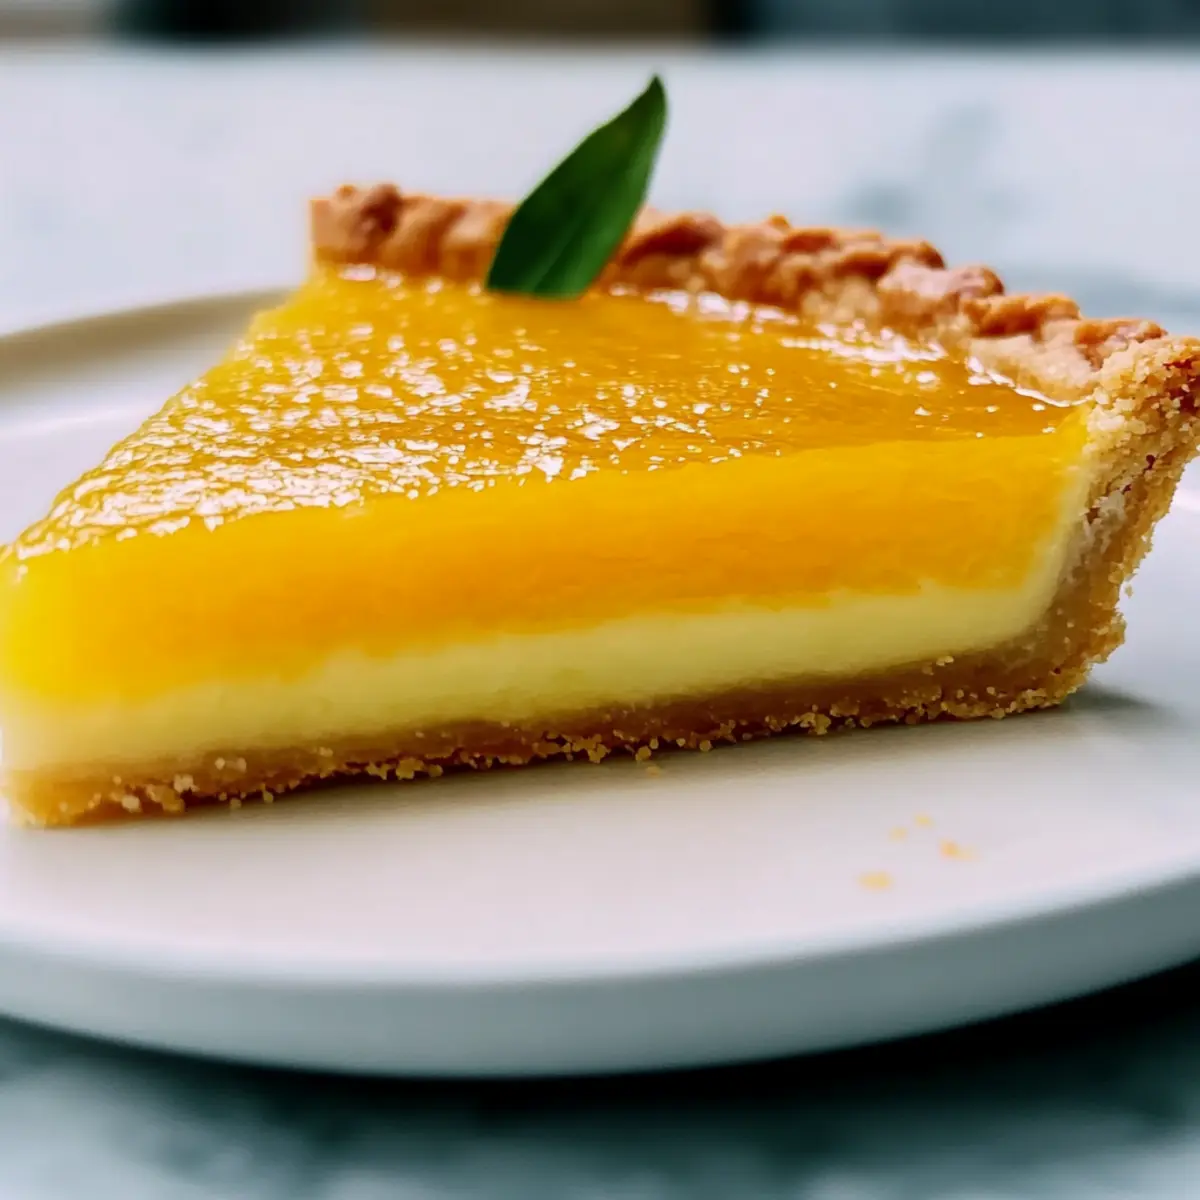
As I stood in my kitchen, the sweet aroma of fresh oranges filled the air, transporting me back to sun-kissed afternoons spent baking with loved ones. This Classic Orange Tart effortlessly captures that nostalgic warmth and joy, making it the perfect dessert for any occasion. With its smooth and silky orange curd nestled in a flaky crust, this elegant treat isn’t just about good looks—it’s incredibly simple to whip up, and the best part? It can be made ahead of time, freeing you to focus on your guests. Whether you’re planning a dinner party or just looking for a refreshing end to a casual meal, this tart will surely impress. Ready to elevate your dessert game and bring a touch of sunshine to your table? Let’s dive into this delightful recipe!
Why is this Classic Orange Tart a must-try?
Simplicity at its finest: With just a few simple ingredients, you’ll discover how easy it is to craft a stunning dessert that looks like it’s from a gourmet bakery. Effortless elegance: This Classic Orange Tart combines a buttery crust with a vibrant orange filling, turning any occasion into a special celebration. Make-ahead convenience: Prepare the tart in advance, allowing the flavors to meld beautifully, so you can enjoy more time with your guests. Versatile serving options: Serve it with whipped cream or a scoop of vanilla ice cream for a delightful twist. For an added touch, pair it with a refreshing beverage like iced tea or coffee! If you’re interested in other versatile recipes, check out my Muffin Breakfast Pizza for a delicious brunch idea or the comforting Cheddar Gnocchi Soup for a cozy dinner!
Classic Orange Tart Ingredients
• Delight in creating this vibrant masterpiece with simple ingredients!
For the Crust
- Flour – Forms the base; use all-purpose flour for best results, or gluten-free for a lighter option.
- Powdered Sugar – Sweetens the crust while ensuring a tender texture; no substitutions are necessary.
- Almond Flour – Adds richness and a delicate texture; can replace with more all-purpose flour if needed.
- Salt – Enhances flavor in the crust; a small but essential addition for balance.
- Orange Zest – Infuses the crust with vibrant citrus notes; use more for an intensified taste, or swap for lemon zest if desired.
- Butter – Delivers that flaky texture; switch to margarine for a dairy-free twist.
- Egg Yolk – Binds and enriches the dough; using a whole egg is an option but may slightly adjust the texture.
- Water – Helps form the dough; no real alternative needed unless replacing the egg impacts moisture.
For the Filling
- Fresh Orange Juice – The star of the curd; opt for freshly squeezed to truly enhance flavor—bottled juice won’t do!
- Eggs – Crucial for a smooth curd texture; can substitute with a plant-based egg alternative for a vegan version.
- Superfine Sugar – Sweetens the curd and aids in a smooth blend; regular sugar can also work if ground finely.
- Cornstarch – Thickens the curd; alternatives include arrowroot or tapioca starch if needed.
- Gelatin – Ensures the filling sets perfectly; for a vegetarian option, use agar-agar.
For Serving
- Heavy Cream – Whipped to top the tart; coconut cream serves as a delicious dairy-free alternative.
- Optional Garnishes – Mint leaves, crushed pistachios, or orange segments add a festive flair and freshness.
Enjoy creating this Classic Orange Tart—a show-stopping dessert that marries simplicity with elegance!
Step‑by‑Step Instructions for Classic Orange Tart
Step 1: Dough Preparation
In a food processor, combine 1 ½ cups flour, ½ cup powdered sugar, ½ cup almond flour, ¼ teaspoon salt, and the zest of 1 orange. Add ½ cup chilled, cubed butter and pulse until the mixture resembles coarse crumbs. Mix in 1 egg yolk and 2 tablespoons of cold water until it forms a dough. Wrap in plastic wrap and chill for 15–60 minutes.
Step 2: Tart Shell
Preheat your oven to 200°C (390°F). Grease a tart pan with removable bottom. Roll out the chilled dough on a floured surface and press it evenly into the pan. Chill again for 15 minutes, then line the shell with parchment paper and fill with pie weights. Bake for 12–15 minutes until the edges are set, then remove weights and bake uncovered for an additional 10–12 minutes until golden.
Step 3: Filling Creation
In a medium saucepan, gently heat 1 cup of freshly squeezed orange juice over low heat. Meanwhile, whisk together 3 eggs, ¾ cup superfine sugar, and 2 tablespoons of cornstarch in a bowl. Slowly pour in the warm juice while whisking to temper the eggs. Return the mixture to the saucepan and cook over medium-low heat, stirring constantly until thickened (about 5 minutes). Stir in 1 tablespoon gelatin and ¼ cup cooled, diced butter until fully combined.
Step 4: Assemble Tart
Remove the tart shell from the oven and let it cool completely. Once cooled, pour the smooth orange filling into the tart shell, ensuring an even layer. Refrigerate the assembled Classic Orange Tart for at least 3 hours, or overnight, until fully set and chilled. This allows the flavors to meld beautifully.
Step 5: Whipped Cream Topping
When ready to serve, whip 1 cup of heavy cream in a mixing bowl until soft peaks form. Add 2 tablespoons of sugar and a few drops of orange bitters if desired; whip until stiff peaks form. Garnish the chilled tart with dollops of whipped cream and a sprinkle of crushed pistachios or mint leaves for a visually appealing presentation.
What to Serve with Classic Orange Tart
Imagine a table set for an elegant gathering, where each bite of dessert transports you to a sun-drenched orchard filled with the fragrance of citrus.
-
Creamy Whipped Cream: A classic pairing, it adds a light, sweet contrast to the zesty filling, enhancing every bite.
-
Fresh Berries: Juicy strawberries or tart raspberries create a delightful balance of flavors, adding freshness and color to your plate.
-
Coconut Sorbet: This refreshing, dairy-free option brings a tropical twist, complementing the tart’s citrus notes while keeping things light and airy.
-
Chilled Prosecco: The bubbly’s effervescence and hint of sweetness elevate the dining experience, making it feel like a celebration with every sip.
-
Mint Tea: Serve a warm or iced mint tea alongside the tart for a soothing herbal note that contrasts beautifully with the tartness of the orange.
-
Chocolate Drizzle: A rich chocolate sauce drizzled over the tart adds a decadent element, creating a luxurious treat that will satisfy any sweet tooth.
-
Almond Biscotti: Crunchy, nutty biscotti offers a delightful contrast in texture, perfect for dipping in coffee after enjoying the tart.
-
Citrus Salad: A light salad of mixed citrus fruits brings out the tart’s flavor while adding a refreshing and healthy element to your meal.
-
Dark Chocolate Espresso: Serve a small cup of this rich beverage for a sophisticated finish, beautifully highlighting the orange’s bright notes.
Make Ahead Options
These Classic Orange Tart is perfect for meal prep enthusiasts! You can prepare the tart shell and filling up to 2 days in advance, allowing the flavors to blend beautifully while saving you valuable time. To maintain its quality, store the baked tart shell covered at room temperature and the filling in an airtight container in the refrigerator until you’re ready to assemble. When you’re ready to serve, simply pour the orange filling into the cooled tart shell, refrigerate for at least 3 hours to set, and whip up your cream topping just before serving. This way, you’ll have a show-stopping dessert that’s just as delicious and ready to impress your guests!
Tips for the Best Classic Orange Tart
-
Perfect Dough Texture: Avoid overworking the pastry dough to ensure a tender, flaky crust. Mix just until combined for the best results.
-
Blind Baking Essentials: Thoroughly blind bake the tart shell to prevent a soggy bottom. Make sure the edges are set and the base is golden for a crispy texture.
-
Smooth Orange Curd: Cook the curd over low heat while stirring constantly to avoid scrambling the eggs, leading to a silky-smooth filling for your Classic Orange Tart.
-
Chill for Flavor: Allow the tart to chill for at least 3 hours, or overnight, to let the flavors meld and create a beautifully set filling.
-
Garnish Impeccably: Consider adding fresh mint leaves or crushed pistachios as a garnish just before serving for an elegant presentation and added texture.
Classic Orange Tart Variations & Substitutions
Feel free to let your culinary creativity shine by customizing this classic recipe with delightful twists and smart substitutions!
- Citrus Twist: Add lemon juice or zest for a refreshing citrus medley that brightens the flavor profile beautifully.
- Berry Bliss: Fold in fresh raspberries or strawberries into the filling for a splash of fruity flavor, elevating the tart to new heights of deliciousness.
- Miniature Treats: For individual servings, opt for mini tart pans—perfect for parties or dinner gatherings, making them beautifully bite-sized.
- Lighter Option: Swap heavy cream for whipped coconut cream to keep it light and dairy-free yet indulgent.
- Sugar-Free: Use your favorite sugar substitute to sweeten the curd, resulting in a delicious diabetic-friendly dessert without compromising taste.
- Nutty Inclusion: Incorporate finely chopped pistachios or almonds into the crust for added texture and a lovely nutty flavor that complements the orange.
- Spice It Up: Add a pinch of cardamom or ginger to the filling for a surprising warmth that brings depth to the tart.
- Garnish Boldly: Experiment with edible flowers or a sprinkle of lavender on top for a charming presentation that adds a touch of whimsy.
So, ready to spice things up? Whether you’re serving it alongside a steaming cup of coffee or at your next gathering, your Classic Orange Tart will surely dazzle your taste buds! For more inspiration, don’t miss checking out my Glazed Salmon or the comforting Cheddar Gnocchi Soup for delicious pairings!
Storage Tips for Classic Orange Tart
-
Fridge: Store the Classic Orange Tart covered in the refrigerator for up to 3 days. The flavors develop beautifully after chilling for a day.
-
Freezer: For longer storage, freeze the tart without the whipped cream topping for up to 2 months. Wrap it tightly in plastic wrap, then aluminum foil to prevent freezer burn.
-
Reheating: If preferred, let the tart thaw overnight in the fridge before serving. Add freshly whipped cream just before presenting for the best texture.
-
Tart Shell Storage: You can prepare the tart shell up to 2 days in advance. Store it in an airtight container at room temperature to keep it crisp until ready to fill.
Classic Orange Tart Recipe FAQs
What type of oranges should I use for the filling?
Absolutely go for fresh, sweet oranges! Navel oranges are a great choice for their juiciness and sweetness. Avoid using bottled juice, as the flavor won’t compare. Look for oranges that are firm, heavy for their size, and free of dark spots for the best taste.
How should I store the Classic Orange Tart?
Store your Classic Orange Tart in the refrigerator, covered, for up to 3 days. I find that the flavors become even more delightful after a day in the fridge, allowing the curd to set beautifully. Just make sure to keep it in an airtight container to maintain freshness.
Can I freeze the Classic Orange Tart?
Yes, you can! To freeze the tart, do so without the whipped cream topping. Wrap it tightly in plastic wrap followed by a layer of aluminum foil to keep out excess air. It’ll stay fresh in the freezer for up to 2 months. When you’re ready to enjoy, let it thaw overnight in the fridge, then add the whipped cream before serving.
What can I do if my tart shell is soggy?
If your tart shell turns out soggy, it might be due to insufficient blind baking. Make sure to bake the shell until the edges are set and golden brown. You can also prick the bottom of the shell with a fork before baking to prevent air bubbles. If it’s already soggy, you can crisp it up in the oven for a few minutes at a low temperature.
Can I make this Classic Orange Tart dairy-free or vegan?
Absolutely! For a dairy-free option, use margarine instead of butter in the crust and substitute coconut cream for the whipped cream. To make it vegan, replace the eggs with a plant-based equivalent, such as aquafaba or a commercial egg replacer, which works well in the curd. You’ll still end up with a luscious tart!
How long does it take for the filling to set?
You’ll want to refrigerate your assembled Classic Orange Tart for at least 3 hours, but overnight is best for full flavor melding. This time allows the curd to set firm and slice beautifully, making it easier to serve!
Classic Orange Tart: Effortless Elegance for Every Occasion
Ingredients
Equipment
Method
- In a food processor, combine flour, powdered sugar, almond flour, salt, and orange zest. Add butter and pulse until coarse crumbs form. Mix in egg yolk and cold water until dough forms. Wrap and chill for 15-60 minutes.
- Preheat oven to 200°C (390°F). Grease tart pan, roll out dough and press into the pan. Chill for 15 minutes. Line with parchment, fill with weights and bake for 12-15 minutes. Remove weights and bake uncovered for 10-12 minutes until golden.
- In a saucepan, heat orange juice. Whisk eggs, superfine sugar, and cornstarch in a bowl. Slowly add warm juice while whisking. Cook mixture over medium-low heat, stirring until thickened, then stir in gelatin and cooled butter.
- Cool tart shell, pour orange filling into the shell and refrigerate for at least 3 hours, or overnight until set.
- Whip cream until soft peaks form. Add sugar and orange bitters if desired. Garnish the tart with whipped cream and crushed pistachios or mint leaves.
Leave a Reply