
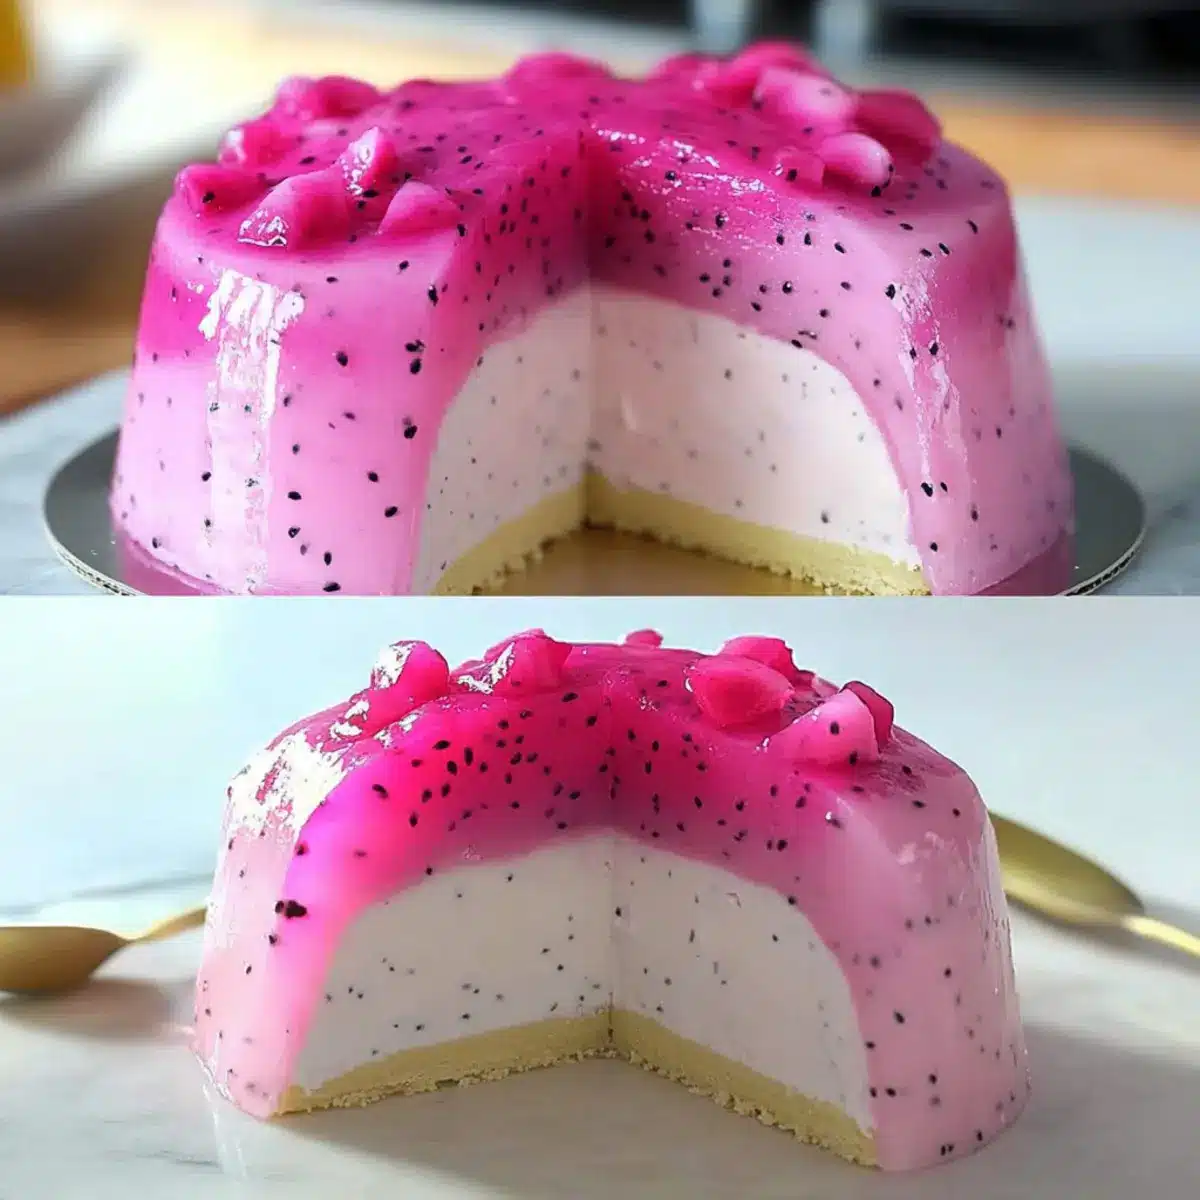
As I placed the vibrant Dragon Fruit Mousse Cake on the table, I couldn’t help but feel a rush of excitement. This no-bake masterpiece isn’t just a feast for the eyes; it’s a refreshing dessert that redefines indulgence while being surprisingly light. The luscious dragon fruit mousse, paired with a subtly buttery almond base, brings a unique blend of flavor and texture that’s perfect for impressing guests at any special occasion. Plus, the fact that it requires no baking means you can focus on enjoying the moment rather than fretting over the oven. Are you ready to elevate your dessert game and create a stunning treat that will have everyone asking for seconds?

Why is Dragon Fruit Mousse Cake special?
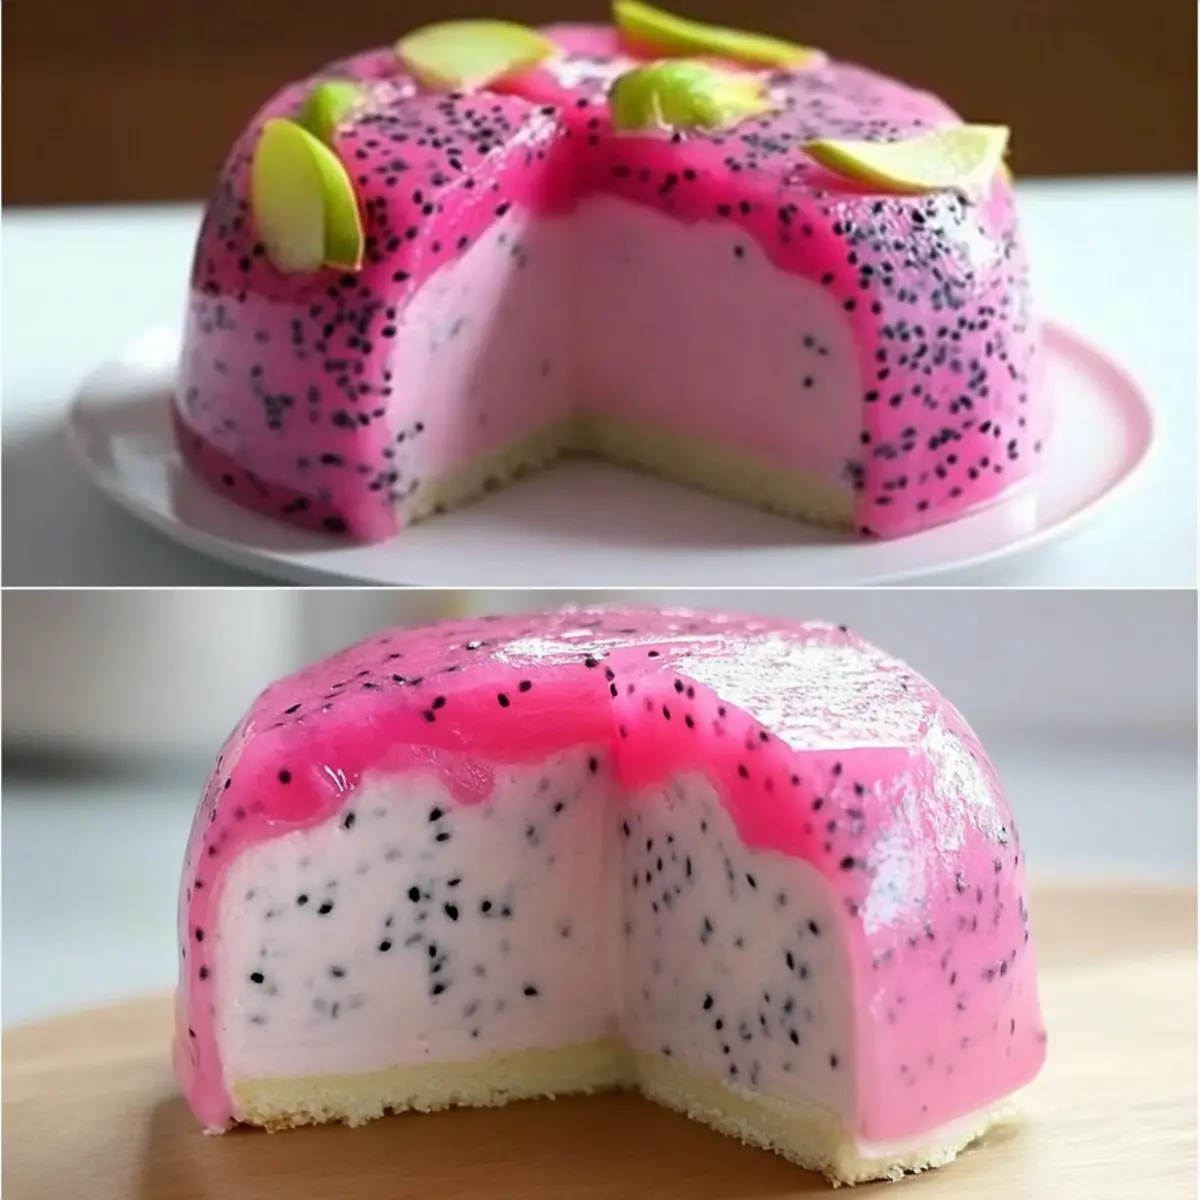
Visual Appeal: The vibrant pink hue of dragon fruit creates a stunning centerpiece that will impress any guest.
No-Bake Convenience: Enjoy the luxury of a delightful dessert without the hassle of baking.
Light and Refreshing: This mousse cake is airy and incredibly refreshing, making it an ideal ending to any meal.
Crowd-Pleaser: Its unique flavor profile is sure to charm even the pickiest of eaters—perfect for special occasions!
Customizable Flavors: Feel free to swap out the dragon fruit for other purees, like mango or passion fruit, for a twist on the classic!
Elevate your dessert repertoire with this Dragon Fruit Mousse Cake and indulge in a refreshing treat that impresses on every level. For another delicious option, check out my Chocolate Cheesecake Decadent recipe!
Dragon Fruit Mousse Cake Ingredients
For the Almond Base
- Almonds – Finely crushed almonds give a delightful nutty flavor and strong structure.
- Butter – Melted butter binds the crumbs together, forming a rich base.
For the Dragon Fruit Mousse
- Dragon Fruit Puree – Main flavor that imparts a vibrant color and tropical taste; can be swapped with mango for a different twist.
- Heavy Cream – Whipped to soft peaks for a rich and creamy texture, consider coconut cream for a dairy-free alternative.
- Gelatin – Essential for setting the mousse and jelly layers; agar-agar can be used as a vegetarian substitute.
- Sugar – Sweetens the mousse while balancing acidity; substitute with honey or a preferred sugar alternative if desired.
For the Jelly Layer
- Dragon Fruit Juice – Adds a burst of flavor to the jelly, enhancing the overall taste of the cake.
For the Neutral Glaze
- Neutral Glaze – Gives a glossy finish that elevates the cake’s visual appeal; can be store-bought or homemade for convenience.
This Dragon Fruit Mousse Cake is not just about taste—each ingredient plays a crucial role in creating a beautiful and refreshing dessert!
Step‑by‑Step Instructions for Dragon Fruit Mousse Cake
Step 1: Prepare the Almond Base
Start by finely crushing almonds using a food processor until they resemble coarse crumbs. In a mixing bowl, combine the crushed almonds with melted butter, mixing until well combined. Firmly press this mixture into the bottom of a 9-inch springform pan to form your base. Place the pan in the refrigerator to chill for at least 30 minutes, allowing the base to solidify.
Step 2: Make the Dragon Fruit Mousse
In a large mixing bowl, whip 2 cups of heavy cream until soft peaks form, which should take about 3-5 minutes with an electric mixer. Meanwhile, prepare the dragon fruit puree by blending ripe dragon fruit until smooth. Gently fold the cooled puree and a gelatin mixture (previously dissolved in warm water) into the whipped cream, combining until you achieve a uniform color and texture. Pour this delightful mixture over the chilled almond base.
Step 3: Chill the Mousse
Carefully place the cake back into the refrigerator and allow the Dragon Fruit Mousse to set for at least 4 hours, or until firm to the touch. This step is crucial as it builds the light, airy texture that the mousse cake is known for. Avoid frequent opening of the fridge to maintain an even temperature during chilling.
Step 4: Prepare the Jelly Layer
Once the mousse is set, begin making the jelly layer. In a small saucepan, heat 1 cup of dragon fruit juice until warm but not boiling. Stir in gelatin until fully dissolved, making sure there are no lumps. Let this mixture cool slightly before carefully pouring it onto the set mousse layer. This adds a refreshing burst of flavor and a beautiful visual layer.
Step 5: Apply the Neutral Glaze
After the jelly has set, which should take about 1-2 hours, prepare the neutral glaze according to the package instructions or your homemade recipe. Pour the glaze over the top of the cake, ensuring an even coat. Return the cake to the refrigerator for an additional 30 minutes, allowing the glaze to set for a shiny, professional finish.
Step 6: Serve the Cake
Once fully chilled and set, remove the Dragon Fruit Mousse Cake from the springform pan. Use a sharp knife to slice into serving pieces, making sure to cut through the vibrant layers. The stunning color and airy texture will shine through, making this dessert perfect for any special occasion or gathering.

Expert Tips for Dragon Fruit Mousse Cake
-
Cool the Puree: Make sure your dragon fruit puree is completely cooled before adding it to the whipped cream; this keeps the mousse light and airy.
-
Chill Longer: For the best texture and flavor, let the mousse set in the fridge for up to overnight. Patience pays off!
-
Watch the Gelatin: Work quickly when mixing in the gelatin to prevent it from setting before you incorporate it into the mousse.
-
Modify the Base: If you don’t have almonds, crushed graham crackers make a delicious alternative for the almond base of the Dragon Fruit Mousse Cake.
-
Perfect Slicing: Run your knife under hot water before slicing the cake; this helps create clean, smooth cuts through the layers.
How to Store and Freeze Dragon Fruit Mousse Cake
Fridge: Store any leftovers in an airtight container in the fridge for up to 3 days to maintain freshness and prevent the mousse from absorbing other odors.
Freezer: For longer storage, you can freeze the Dragon Fruit Mousse Cake for up to 1 month. Ensure it’s wrapped tightly in plastic wrap and foil to prevent freezer burn.
Thawing: When ready to enjoy, thaw the cake in the fridge overnight. This helps preserve the texture of the mousse. Avoid thawing at room temperature, which may affect the consistency.
Reheating: Since this is a no-bake dessert, there’s no need to reheat. Simply serve chilled to enjoy its refreshing qualities at their best!
What to Serve with Dragon Fruit Mousse Cake
Elevate your dining experience by pairing this delightful dessert with complementary flavors and textures.
- Herbal Tea: A soothing cup of herbal tea balances the sweetness and enhances the vibrant flavors of the mousse cake.
- Fresh Berries: Juicy berries like raspberries or blueberries add a refreshing tartness that beautifully contrasts the creamy mousse.
- Coconut Sorbet: The tropical flavor and smooth texture of coconut sorbet provides a luscious, refreshing counterpoint to the cake.
- Sparkling Water: Serve with a splash of lime for a zesty drink that cleanses the palate, allowing the mousse cake to shine.
- Light Citrus Salad: A mix of citrus fruits drizzled with honey creates a bright, refreshing side that complements the dessert’s tropical notes.
- Chocolate Fondue: For the chocolate lovers, a warm chocolate fondue can add indulgence and richness, creating a delightful textural contrast.
These pairings not only enhance the experience of your Dragon Fruit Mousse Cake but also celebrate the beautiful flavors that make it a showstopper atop any dessert table.
Make Ahead Options
Preparing the Dragon Fruit Mousse Cake ahead of time is a fantastic way to save yourself some stress for special occasions! You can make the almond base and store it in the refrigerator up to 3 days in advance, ensuring it retains its delightful texture. Additionally, the dragon fruit mousse can be prepared up to 24 hours ahead; just make sure to cover it well to avoid absorbing any odors from your fridge. When you’re ready to serve, simply add the jelly layer and neutral glaze for a beautiful finishing touch. This way, you’ll have a stunning dessert ready to impress with minimal last-minute effort!
Dragon Fruit Mousse Cake: Customize Your Creation
Feel free to explore your creativity with delightful twists and substitutions to make this dessert truly your own!
- Dairy-Free: Replace heavy cream with coconut cream for a light, tropical flavor and creamy texture.
- Fruit Variation: Swap out dragon fruit puree for mango or passion fruit to give it a unique flavor profile.
- Sweetness Level: Adjust the sugar amount to your liking or use honey as a natural sweetener for a different touch.
- Texture Boost: Add a layer of crumbled meringue or whipped coconut on top for an extra layer of texture and sweetness.
- Zesty Twist: Infuse the mousse with fresh lime zest to add a citrusy brightness that enhances the overall flavor.
- Colorful Layers: Experiment with layering the mousse with other fruit purees for a stunning ombre effect that’s as beautiful as it is delicious.
- Nut-Free Base: Use crushed graham crackers or digestive biscuits in place of almonds for a nut-free option that’s equally delicious.
- Gluten-Free Alternative: Make the almond base gluten-free by selecting gluten-free cookies for a scrumptious and safe option for all guests.
This Dragon Fruit Mousse Cake is a canvas for your culinary creativity! If you’re looking for more delicious treats, don’t miss my recipe for Chocolate Cheesecake Decadent or indulge in the flavors of Pumpkin Cheesecake Balls.
Dragon Fruit Mousse Cake Recipe FAQs
What should I look for when selecting dragon fruit?
Choose ripe dragon fruit that has bright pink or yellow skin, and feel slightly soft to the touch. Avoid fruits with dark spots all over or any signs of wrinkles, as they may be overripe.
How should I store leftover Dragon Fruit Mousse Cake?
Store leftovers in an airtight container in the fridge for up to 3 days. This keeps the mousse creamy and prevents it from absorbing odors. If you anticipate having leftovers for more than a few days, consider freezing.
Can I freeze the Dragon Fruit Mousse Cake?
Absolutely! To freeze, wrap the mousse cake tightly in plastic wrap and then in aluminum foil to prevent freezer burn. It can be kept frozen for up to 1 month. Thaw it in the refrigerator overnight before serving to maintain its texture.
What if my mousse doesn’t set properly?
If your mousse doesn’t set, it could be due to the gelatin not being dissolved fully or the mixture being too warm when combined. To troubleshoot, try gently re-heating the mixture slightly and adding a little more gelatin, dissolved in warm water, then place it back in the refrigerator to set again.
Are there any dietary considerations I should keep in mind?
If you have a gelatin allergy or dietary restrictions, you can substitute gelatin with agar-agar, which is a plant-based option. Additionally, you can use coconut cream instead of heavy cream for a dairy-free dessert. Always double-check ingredient labels for any specific allergens.
Can I make this dessert in advance?
Yes, you can prepare the Dragon Fruit Mousse Cake up to a day in advance! Making it ahead gives the flavors more time to meld, and it ensures the texture is perfect when it’s time to serve. Just make sure to keep it well covered in the fridge.
Dragon Fruit Mousse Cake: A Light, No-Bake Delight
Ingredients
Equipment
Method
- Start by finely crushing almonds using a food processor until they resemble coarse crumbs. Combine with melted butter and press into a 9-inch springform pan. Chill for 30 minutes.
- Whip heavy cream until soft peaks form, about 3-5 minutes. Blend dragon fruit until smooth. Fold the puree and dissolved gelatin into whipped cream and pour over chilled almond base.
- Refrigerate the cake for 4 hours, or until set and firm to the touch.
- In a saucepan, heat dragon fruit juice until warm. Stir in gelatin until dissolved. Cool slightly and pour over set mousse.
- Prepare neutral glaze according to instructions and pour over the cake. Chill for 30 minutes to set.
- Once set, remove from pan and slice for serving.
Leave a Reply