
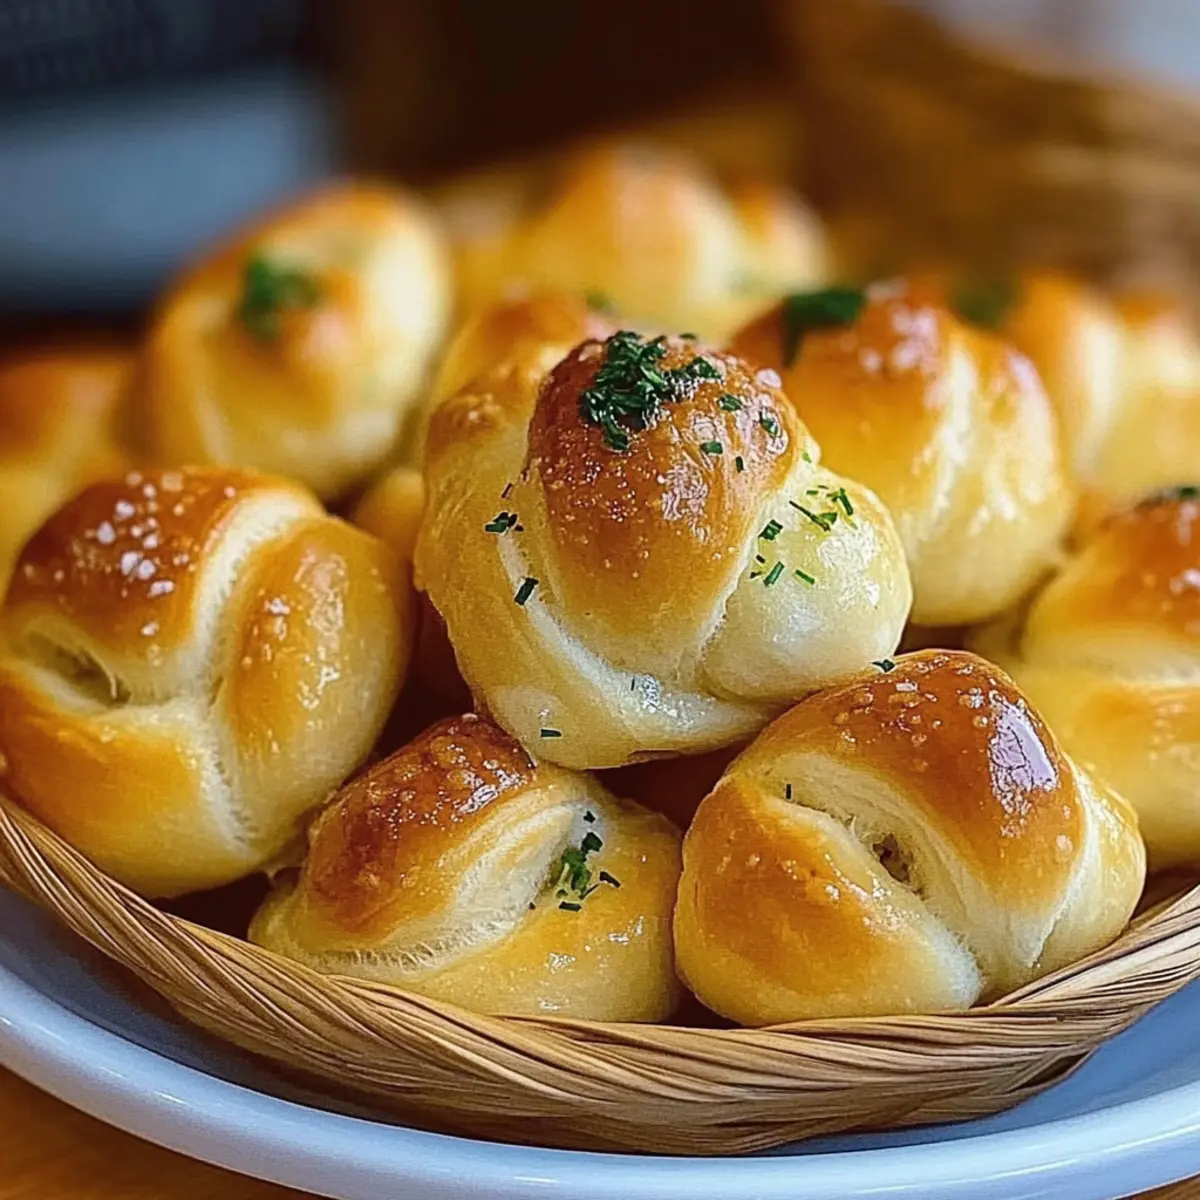
Sinking my teeth into a warm, fluffy garlic knot takes me right back to family gatherings filled with laughter and delightful aromas wafting through the kitchen. These Amazing Gluten Free Garlic Knots are a mouthwatering twist on a classic favorite, ensuring no one has to miss out on their garlicky goodness. With an easy prep time and a recipe that caters to gluten sensitivities, you can whip up these golden bites in no time, perfect for sharing at parties or cozy family dinners. The combination of chewy interiors and crispy exteriors will have everyone reaching for seconds. Curious about how to make these irresistible knots at home? Let’s dive in!
Why Make Gluten Free Garlic Knots?
Deliciously Delectable: These garlic knots are packed with a burst of savory flavor that will make your taste buds dance.
Easy and Accessible: With simple ingredients like gluten-free all-purpose flour and olive oil, anyone can create these mouthwatering bites in their own kitchen.
Perfect for Sharing: Whether it’s a family dinner or a party spread, these knots are crowd-pleasers that will impress gluten-sensitive and gluten-loving diners alike!
Versatile Pairing: Serve them warm with marinara sauce or as a side to your favorite pasta dish for an unforgettable meal experience.
Quick Prep Time: In under an hour, you can enjoy freshly baked knots that are soft on the inside and crispy on the outside. Get ready to enjoy these wonderful flavors, perhaps even alongside some Gluten Free Pancakes for a brunch twist!
Gluten Free Garlic Knots Ingredients
For the Dough
- Gluten-Free All-Purpose Flour – Mimics traditional flour for a perfect texture; brands like Cup4Cup or Bob’s Red Mill work wonders.
- Yeast – Active dry yeast is crucial for a delightful rise and airy texture.
- Warm Water – Activates the yeast effectively; should be around 110°F (43°C) for best results.
- Olive Oil – Adds richness and moisture; use extra virgin for the best flavor.
- Garlic Powder – Provides robust garlic flavor that permeates every knot.
- Salt – Flaky sea salt enhances the overall flavors beautifully.
For the Topping
- Butter – Melted butter brushed over the knots before serving adds gloss and richness.
- Fresh Parsley – Adds color and a fresh taste contrast; can be substituted with dried herbs if needed.
Step‑by‑Step Instructions for Amazing Gluten Free Garlic Knots
Step 1: Prepare Your Dough
Preheat your oven to 400°F (200°C) to create a warm environment for baking. In a mixing bowl, combine warm water (around 110°F) and active dry yeast, letting it sit for about 5 minutes until frothy. This step activates the yeast, ensuring your gluten free garlic knots rise beautifully.
Step 2: Mix Ingredients
Once the yeast mixture is frothy, add in gluten-free all-purpose flour, olive oil, garlic powder, and salt. Use a wooden spoon or spatula to stir until a sticky dough forms, which should take about 2 minutes. The consistency may vary; don’t worry if it’s a bit gooey, as this is part of the charm of gluten free baking.
Step 3: Knead Gently
Lightly flour a clean work surface before turning out your dough. Knead the mixture gently for about 2 minutes until it becomes smooth and slightly elastic. If the dough is too sticky, you can sprinkle a bit more gluten-free flour to make it manageable. This step will help develop the texture of your amazing gluten free garlic knots.
Step 4: Shape Your Knots
Divide the dough into approximately 10 equal pieces, rolling each piece into a 6-inch rope. Carefully tie each rope into a knot, ensuring they’re as uniform as possible for even baking. Place the tied knots on a greased baking sheet, leaving space between each to allow for rising.
Step 5: Let Them Rise
Cover the shaped knots with a clean kitchen towel and place them in a warm area for about 20 minutes. During this time, they will puff up, becoming light and airy. Keeping the knots warm is crucial for a perfect rise, enhancing the fluffy texture you’ll enjoy in your gluten free garlic knots.
Step 6: Add Flavor and Bake
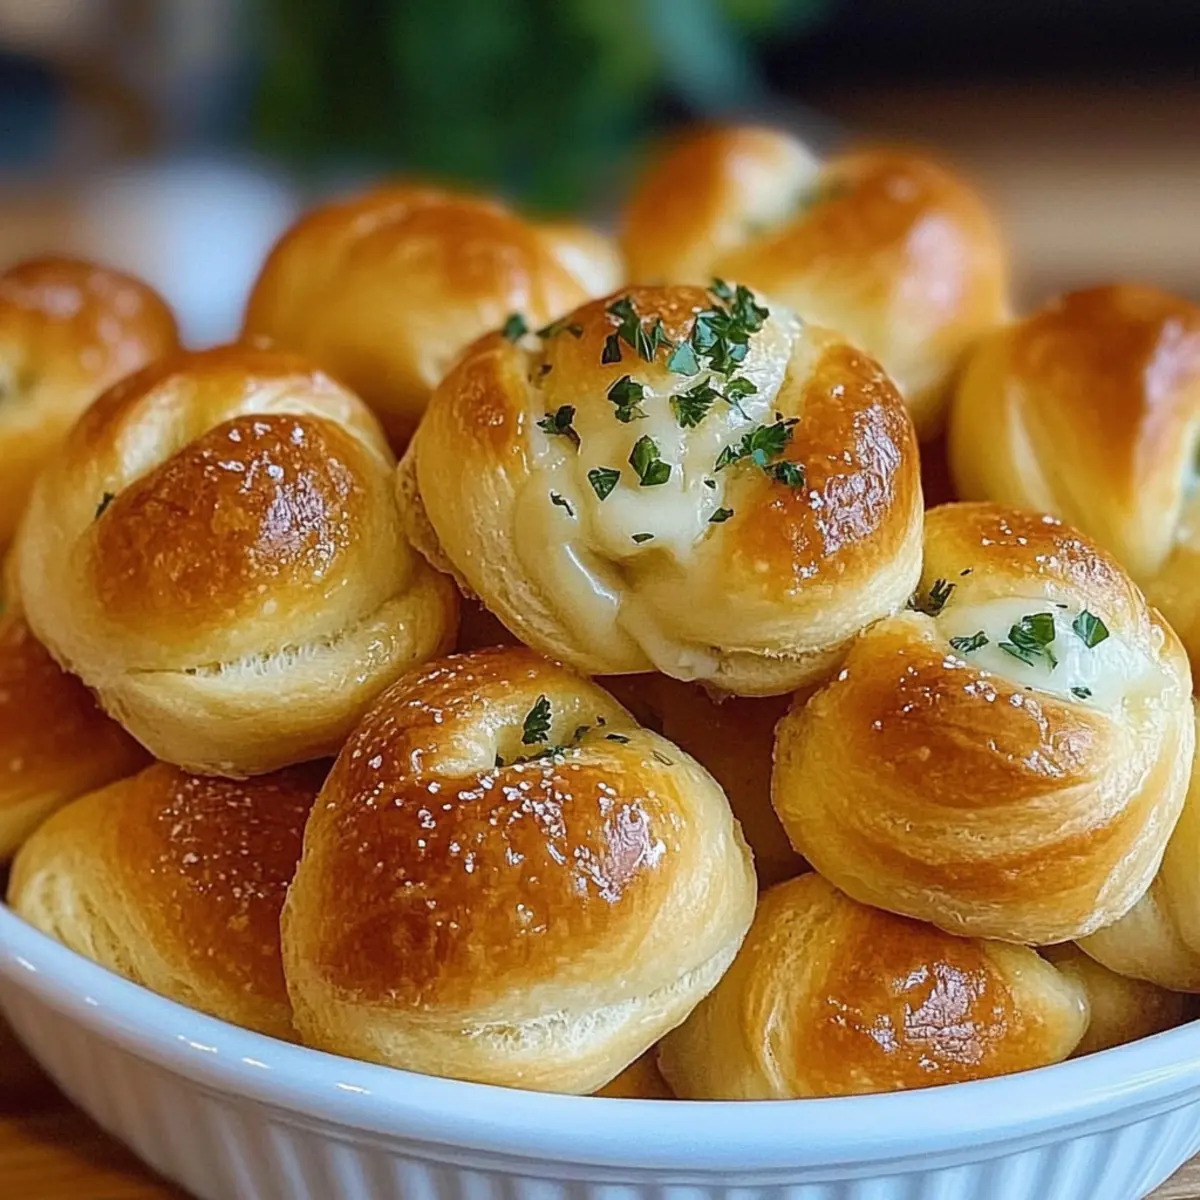
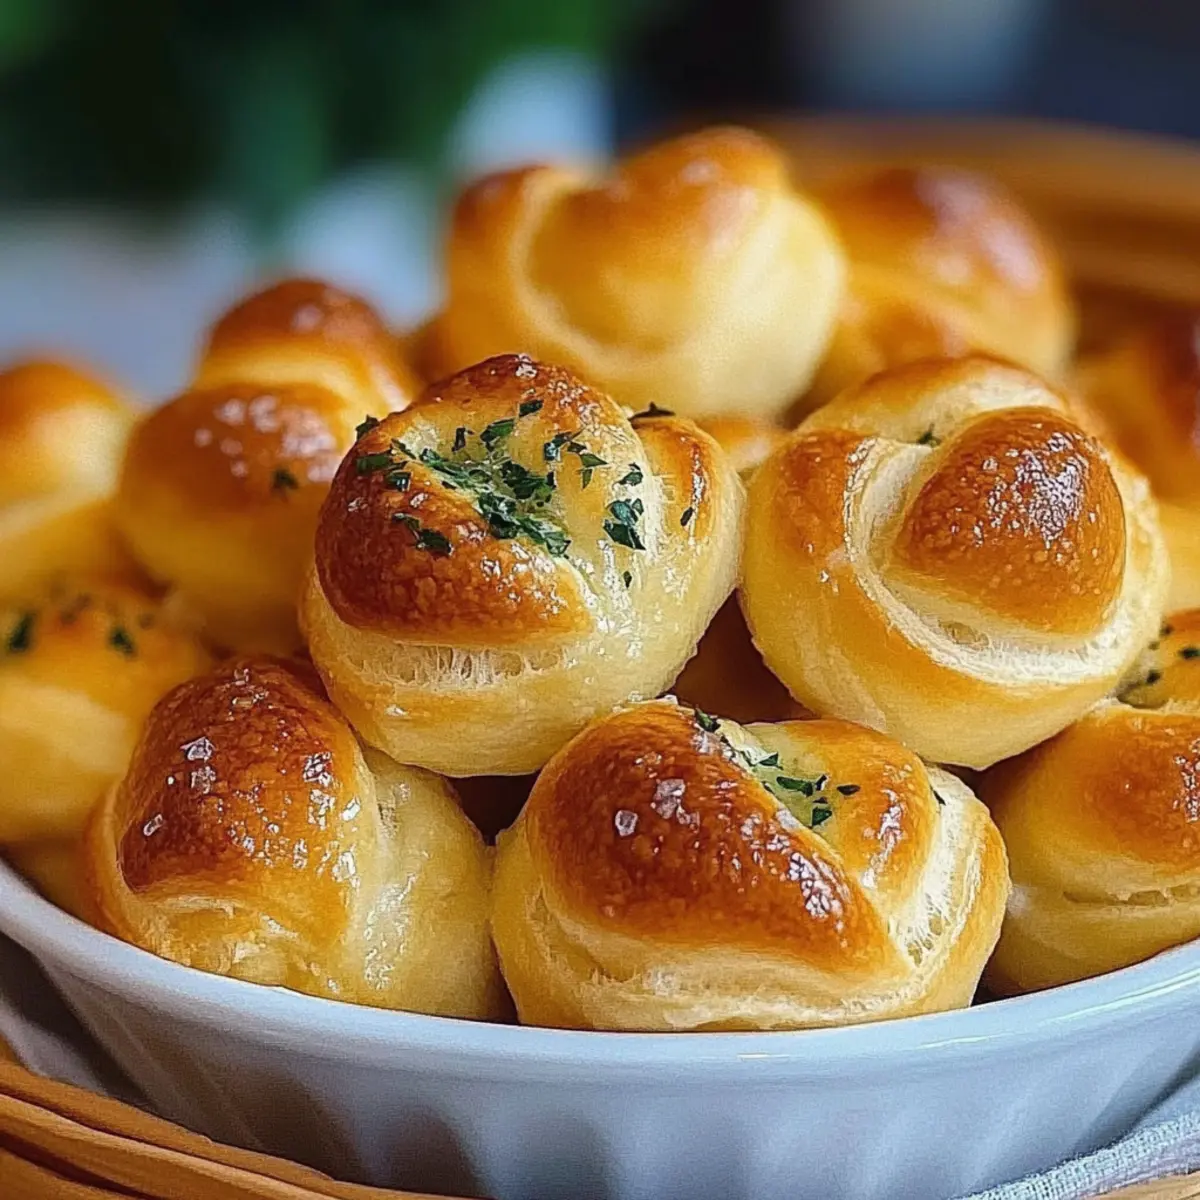
After rising, brush the knots generously with melted butter, then sprinkle with chopped fresh parsley and flaky sea salt for flavor. Bake in the preheated oven for about 15 minutes or until they turn golden brown and fragrant, affirming that your delicious gluten free garlic knots are ready to be served.
How to Store and Freeze Gluten Free Garlic Knots
Fridge: Keep leftover gluten free garlic knots in an airtight container for up to 2 days to maintain their freshness and flavor.
Freezer: For longer storage, freeze the knots in a freezer-safe bag for up to 3 months. Lay them flat when freezing to optimize space.
Reheating: When ready to enjoy, reheat the frozen garlic knots at 350°F for 5-10 minutes until warmed through and crispy again. Enjoy the delightful taste all over again!
Thawing: If reheating from frozen, it’s best to let them thaw in the refrigerator overnight before reheating for optimal texture and taste.
Expert Tips for Gluten Free Garlic Knots
-
Correct Water Temperature: Make sure your warm water is around 110°F (43°C) to effectively activate the yeast and ensure perfect rising.
-
Adjust Dough Consistency: If the dough feels sticky, gradually add more gluten-free flour as needed. This will help you achieve a manageable, pliable dough.
-
Don’t Rush the Rising: Allow the knots to rise in a warm place for a full 20 minutes. This step is key to achieving that fluffy, irresistible texture.
-
Use Quality Ingredients: Opt for high-quality gluten-free all-purpose flour, as brands like Cup4Cup or Bob’s Red Mill can impact your gluten free garlic knots’ texture and flavor.
-
Brush Well for Flavor: Generously brush the knots with melted butter before baking. This adds a golden richness that enhances both taste and appearance.
Make Ahead Options
These Amazing Gluten Free Garlic Knots are perfect for busy cooks looking to save time during their week. You can prepare the dough up to 24 hours in advance; simply follow the recipe up to the shaping step, then cover the knots tightly with plastic wrap and refrigerate. This method allows the flavors to meld beautifully without sacrificing quality. When you’re ready to bake, simply take them out, let them rise for about 20 minutes at room temperature, brush with melted butter, sprinkle with parsley and salt, and bake as instructed. With this make-ahead option, you’ll have delicious garlic knots ready to impress at a moment’s notice!
What to Serve with Amazing Gluten Free Garlic Knots?
Savor the warmth and comfort of a meal that enhances the delightful experience of these fluffy, garlicky bites.
-
Marinara Sauce: A classic pairing, this tangy sauce complements the knots’ flavor while providing a delightful dipper.
-
Fresh Salad: A zesty mixed greens salad with a tangy vinaigrette adds a refreshing crunch that balances the knots’ richness.
-
Roasted Vegetables: Seasoned roasted veggies bring earthy flavors and bright colors to your plate, creating a balanced meal.
-
Pasta Primavera: Light and colorful, this pasta dish offers contrast with its fresh veggies, pairing beautifully with the buttery knots.
-
Cheesy Garlic Bread: For a true garlic lover’s feast, this indulgent side elevates the meal with even more savory goodness.
-
Italian Herb Olive Oil: Drizzle this flavorful blend over the warm knots for an added layer of richness and aroma.
-
Creamy Potato Soup: The smooth, comforting texture of a hearty potato soup makes it a cozy accompaniment to the knots.
-
Lemonade or Iced Tea: Refreshing beverages like these provide a perfect counterpoint to the garlic flavor, making your meal even more enjoyable.
-
Tiramisu: End your feast on a sweet note with this classic Italian dessert that pairs wonderfully with the savory elements of your meal.
Gluten Free Garlic Knots Variations
Feel free to adapt these delightful garlic knots to suit your taste buds and dietary needs, inviting a world of delicious possibilities!
- Herb Swap: Replace fresh parsley with rosemary or thyme for a new, aromatic twist. Each herb adds its distinctive flavor, turning traditional knots into a gourmet experience.
- Cheesy Delight: Incorporate shredded mozzarella or parmesan into the dough for a creamy richness that complements the garlic beautifully. The melty texture will have everyone craving more!
- Spicy Kick: Add a sprinkle of red pepper flakes to the dough or as a topping before baking for an exciting heat that elevates every bite. Spice lovers will appreciate this extra zing!
- Sweet Garlic Knots: Mix in a dash of honey or maple syrup to the dough for a subtly sweet contrast to the garlic, reminiscent of a sweet roll. It’s unexpected but delightful!
- Nutty Texture: For added crunch, toss some chopped walnuts or pine nuts into the dough before shaping the knots. This texture twist brings a whole new dimension to these bites!
- Stuffed Knots: Fill each knot with a slice of pepperoni, a piece of cheese, or sautéed mushrooms before tying them up for a fun surprise in every bite! It’s like a flavor treasure hunt!
- Gluten Free Veggie Knots: Incorporate roasted red peppers or finely chopped spinach into the dough for a nourishing boost. This not only enhances the flavor but adds appealing color!
- Garlic Butter Infusion: Instead of just brushing the tops with melted butter, infuse the butter with minced garlic and herbs for a double dose of flavor that will leave everyone begging for the recipe.
Don’t forget to enjoy your garlic knots alongside some irresistible Garlic Butter Chicken for a complete meal experience!

Amazing Gluten Free Garlic Knots Recipe FAQs
How do I choose the right gluten-free flour for garlic knots?
Absolutely! When selecting gluten-free flour, look for a blend that contains xanthan gum for the best texture. Brands like Cup4Cup or Bob’s Red Mill mimic traditional flour well and provide that fluffy bite you’re looking for in delightful garlic knots.
What’s the best way to store leftover garlic knots?
For optimal freshness, store leftover gluten free garlic knots in an airtight container at room temperature for up to 2 days. Make sure they are completely cool before sealing them to avoid trapping moisture, which can make them soggy.
Can I freeze garlic knots, and if so, how?
Yes, you can! To freeze your garlic knots, place them in a single layer on a baking sheet and freeze until solid. Then transfer them to a freezer-safe bag, removing as much air as possible. They’ll stay good for up to 3 months. When you’re ready to enjoy them, simply reheat at 350°F for 5-10 minutes for that fresh-baked taste.
What should I do if my dough feels too sticky?
If your dough is too sticky while kneading, don’t worry; it happens! Gradually sprinkle in a little more gluten-free flour, just a tablespoon at a time, until it becomes manageable. Kneading gently will also help create a great texture. Make sure to avoid over-flouring it as well; the goal is a slightly tacky yet smooth dough.
Can I make these garlic knots without eggs or dairy?
Absolutely! Since this recipe is already gluten-free, you can easily substitute dairy ingredients. Use a plant-based butter for brushing and omit any cheese toppings or add a vegan cheese alternative. The garlic knots will still be delicious and suitable for a plant-based diet!
Irresistible Gluten Free Garlic Knots That Everyone Will Love
Ingredients
Equipment
Method
- Preheat your oven to 400°F (200°C). In a mixing bowl, combine warm water and active dry yeast, letting it sit for about 5 minutes until frothy.
- Add gluten-free all-purpose flour, olive oil, garlic powder, and salt to the yeast mixture. Stir until a sticky dough forms.
- Lightly flour a clean work surface and knead the dough gently for about 2 minutes until smooth and slightly elastic.
- Divide the dough into approximately 10 equal pieces and roll each into a 6-inch rope, tying each into a knot.
- Cover the knots with a kitchen towel and let them rise in a warm area for about 20 minutes.
- Brush the knots with melted butter and sprinkle with chopped fresh parsley and flaky sea salt. Bake for about 15 minutes.
Leave a Reply