
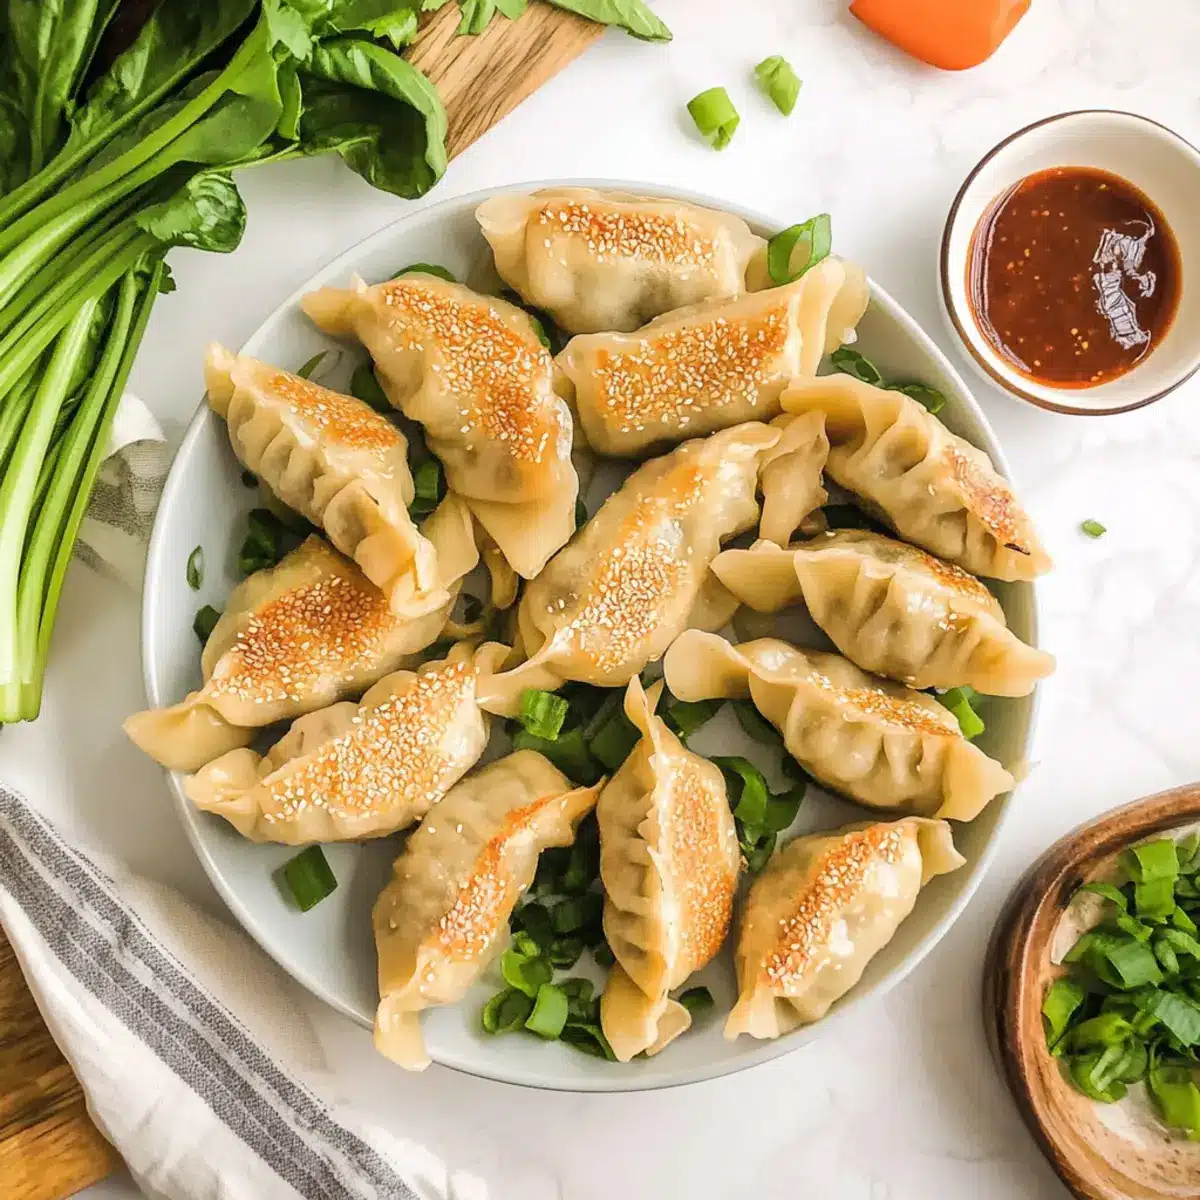
As I flipped through an old cookbook, a memory washed over me—my first attempt at making dumplings with my grandmother. Those heartfelt afternoons always left me craving the scratch-made flavors of potstickers, but nowadays, I need a gluten-free option. Enter my Gluten Free Pork Potstickers! These beauties feature a chewy yet tender dough and a savory ground pork filling that brings back all the cozy vibes of my childhood kitchen. Not only are they a fantastic crowd-pleaser, but they also offer a healthier homemade twist to your dinner routine. And guess what? They’re pan-fried to crispy perfection before a gentle steam, ensuring you get that delightful contrast in every bite. Are you ready to transform your mealtime with this delicious recipe?
Why are gluten-free potstickers a must-try?
Flavorful Filling: These potstickers are packed with a savory ground pork filling that’s perfectly balanced with fresh vegetables, bringing a burst of flavor in every bite.
Homemade Texture: The combination of gluten-free flour and tapioca starch creates a delicate, chewy texture that rivals traditional dumplings.
Easy to Customize: Feel free to swap out the meat for chicken or tofu and experiment with your favorite vegetables, making these potstickers adaptable to any dietary preference.
Crowd-Pleasing Delight: Perfect as an appetizer or main dish, they’ll impress family and friends at your next gathering! For more gluten-free inspirations, check out my Gluten Free Pancakes recipe!
Quick to Prepare: With straightforward steps, you can whip these up faster than takeout, saving you time while adding great homemade flavor to your meals.
Gluten Free Potstickers Ingredients
• Here’s what you need to create your deliciously chewy potstickers!
For the Dough
- Gluten-free flour – The base for creating chewy potsticker dough; substitute with your favorite gluten-free blend.
- Xanthan gum – Adds elasticity to the dough; omit if your blend already contains it.
- Tapioca starch – Contributes softness and stretchiness, enhancing the potstickers’ texture.
- Egg – Enriches and binds the dough for a sturdy wrapper.
For the Filling
- Ground pork – The main protein in the filling; substitute with ground chicken, turkey, or tofu for a different flavor profile.
- Carrot – Offers mild sweetness and a pop of color; finely diced for best results.
- White onion – Adds depth and a gentle sharpness to the mix.
- Celery – Provides crunch and freshness; finely minced to blend with other flavors.
- Napa cabbage – Infuses moisture and softness into the filling.
- Green onions – Adds a burst of brightness and mild onion flavor.
- Sesame oil – Imparts a warm, toasty depth; don’t skip this for that authentic taste.
- Garlic clove – Elevates the savory profile; fresh is best.
- Ground ginger – Gives a fragrant warmth and aroma.
- Black pepper – Adds a balanced hint of heat.
- Coconut aminos – A gluten-free substitute for soy sauce to introduce umami richness.
For the Dipping Sauce
- Garlic powder – Mellow garlic flavor that enhances the dipping experience.
- Sesame seeds – Toasted for a delightful crunch and nutty finish.
- Egg (for egg wash) – Helps achieve a crispy golden color on the dumpling wrappers.
You’re now ready to gather your ingredients and dive into making these fantastic gluten-free potstickers that are sure to impress!
Step‑by‑Step Instructions for Gluten Free Potstickers
Step 1: Make the dough
In a stand mixer, combine your gluten-free flour, xanthan gum, tapioca starch, and a pinch of salt. Mix in one egg and gradually add water until the dough reaches a smooth consistency that holds together when squeezed. Cover the dough with plastic wrap and let it rest for 15 minutes at room temperature, allowing it to hydrate properly.
Step 2: Prepare the filling
Finely dice the carrot, onion, celery, and chop the napa cabbage into small bits. In a mixing bowl, combine these vegetables with the ground pork and your seasonings, including sesame oil, garlic, ginger, black pepper, and coconut aminos. Mix thoroughly to ensure all ingredients are evenly distributed, enhancing the flavors of your savory filling.
Step 3: Roll out the dough
On a gluten-free floured surface, roll out your rested dough evenly to a thickness of about 1/8-inch, which will ensure a tender wrapper. Using a 3-inch biscuit cutter, cut out circles from the rolled dough. Gather any scraps, re-roll, and cut additional circles until all dough is used, creating a generous number of gluten-free potstickers.
Step 4: Assemble the potstickers
Take one dough circle and place a tablespoon of the filling in the center. Wet the edge of the dough lightly with water, then fold the circle in half over the filling, pinching the edges to seal tightly. Crimp the edges with a fork or your fingers to ensure a secure closure and prevent any filling from escaping during cooking.
Step 5: Brush with egg
Prepare an egg wash by whisking an egg in a small bowl. Carefully coat both sides of each assembled potsticker with the egg wash using a pastry brush. This step is crucial as it helps achieve a beautifully crisp, golden exterior while adding a touch of richness to your gluten-free potstickers.
Step 6: Cook the potstickers
Heat a tablespoon of coconut oil in a non-stick skillet over medium heat until shimmering. Arrange potstickers flat-side down in the skillet and cook for about 2 minutes until they develop a crispy, golden bottom. Once browned, add a splash of water to the skillet, cover it with a lid, and steam the potstickers for an additional 5 minutes, ensuring a tender finish.
Step 7: Make the sauce
In a small bowl, combine the dipping sauce ingredients: garlic powder, toasted sesame seeds, and any additional seasonings you prefer. Whisk the mixture until it is smooth and homogeneous, creating a delightful sauce that will perfectly complement your delicious gluten-free potstickers.
Step 8: Serve
Once the potstickers are cooked through and golden, transfer them to a plate. Garnish with chopped green onions for a burst of color and serve alongside the sesame dipping sauce, allowing everyone to enjoy this savory treat that brings the flavors of homemade gluten free potstickers to your dining table.
Make Ahead Options
These Gluten Free Potstickers are perfect for meal prep enthusiasts! You can prepare the potstickers in advance, as they can be assembled and refrigerated for up to 24 hours before cooking. Simply assemble the potstickers, ensuring they are sealed tightly to prevent leaks. Place them in a single layer on a parchment-lined baking sheet, cover with plastic wrap, and refrigerate until you’re ready to cook. Alternatively, uncooked potstickers can be frozen for up to 3 months; just make sure to dust them with gluten-free flour and store in an airtight container. When ready to serve, cook them straight from the freezer to achieve just as delicious results. Enjoy hassle-free mealtimes with these tasty make-ahead potstickers!
Gluten Free Potstickers Customization Options
Dive into the world of customization with these potstickers, where flavor and creativity unite!
-
Lean Protein: Switch ground pork for ground chicken or turkey for a lighter option, while still enjoying that hearty filling.
-
Vegetarian Delight: For a vegetarian twist, use chopped mushrooms or tofu seasoned with your favorite spices; they’ll absorb the delicious flavors beautifully.
-
Veggie Packed: Add or swap in any vegetables you love, such as spinach or bell peppers; they offer both nutrition and color to your potstickers.
-
Spicy Kick: Craving heat? Mix in some red pepper flakes or a dash of Sriracha to the filling for a tantalizing kick that’ll wake up your taste buds.
-
Different Flours: If you love experimenting, try using almond flour or chickpea flour blended with your gluten-free flour for a unique flair. Each flour brings its own delightful taste and texture.
-
Extra Crunch: Add water chestnuts to the filling for added crunch and a subtle sweetness, taking your potstickers to the next level of texture.
-
Flavorful Sauce: Experiment with the dipping sauce by adding a splash of rice vinegar or a hint of honey for a sweet tang that beautifully complements the savory flavors.
For more gluten-free adventures, don’t miss out on my tasty Gluten Free Vegan cookie recipe, or if pancakes are more your style, check out these fluffy Gluten Free Pancakes!
How to Store and Freeze Gluten Free Potstickers
Fridge: Store leftover potstickers in an airtight container in the refrigerator for up to 3 days. Reheat by pan-frying for a few minutes to regain crispiness.
Freezer: Freeze uncooked gluten free potstickers by dusting them with gluten-free flour and placing them in a single layer on a baking sheet. Once frozen, transfer them to an airtight container for up to 3 months.
Reheating: To reheat frozen potstickers, no need to thaw! Simply pan-fry frozen potstickers on medium heat for about 5-7 minutes, then add a splash of water and cover to steam for 5 minutes.
Avoiding Texture Loss: For the best taste and texture, reheat potstickers from frozen to enjoy that delightful contrast of crispy and tender without compromising their quality.
Expert Tips for Gluten Free Potstickers
- Finely Dice: Ensure all filling ingredients are chopped finely for an even texture and enhanced flavor distribution in your gluten free potstickers.
- Water Gradually: Add water to the dough gradually, monitoring its consistency; it should feel like playdough and hold together when squeezed.
- Even Rolling: Roll the dough evenly to about 1/8-inch thickness, avoiding thick areas that may not cook through during frying.
- Proper Sealing: Make sure to seal the potstickers tightly to prevent any leaks during cooking; wet edges and crimp securely.
- Steam After Frying: Remember to steam the potstickers after frying; this ensures a perfect blend of crispy and tender textures in every bite.
What to Serve with Gluten Free Pork Potstickers
Elevate your meal experience with vibrant side dishes and delightful drinks that complement these savory beauties.
-
Stir-Fried Vegetables:
A colorful mix of bell peppers, carrots, and snap peas adds brightness and complements the potstickers’ flavors beautifully. -
Jasmine Rice:
Fluffy and fragrant, jasmine rice provides a lovely base that soaks up any dipping sauce, enhancing each bite. -
Sesame Noodles:
Tossed with a light soy sauce dressing, these noodles introduce a satisfying contrast in texture, making them a perfect partner. -
Cucumber Salad:
Refreshing and crunchy, this salad with a tangy dressing cuts through the richness of the potstickers for a delightful palate cleanse. -
Miso Soup:
Warm and comforting, a bowl of miso soup rounds out your meal, offering a light umami flavor that harmonizes with the dumplings. -
Elderflower Mojito:
This floral cocktail adds a refreshing twist that pairs perfectly with the savory potstickers, enhancing the overall dining experience. -
Matcha Green Tea:
Earthy and smooth, this tea provides a delicate finish that balances the richness of the potstickers with its subtle flavor. -
Chocolate Mochi Dessert:
Soft and chewy, this gluten-free treat rounds off the meal with a sweet touch, while mirroring the potstickers’ inviting textures.
Gluten Free Potstickers Recipe FAQs
What type of gluten-free flour should I use?
I recommend using a good gluten-free flour blend that includes xanthan gum for the best results. You can also substitute with specific blends designed for baking, but make sure to check the packaging for instructions, as some may require different ratios of ingredients.
How should I store leftover potstickers?
Leftover potstickers can be stored in an airtight container in the refrigerator for up to 3 days. To retain their crispy texture upon reheating, I suggest pan-frying them in a bit of oil until warm.
Can I freeze uncooked gluten-free potstickers?
Absolutely! To freeze, dust the uncooked potstickers with gluten-free flour to prevent sticking, then arrange them in a single layer on a baking sheet and freeze for about an hour. Once they’re frozen, transfer them to an airtight container or freezer bag and keep them for up to 3 months.
What should I do if the dough is too sticky?
If your dough feels too sticky while rolling, sprinkle a touch more gluten-free flour during the rolling process. It’s key to find just the right balance; remember, it should hold together without being overly wet.
Are these potstickers safe for people with allergies?
While this recipe aims to be gluten-free, always check your ingredient labels for any allergens—especially the gluten-free flour blend, as some may contain other allergens like nuts or dairy. Additionally, to make it more allergy-friendly, substitute the ground pork for tofu or chicken if you have meat allergies.
How do I ensure the potstickers are sealed properly?
Make sure to wet the edges of the dough circle before folding it over to seal the filling inside. Crimp the edges using your fingers or a fork to prevent any filling from leaking out during cooking. If needed, do a “test run” with one potsticker to ensure it holds before cooking the rest!

Gluten Free Potstickers Bursting with Flavor and Texture
Ingredients
Equipment
Method
- In a stand mixer, combine gluten-free flour, xanthan gum, tapioca starch, and a pinch of salt. Mix in one egg and gradually add water until the dough reaches a smooth consistency.
- Finely dice the carrot, onion, and celery, then chop the napa cabbage. In a mixing bowl, combine these vegetables with ground pork and seasonings.
- On a gluten-free floured surface, roll out the rested dough evenly to about 1/8-inch thickness and cut out circles using a biscuit cutter.
- Place a tablespoon of filling in the center of a dough circle, wet the edges, fold, and pinch to seal. Crimp edges with a fork.
- Whisk an egg in a small bowl and coat both sides of each potsticker with the egg wash.
- Heat coconut oil in a skillet over medium heat, cook potstickers flat-side down for 2 minutes until crispy, then steam with a splash of water for 5 minutes.
- Combine garlic powder, toasted sesame seeds, and any additional seasonings for the dipping sauce.
- Serve potstickers garnished with chopped green onions and the dipping sauce.
Leave a Reply