
The seductive aroma of sizzling chicken fills the kitchen as I carefully prepare my Japanese Katsu Bowls, a dish that has quickly become a staple in my home. This comforting meal features crispy chicken cutlets resting atop a bed of fluffy rice, drizzled with a savory tonkatsu sauce that brings everything together beautifully. Beyond its mouthwatering flavors, making Katsu is an empowering experience—it’s a quick yet impressive option for weeknight dinners or a cozy family gathering. What’s even better is that you can easily swap the chicken for pork for a delightful variation! Are you ready to dive into this crispy, savory adventure? Let’s get cooking!
Why are Japanese Katsu Bowls so irresistible?
Crispy Perfection: The katsu features a golden-brown crust that delivers a satisfying crunch in every bite.
Flavor Harmony: With a savory tonkatsu sauce drizzled over, this dish creates a delightful balance of savory and slightly sweet flavors that will have everyone asking for seconds.
Easy Variations: You can effortlessly swap chicken for pork or even plant-based proteins like tofu, making this recipe versatile for everyone!
Quick Preparation: In under an hour, you can serve up this comfort food that’s perfect for both busy weeknights and cozy dinners with family and friends.
Crowd-Pleasing Meal: Whether it’s a casual night in or a gathering, these bowls cater to many tastes, ensuring delighted smiles all around! You might also enjoy these Storage Tips for keeping leftovers crispy!
Japanese Katsu Bowls Ingredients
For the Katsu
- Boneless chicken breasts – The main protein for this comforting dish; pork can also be used for a variation.
- Salt and pepper – Essential seasonings to enhance the chicken’s flavor; adjust to your personal taste.
- All-purpose flour – Used to create a crispy coating on the chicken; gluten-free flour works well too.
- Large eggs – They act as a binding agent for the breadcrumbs; don’t forget to beat them well!
- Panko breadcrumbs – These provide that signature crispy texture; regular breadcrumbs can substitute in a pinch.
- Vegetable oil – Needed for frying the katsu; oils like canola or peanut oil are suitable alternatives.
For the Rice
- Japanese short-grain rice – Serves as the base for your bowls; Jasmine rice can be a lovely twist as well.
- Water – Required for cooking your rice to perfect fluffiness.
- Rice vinegar, sugar, salt – These season the rice wonderfully; feel free to tweak to your taste preferences.
For the Sauce
- Tonkatsu sauce – This rich sauce elevates the flavor of the katsu; you can use a mix of ketchup, soy sauce, and Worcestershire sauce as a substitute.
- Soy sauce – Adds an umami punch; gluten-free soy sauce is a great option for dietary needs.
- Worcestershire sauce – Provides depth to the flavor; feel free to omit if you don’t have it on hand.
- Ketchup – Introduces sweetness to the sauce; adjust for balance as needed.
For the Toppings
- Shredded cabbage – Adds a fresh crunch; you can substitute with other vegetables if you like.
- Green onions – Bring a burst of flavor; chives can be used instead for a similar effect.
- Sesame seeds (optional) – For garnish that adds a decorative touch; they can be replaced with furikake if desired.
- Pickled ginger (optional) – Offers a tangy bite that perfectly complements the katsu.
These Japanese Katsu Bowls are not only easy to prepare, but they’re also a delightful canvas for your creativity in the kitchen!
Step‑by‑Step Instructions for Japanese Katsu Bowls
Step 1: Prepare the Rice
Start by rinsing 1 cup of Japanese short-grain rice under cold water until it runs clear, which removes excess starch. Soak the rice for 30 minutes in water, then drain and place it into a rice cooker or saucepan. Add 1.2 cups of water and bring to a boil. Once boiling, cover and reduce to low heat, cooking for 15 minutes. Afterward, allow it to rest for 10 minutes off the heat. Fold in a mixture of rice vinegar, sugar, and salt for deliciously seasoned rice.
Step 2: Prepare the Katsu
While the rice cooks, prepare your chicken for the Japanese Katsu Bowls. Pound 2 boneless chicken breasts to about 1/2 inch thick for even cooking. Season both sides with salt and pepper. Set up a breading station: place all-purpose flour in one bowl, beaten eggs in a second, and panko breadcrumbs in a third. Dredge each chicken breast first in the flour, then dip into the egg wash, and finally coat thoroughly with panko to achieve that crispy texture.
Step 3: Fry the Katsu
In a heavy skillet, heat about 1 cup of vegetable oil over medium-high heat until hot, which takes about 5 minutes. Carefully add the breaded chicken breasts, frying them for 4-5 minutes on each side. They should turn a beautiful golden brown and feel firm when pressed. Once cooked, transfer the chicken to a plate lined with paper towels to drain excess oil before slicing into crispy strips.
Step 4: Make the Sauce
In a small bowl, combine 1/4 cup of tonkatsu sauce, 1 tablespoon each of soy sauce and Worcestershire sauce, and 1 tablespoon of ketchup. Stir well to blend the flavors, creating a savory sauce that will elevate your Japanese Katsu Bowls. Taste and adjust the sweetness or saltiness according to your preference for a perfect finishing touch.
Step 5: Assemble the Bowl
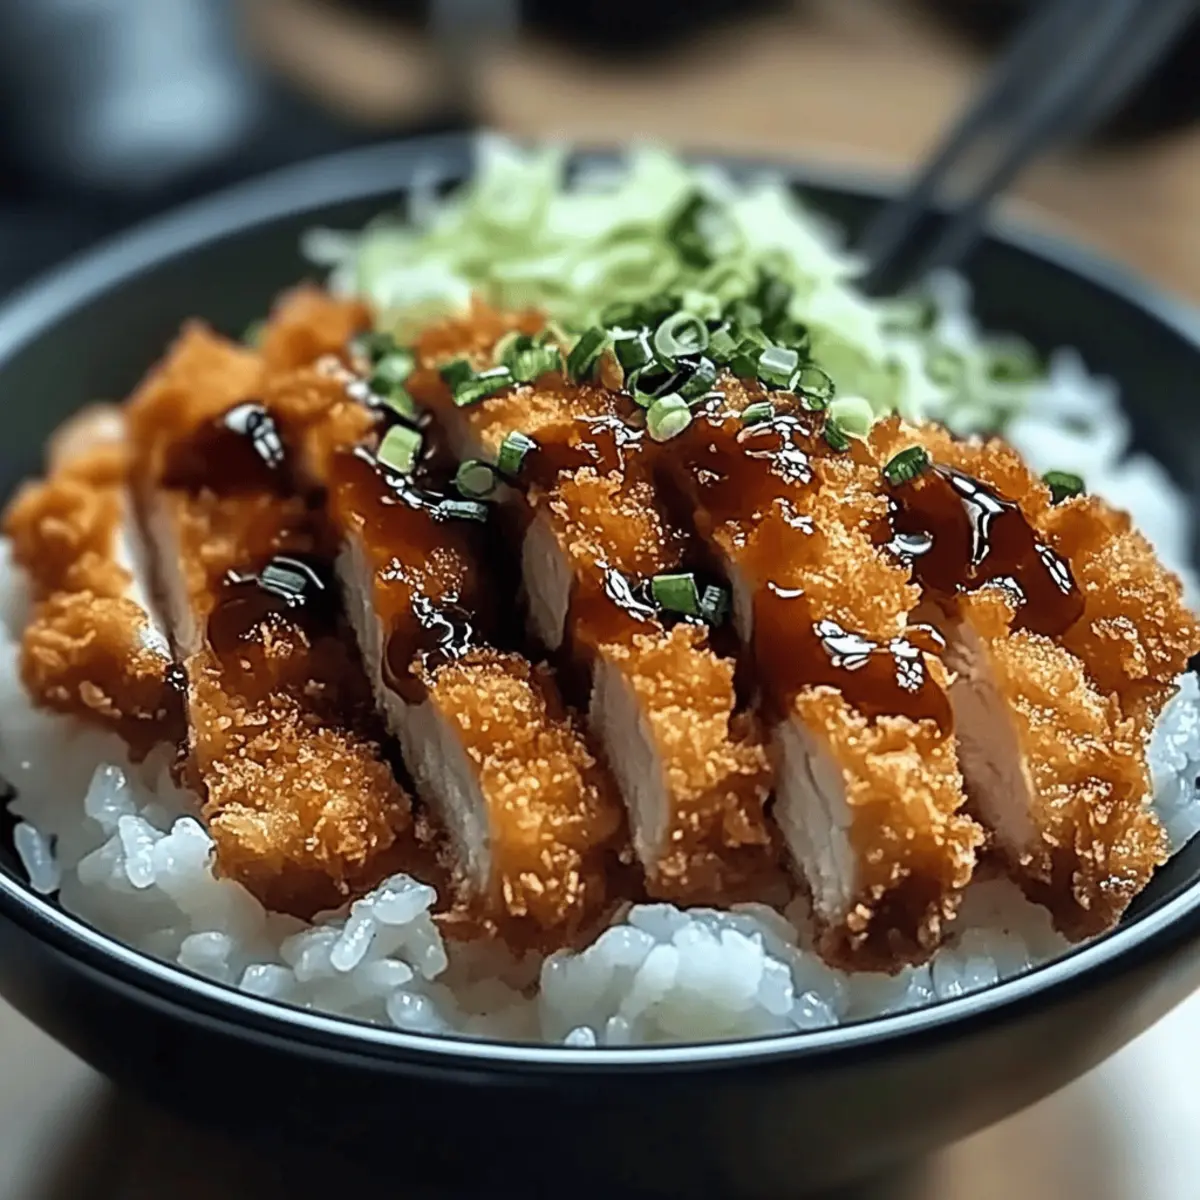
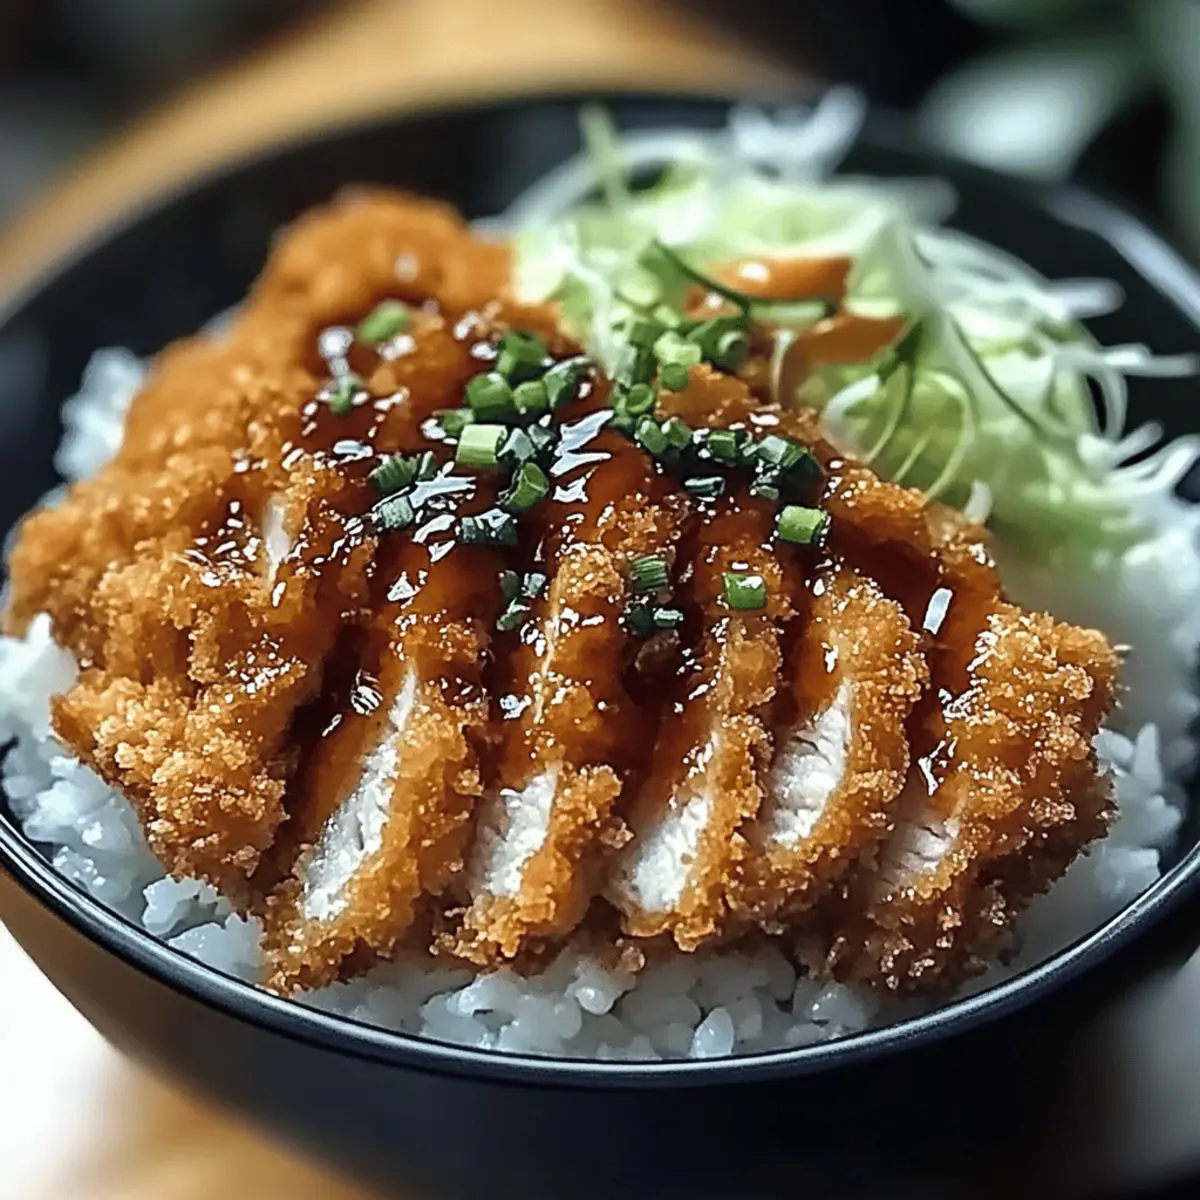
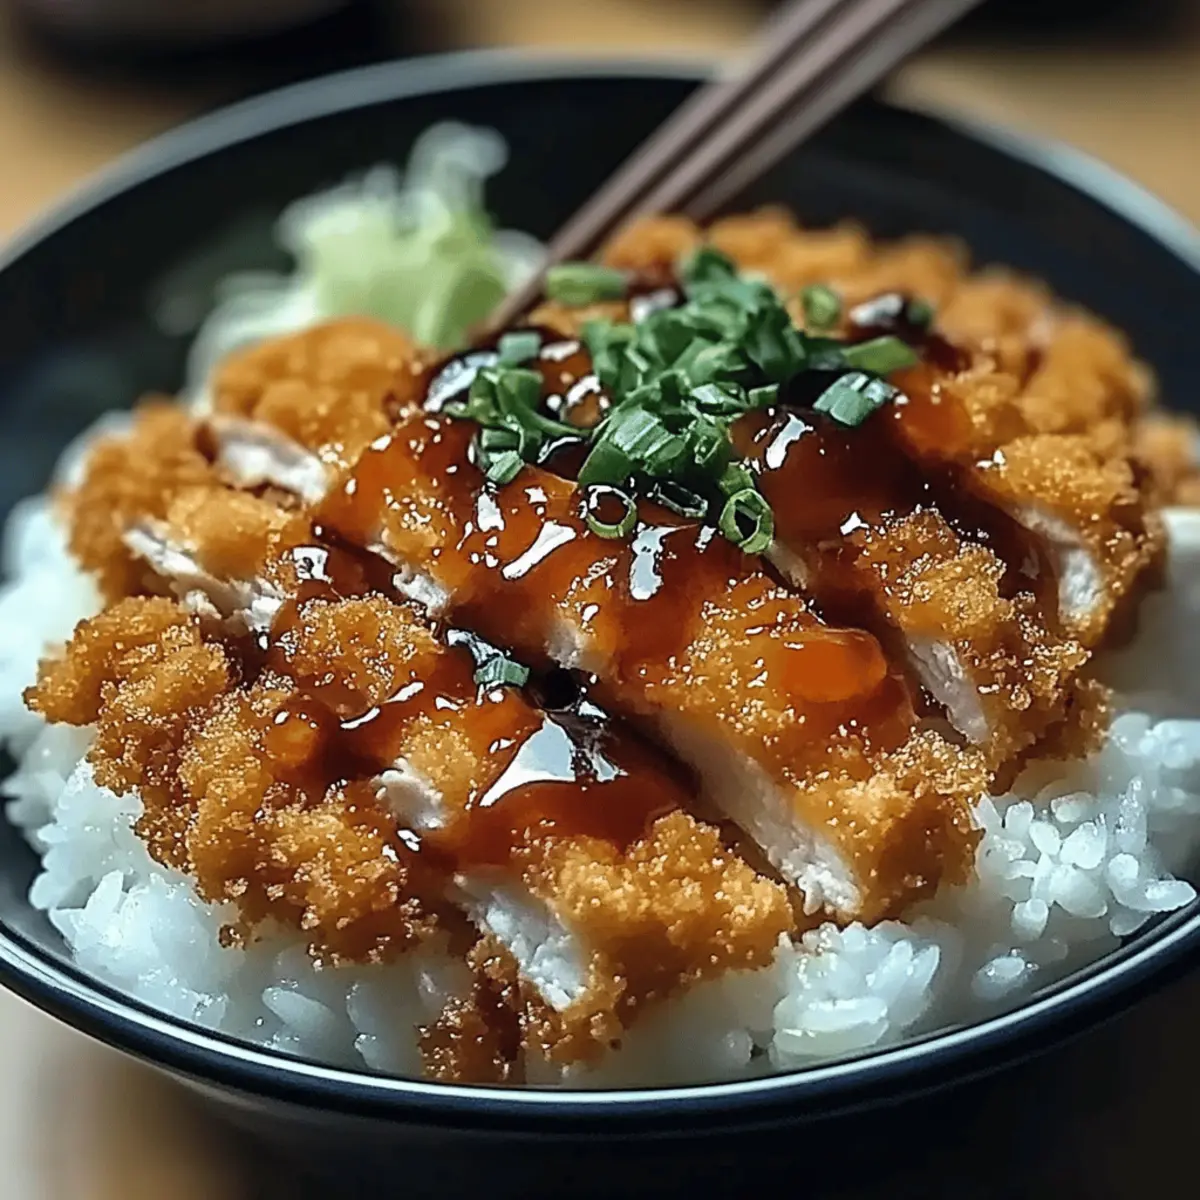
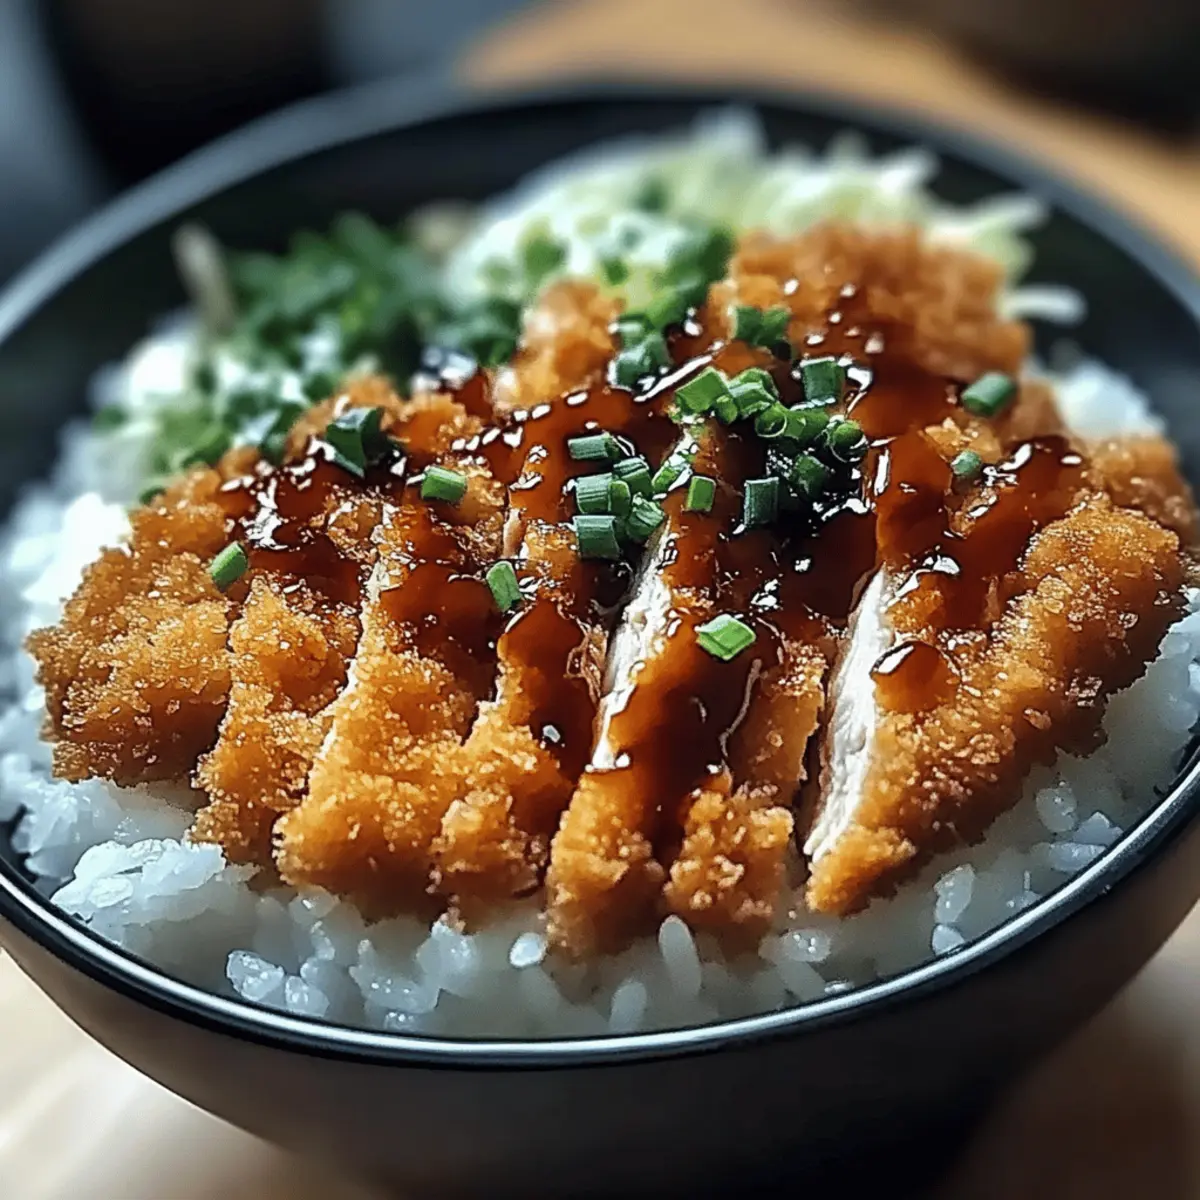
To plate, scoop a generous portion of the seasoned rice into a bowl. Then, arrange the sliced chicken katsu on top. Drizzle the delightful sauce over the chicken, allowing it to soak into the fluffy rice. Finish with a handful of shredded cabbage, a sprinkle of green onions, and sesame seeds for garnish. This arrangement transforms your dish into visually appealing Japanese Katsu Bowls that are ready to enjoy!
Expert Tips for Japanese Katsu Bowls
-
Oil Temperature: Ensure the oil is hot enough before frying. A simple test is to drop a small piece of bread in; it should sizzle immediately.
-
Perfect Rice Cooking: Avoid lifting the lid while cooking the rice to maintain steam, which is crucial for achieving the fluffy texture that complements your Japanese Katsu Bowls.
-
Breading Technique: For an even crunch, when breading, gently press the panko into the chicken to ensure it adheres well and avoids any falling off during frying.
-
Slice Wisely: Allow the katsu to rest for a minute after frying before slicing. This helps retain its juices and ensures flavorful bites.
-
Don’t Overcrowd the Pan: Fry the chicken in batches if necessary. Overcrowding can lower the oil temperature, leading to soggy katsu instead of the crispy delight you desire.
Japanese Katsu Bowls Customization Ideas
Feel free to make these delicious Japanese Katsu Bowls your own with exciting variations and substitutions!
- Pork Swap: Substitute chicken with pork for a classic katsu variation; the pork’s richness pairs beautifully with the sauce.
- Vegetarian Option: Try using eggplant or tofu as a plant-based alternative for a satisfying meatless meal; just ensure to coat them well for that crispy texture.
- Gluten-Free: Replace all-purpose flour and panko with gluten-free flour and necessary crumbs; enjoy crispy comfort without worry!
- Rice Alternatives: Use Jasmine rice instead of short-grain for a fluffier texture or try quinoa for a nutritious twist; both lend well to the dish.
- Flavor Boost: Add a drizzle of spicy mayo or ponzu sauce to elevate the flavor profile; these add an exciting kick that your taste buds will love!
- Toppings Galore: Top with a soft-boiled egg or creamy avocado for extra satisfaction; a sprinkle of furikake can enhance the flavor too.
- Heat It Up: Feeling spicy? Incorporate red pepper flakes or sriracha into your sauce for a delightful heat; this will give your katsu bowls a new zing!
- Mix Veggies: Substitute or add shredded carrots, cucumber, or radishes for a crunchy and refreshing topping; it’s a perfect way to balance the richness of the katsu.
With these flavorful options, you can tailor your Japanese Katsu Bowls to suit any palate or occasion! Enjoy your kitchen adventure and explore the art of customization!
Make Ahead Options
These Japanese Katsu Bowls are perfect for meal prep enthusiasts! You can prepare the rice and sauce up to 24 hours in advance, storing them separately in the refrigerator to ensure they stay fresh. The katsu can also be breaded the night before; simply place it in the fridge with a layer of parchment paper between each piece to maintain its crispy texture. When ready to serve, heat the oil and fry the katsu fresh for that irresistible crunch. By prepping ahead, you’ll save valuable time on busy weeknights while still enjoying delicious, homemade meals that taste just as amazing as when freshly made!
What to Serve with Japanese Katsu Bowls
A warm, comforting meal is just a few side dishes away from elevating your Japanese Katsu Bowls into a delightful feast.
-
Creamy Coleslaw: This cool, crunchy slaw adds a refreshing contrast to the crispy katsu, balancing flavors beautifully. The creamy dressing brings additional richness that complements the savory notes of the dish.
-
Steamed Edamame: Lightly salted and warm, edamame offers a vibrant, protein-packed side that’s perfect for sharing. Their slight nuttiness is a delightful match for the rich tonkatsu sauce.
-
Miso Soup: A warm bowl of miso soup provides a soothing, umami-rich counterpart to the savory katsu, enhancing the authentic Japanese dining experience.
-
Chilled Soba Noodles: Tossed in a light sesame dressing, these noodles add a refreshing, nutty element with every bite. They are perfect for soaking up the delicious sauce from your katsu!
-
Pickled Vegetables: A small side of tangy pickles brightens up the rich flavors of the katsu, offering a delightful pop of acidity to cleanse your palate between bites.
-
Japanese Green Tea: This fragrant, warm beverage is a lovely way to round out your meal. Its floral notes and slight bitterness balance the savory and sweet flavors of the katsu beautifully.
-
Mochi Ice Cream: For dessert, this sweet treat combines chewy and creamy textures, leaving you with a satisfying experience after the hearty main course. The refreshing flavors will wrap up your meal on a high note!
How to Store and Freeze Japanese Katsu Bowls
Fridge: Store leftover katsu in an airtight container for up to 3 days. To keep the crispy texture, place a paper towel at the bottom of the container.
Freezer: Freeze the cooked katsu separately in a secure, freezer-safe bag for up to 2 months. When ready to enjoy, thaw in the fridge overnight before reheating.
Reheating: Reheat katsu in the oven at 350°F (175°C) for about 10-15 minutes to regain its crunch. The rice can be microwaved with a splash of water to keep it moist.
Storage: For the best results, do not store the sauce with the katsu; keep it in a separate container to maintain the dish’s integrity when reheating.
Japanese Katsu Bowls Recipe FAQs
How do I choose the right chicken for my Katsu?
Absolutely! When selecting chicken, look for boneless chicken breasts that are firm without dark spots. If you opt for pork, choose a tender cut like pork loin for the perfect substitution.
How should I store leftover Japanese Katsu Bowls?
Very good question! Store the leftover katsu in an airtight container lined with a paper towel to absorb moisture, keeping it crispy. It can stay fresh in the refrigerator for up to 3 days.
Can I freeze the chicken katsu?
Yes, you can! To freeze, first allow the cooked katsu to cool completely. Then wrap each piece in plastic wrap, place them in a freezer-safe bag, and seal it tightly, removing as much air as possible. They’ll keep well for up to 2 months. When you’re ready to enjoy, thaw them overnight in the refrigerator before reheating.
What if my katsu doesn’t come out crispy?
No worries! If your katsu lacks crispness, it may be due to the oil temperature being too low. Always test the oil with a small piece of bread; it should sizzle as soon as it hits the oil. If you’re frying too many pieces at once, this can cool the oil too much, resulting in soggy katsu. Fry in smaller batches instead for that perfect crunch!
Are there any dietary concerns I should consider with this recipe?
Definitely! If you have dietary restrictions, ensure you’re using gluten-free flour and panko breadcrumbs to make the dish gluten-free. For allergies, check that your soy sauce and tonkatsu sauce do not contain allergens, as they can vary by brand. If you have pets, remember that some of the ingredients like onion and garlic are harmful to dogs and cats, so keep any leftovers out of their reach.
What’s the best way to reheat leftover katsu?
To reheat leftover katsu and maintain its crunch, preheat your oven to 350°F (175°C). Place the katsu on a baking sheet and heat it for about 10-15 minutes, until warmed through and crisp again. For the rice, add a splash of water and microwave it for a minute or two to keep it moist.
Crispy Japanese Katsu Bowls for Irresistible Comfort Food
Ingredients
Equipment
Method
- Rinse rice under cold water until it runs clear. Soak for 30 minutes, then drain, cook with water for 15 minutes, and let rest for 10 minutes. Mix in rice vinegar, sugar, and salt.
- Pound chicken breasts to 1/2 inch thick, season, and bread using flour, beaten eggs, and panko breadcrumbs.
- Heat vegetable oil in a skillet, fry chicken for 4-5 minutes on each side until golden brown, then drain excess oil and slice.
- Combine tonkatsu sauce, soy sauce, Worcestershire sauce, and ketchup in a bowl, mix well.
- Plate rice, add sliced katsu on top, drizzle with sauce, and finish with cabbage, green onions, and optional sesame seeds.
Leave a Reply