
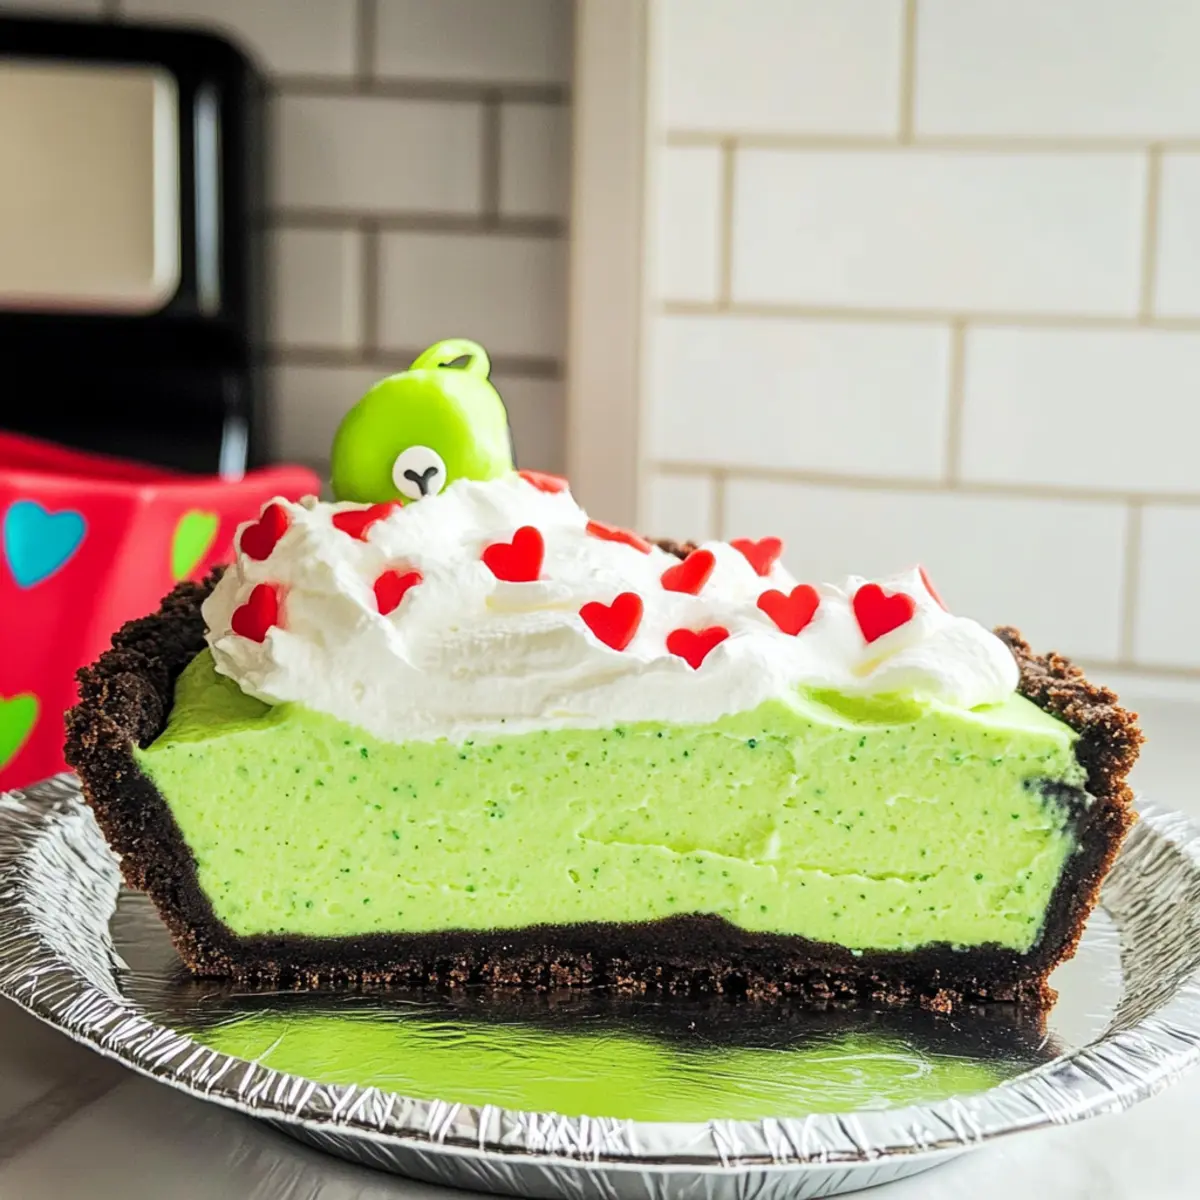
As I scrolled through cheerful holiday desserts, the vibrant No Bake Grinch Pie stopped me in my tracks. This enchanting creation isn’t just a feast for the eyes with its bright green hue and playful sprinkles; it’s also a simple, no-bake delight that whips together in mere minutes. Perfect for busy holiday gatherings or festive celebrations, this easy dessert combines silky white chocolate with a fluffy Cool Whip topping, promising a creamy texture that’ll leave your guests smiling. Plus, its whimsical appearance adds a special touch to any holiday spread, making it a true crowd-pleaser. Curious about how to make your own Grinch-inspired masterpiece? Let’s dive in!
Why is No Bake Grinch Pie a Must-Try?
Effortless: This no bake recipe makes preparation a breeze, perfect for anyone seeking to impress without the fuss of traditional baking.
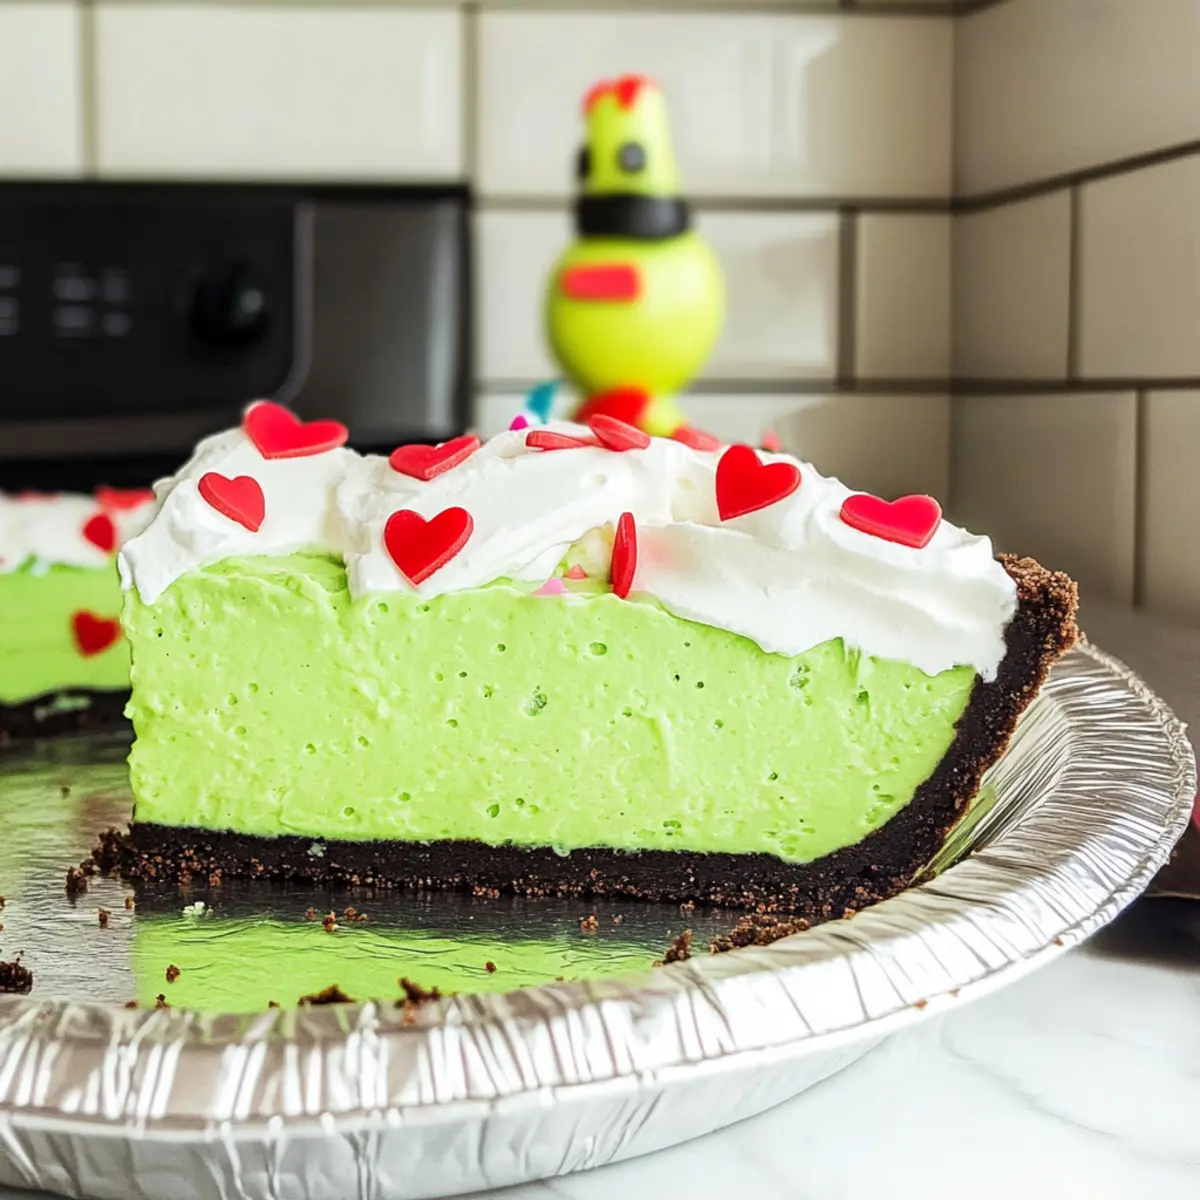
Festive Appeal: Its vibrant green color and playful sprinkles not only make it a showstopper but also add a fun twist to your holiday dessert table.
Crowd Favorite: Loved by both kids and adults alike, this dessert is sure to delight your guests at any festive gathering—it’s a guaranteed hit!
Versatile: Easy to customize with different sprinkles or flavors, you can make it your own and impress with unique variations, like adding crushed peppermint for a minty kick.
Quick Enjoyment: Ready in just minutes, you can whip this together and spend more time enjoying the festivities while still serving up something special.
Don’t forget to check out my other fun holiday recipes like Creamy Southern Spaghetti Bake or indulge in festive treats with Pumpkin Pie Tacos!
No Bake Grinch Pie Ingredients
For the Crust
• Oreo Pie Crust – Provides a sweet and crunchy base; try a chocolate graham cracker crust for a delightful twist.
For the Filling
• White Chocolate Pudding (3.9 oz) – Adds sweetness and creaminess; instant vanilla pudding works well as an alternative.
• 2% Milk (2 Cups) – Used to prepare the pudding mix; non-dairy milk can also be substituted.
• Neon Green Gel Food Coloring (2-3 drops) – Colors the pudding a festive green; other food colorings may not achieve the same vibrancy.
For the Topping
• Cool-Whip (½ container) – Creates a light, fluffy topping; consider homemade whipped cream for a fresh touch.
• Green Sanding Sugar (½ cup) – Adds a festive crunch and sparkle to the dessert; colored sprinkles can be used instead.
For Decoration
• Mini Red Heart Sprinkles (½ cup) – Provides a playful, thematic appeal; swap out for any red sprinkles you have on hand.
• Large Red Heart Sprinkles (½ cup) – Perfect for finishing touches; any red sprinkle works well here.
This delightful No Bake Grinch Pie is a festive treat that will magically transform your holiday celebrations!
Step‑by‑Step Instructions for No Bake Grinch Pie
Step 1: Prepare the Pudding Mixture
In a large mixing bowl, combine the white chocolate pudding mix with 2 cups of cold 2% milk and 2-3 drops of neon green gel food coloring. Using a hand mixer, beat the mixture on medium speed for about 2 minutes, or until soft peaks form. This vibrant green pudding will be the festive filling for your No Bake Grinch Pie.
Step 2: Fill the Pie Crust
Carefully pour the whipped pudding mixture into the Oreo pie crust, using a spatula to smooth the top evenly. Make sure to spread the pudding all the way to the edges to prevent air pockets from forming. The crust’s chocolate flavor perfectly complements the creamy filling, creating a delicious base for your No Bake Grinch Pie.
Step 3: Chill the Pie
Cover the filled pie with plastic wrap or a lid and place it in the refrigerator to chill for at least 3 hours. This chilling time allows the pudding to set and develop its creamy texture. Once set, the pie will hold its shape well, making it easier to slice and serve at your holiday gatherings.
Step 4: Add the Cool-Whip Topping
After the chilling period, remove the pie from the refrigerator. Spread about half of the Cool-Whip container over the top of the set pudding layer. Use a spatula to create a smooth, even layer that beautifully contrasts with the vibrant green filling below. This light and fluffy layer adds a festive touch to your No Bake Grinch Pie.
Step 5: Decorate the Pie
Generously sprinkle the green sanding sugar over the Cool-Whip layer, allowing it to adhere to the creamy topping. Then, add mini red heart sprinkles throughout the pie for a charming holiday aesthetic. This decoration not only enhances the visual appeal but also adds a delightful crunch to each slice of your No Bake Grinch Pie.
Step 6: Final Touches
Before serving, crown the pie with a large red heart sprinkle in the center to add that finishing touch. This sweet detail makes your No Bake Grinch Pie an eye-catching centerpiece on your dessert table, perfect for festive celebrations. It’s the little touches that make this dessert truly special for your guests.
Step 7: Serve and Enjoy
When ready, slice the pie into wedges and serve it chilled. This creamy, dreamy No Bake Grinch Pie is sure to delight everyone at your holiday gathering. For any leftovers, simply store them in the refrigerator for up to a few days, ensuring you can cherish the festive flavor long after the party ends.
Expert Tips for No Bake Grinch Pie
-
Cold Milk Matters: Use cold milk to ensure the pudding whips up to the perfect soft peaks. Room temperature milk can lead to a runny mixture.
-
Mix with Care: Avoid over-mixing the pudding; this can result in a grainy texture. Mix until soft peaks just form for that creamy consistency.
-
Chill Time is Key: Allow the pie to chill for at least 3 hours. This setting period is essential for a firm and sliceable No Bake Grinch Pie.
-
Decorate Wisely: For an even distribution of toppings, use a spatula to spread the Cool-Whip and sprinkle decorations evenly. This ensures every slice looks as good as it tastes!
-
Customize Your Creations: Feel free to swap in different sprinkles or flavors, like peppermint, for a festive twist. Personalizing this dessert makes it even more special for your gatherings.
No Bake Grinch Pie Variations
Feel free to make this delightful pie your own, unleashing your creativity in the kitchen!
-
Minty Twist: Fold in crushed peppermint candies for a refreshing mint flavor that complements the creamy filling beautifully. The added crunch brings a festive flair to your pie.
-
Chocolate Crust: Swap the Oreo crust for a chocolate graham cracker crust to amp up the chocolatey goodness. This creates an even richer flavor that chocolate lovers will adore!
-
Flavored Pudding: Experiment with different pudding flavors, like chocolate or vanilla, for a unique take on the classic Grinch Pie. Each flavor brings its own dynamic, ensuring a fun surprise for your guests.
-
Add Fruit: Incorporate chopped strawberries or raspberries for a pop of color and a burst of fruity flavor. The sweetness of the fruit pairs wonderfully with the creamy filling, making each slice a fruity delight.
-
Non-Dairy Option: Use coconut milk and dairy-free whipped topping for a delicious vegan version of this pie. You won’t sacrifice creaminess, and it’s a wonderful crowd-pleaser for those with dietary restrictions.
-
Colorful Sprinkles: Instead of green sanding sugar, use an assortment of colorful sprinkles or themed ones for different holidays. It makes the dessert versatile for any celebration, not just Christmas!
-
Coconut Flavor: Adding a hint of coconut extract to the pudding mixture can transport your pie to a tropical paradise. Deliciously unexpected, this will surely intrigue your guests.
-
Hot Cocoa Grinch Pie: Mix in hot cocoa powder for a chocolaty twist that’s oh-so-comforting during the winter months. This variation adds a cozy warmth to your festive gatherings.
These variations make the No Bake Grinch Pie even more magical. It pairs perfectly with festive treats like Pumpkin Pie Tacos or a hearty Chicken Pot Pie. Enjoy personalizing this festive delight!
Make Ahead Options
These festive No Bake Grinch Pie delights are perfect for meal prep enthusiasts! You can prepare the pudding mixture and fill the pie crust up to 24 hours in advance, just be sure to cover it tightly with plastic wrap to keep it fresh. Once you’ve chilled the pie for the recommended 3 hours to set, you can leave it wrapped until you’re ready to add the Cool Whip layer. When it’s time to serve, simply add the Cool Whip and decorate with the green sanding sugar and heart sprinkles, keeping the dessert just as delicious and vibrant as when it was first made. This way, you can impress your guests with minimal effort, ensuring that the festivities can start without a last-minute rush!
How to Store and Freeze No Bake Grinch Pie
Fridge: Store any leftover pie in an airtight container in the fridge for up to 3 days. This helps maintain the pie’s creamy texture and keeps the flavors fresh.
Freezer: If you’ve made extra No Bake Grinch Pie, wrap it tightly in plastic wrap or aluminum foil and freeze for up to 1 month. Thaw in the fridge overnight before serving.
Reheating: This pie is best served chilled and does not require reheating. Simply slice and enjoy it straight from the fridge or after thawing from the freezer.
Serving Tips: For optimal taste and texture, enjoy within the suggested storage times to experience its wonderful festive flavors at their best.
What to Serve with No Bake Grinch Pie?
The joy of serving this whimsical dessert amplifies when paired with equally delightful accompaniments.
-
Festive Cocktails: Bright, fruity drinks or Grinch-themed mocktails enhance the holiday spirit, adding a pop of color to your gathering. Think refreshing combinations, like cranberry and lime.
-
Gingerbread Cookies: Their spiced warmth contrasts beautifully with the creamy sweetness of the pie, making for a nostalgic holiday treat. The crunch of a cookie alongside the smooth pie creates a satisfying texture balance.
-
Hot Chocolate Bar: Offer a cozy assortment of toppings like whipped cream and candy canes. This interactive setup beckons guests to craft their warm drinks, perfectly complementing the chilly Grinch Pie.
-
Fruit Salad: A vibrant mix of seasonal fruits can provide a refreshing palate cleanser. The bright flavors of orange, pomegranate, and kiwi elevate the dessert table while keeping the mood light.
-
Sparkling Water: Flavored sparkling water adds a bubbly touch. Its effervescence enhances the richness of the No Bake Grinch Pie without overpowering it.
-
Mini Cheesecakes: Light and luscious, other dessert options such as mini cheesecakes can create a delightful dessert spread. Their creamy texture and various flavors offer guests a taste adventure to explore.

No Bake Grinch Pie Recipe FAQs
What type of milk should I use for the pudding?
I recommend using cold 2% milk for the tastiest results, as it helps the pudding reach the perfect consistency. However, if you prefer a non-dairy option, almond or soy milk also works beautifully!
How long can I store the No Bake Grinch Pie in the fridge?
You can store any leftover pie in an airtight container in the fridge for up to 3 days. This helps maintain the creamy texture while keeping the flavors delightful and fresh!
Can I freeze the No Bake Grinch Pie?
Absolutely! If you’ve made extra, wrap the pie tightly in plastic wrap or foil and freeze it for up to 1 month. When you’re ready to enjoy it, just thaw it overnight in the fridge for the best texture and taste.
What if my pudding mixture isn’t thickening as expected?
If your pudding isn’t thickening, ensure you’ve used cold milk and mixed it at the right speed and time (around 2 minutes). If you notice it’s still too runny, try adding a bit more pudding mix and mix again gently to avoid over-whipping.
Are there any allergy considerations I should keep in mind?
Definitely! If you’re serving guests with allergies, be cautious about common allergens like dairy (found in the pudding and Cool Whip) and gluten (in the Oreo crust). You can opt for non-dairy whipped cream and a gluten-free cookie base to accommodate those with dietary restrictions.
Can I customize the decorations on the pie?
Yes, indeed! Feel free to swap the sprinkles for any festive toppings you love. You could add crushed peppermint for a seasonal twist or use different colored sprinkles to fit the theme of your holiday gathering!

Delightful No Bake Grinch Pie: A Festive Holiday Treat
Ingredients
Equipment
Method
- In a large mixing bowl, combine white chocolate pudding mix with 2 cups of cold 2% milk and 2-3 drops of neon green gel food coloring. Beat the mixture on medium speed for about 2 minutes until soft peaks form.
- Pour the whipped pudding mixture into the Oreo pie crust, smoothing the top evenly with a spatula.
- Cover the pie with plastic wrap or a lid and refrigerate for at least 3 hours to set.
- Spread about half of the Cool-Whip container over the top of the set pudding layer with a spatula.
- Generously sprinkle green sanding sugar over the Cool-Whip layer and add mini red heart sprinkles for decoration.
- Crown the pie with a large red heart sprinkle in the center before serving.
- Slice the pie into wedges and serve it chilled.
Leave a Reply