
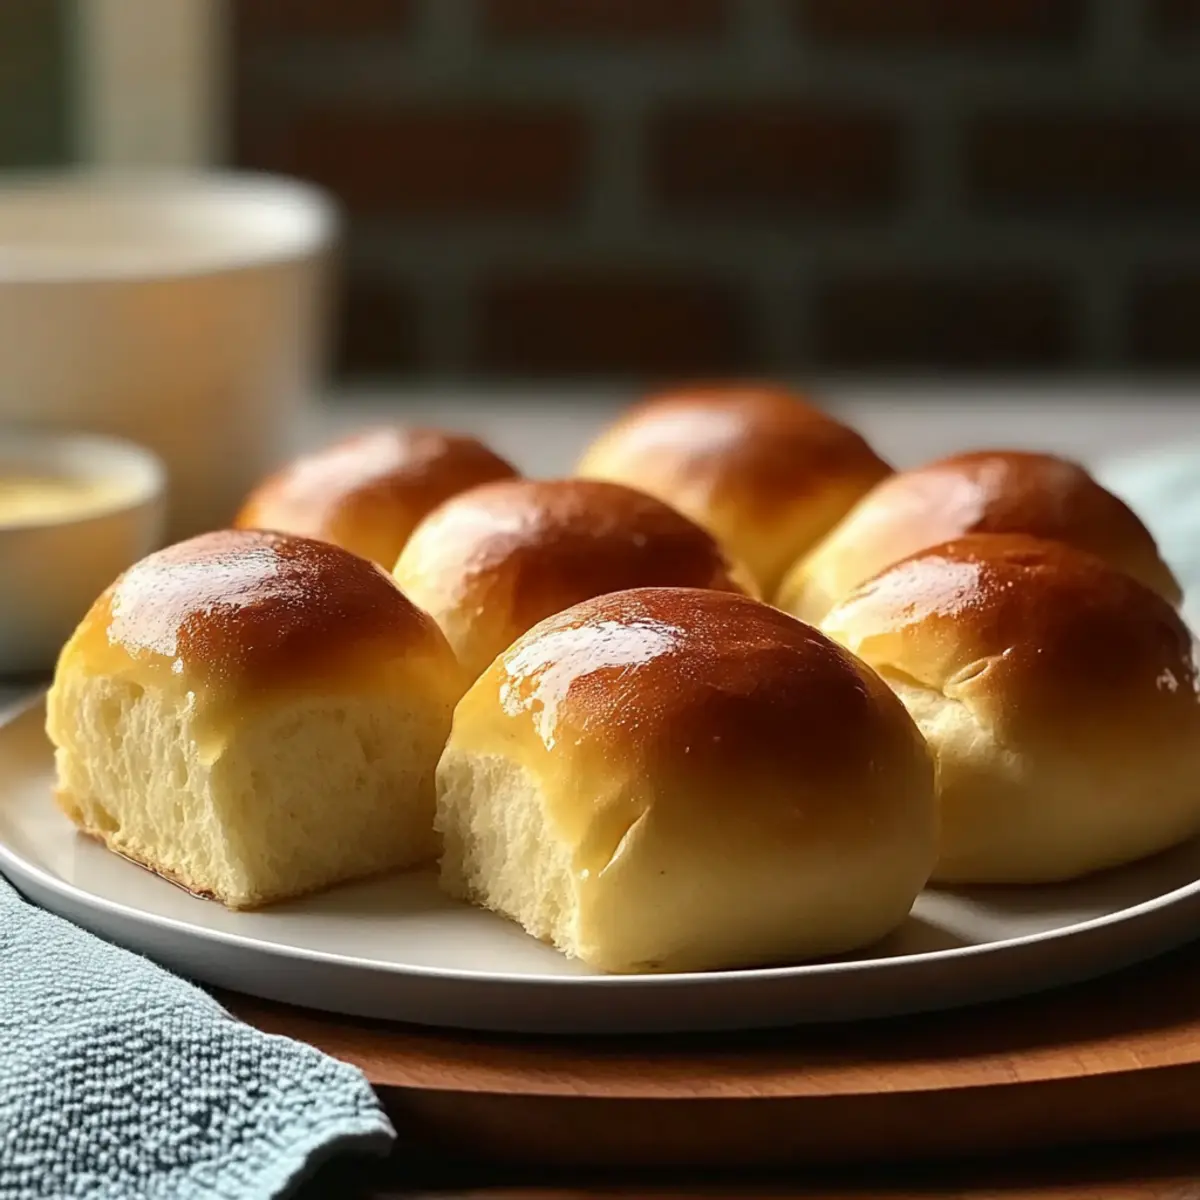
As I stood in my kitchen, the sweet scent of melting butter mingled with warm milk and a hint of pineapple juice, I couldn’t help but feel transported to a sunny Hawaiian beach. If you’re looking for a delightful way to bring a taste of paradise to your dinner table, my gluten-free Hawaiian rolls are just what you need! Not only do these rolls boast a soft, pillowy texture, but they also offer a subtly sweet flavor that’s a welcome departure from ordinary bread. They’re ideal for anyone, gluten-free or not, and perfect for all occasions—from family dinners to potluck gatherings. Plus, you’ll appreciate how quick and easy they are to whip up, making them a reliable crowd-pleaser. Ready to roll up your sleeves and make these tropical delights? Let’s dive into the recipe!
Why Are These Rolls a Must-Try?
Incredible Flavor: The blend of warm milk and pineapple juice brings a delightful twist that transports you straight to Hawaii.
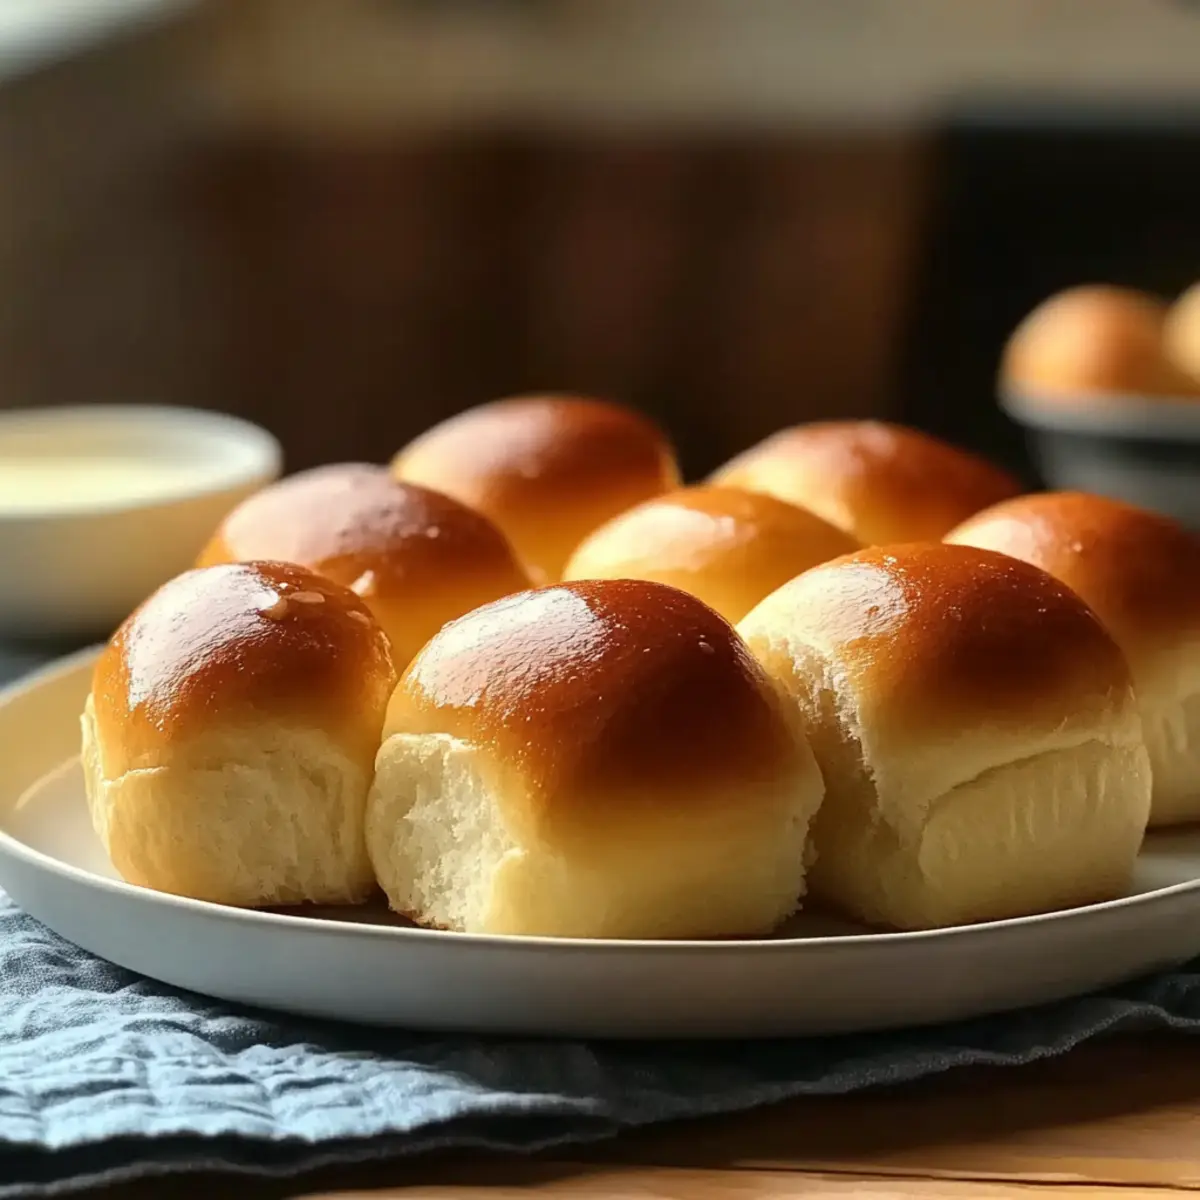
Softness Guaranteed: With these gluten-free Hawaiian rolls, you obtain a pillowy texture that rivals traditional rolls—perfectly fluffy and soft!
Easy to Make: This straightforward recipe is approachable for bakers of any skill level, ensuring that everyone can enjoy freshly baked rolls at home.
Versatile Options: Use them for sliders, or serve alongside your favorite savory dishes; these rolls fit seamlessly into any meal.
Quick Preparation: With minimal rising time, you’ll have these tropical treasures ready to impress in under two hours!
Try them alongside my Gluten Free Pancakes or save your leftovers for a delicious breakfast treat!
Gluten-Free Hawaiian Rolls Ingredients
For the Dough
- Gluten-Free All-Purpose Flour – Acts as the base for structure; avoid scooping to ensure accurate measurement.
- Xanthan Gum – Provides necessary elasticity; skip if your flour blend already contains it.
- Instant Yeast – Essential for leavening the rolls; add directly to dry ingredients without pre-proofing.
- Granulated Sugar – Adds sweetness to the rolls; consider substituting with honey for added moisture.
For the Wet Ingredients
- Warm Milk (or Pineapple Juice) – Contributes richness and enhances the Hawaiian flavor; using pineapple juice helps activate the yeast.
- Melted Butter (or Dairy-Free Butter) – Adds softness and flavor; dairy-free options are perfect for sensitive tummies.
- Eggs – Provide structure and a lovely golden color; ensure they are at room temperature for the best mixing.
For Flavor Enhancement
- Salt – Balances the sweetness; don’t skip this essential ingredient for optimal flavor.
Step‑by‑Step Instructions for Gluten-Free Hawaiian Rolls
Step 1: Prepare Dry Ingredients
In a large bowl or the stand mixer, combine the gluten-free all-purpose flour, xanthan gum (if using), sugar, instant yeast, and salt. Mix thoroughly until the dry ingredients are evenly distributed, ensuring no lumps remain. This foundational step sets the stage for your delicious gluten-free Hawaiian rolls, so take your time and ensure everything is well blended.
Step 2: Mix Wet Ingredients
In a separate jug, whisk together the warm milk (or pineapple juice), melted butter, and eggs until thoroughly combined. The warmth of the liquid will help activate the yeast, ensuring you achieve that perfect rise in your Hawaiian rolls. This mixture should be smooth and velvety, creating a rich base that complements the dry ingredients beautifully.
Step 3: Combine Ingredients
Carefully pour the wet ingredients into the bowl with the dry mixture. Start mixing on low speed, gradually increasing to medium for about 3 minutes, until the dough is thick and sticky. Don’t worry if the dough feels wet—it’s meant to be that way for the softest gluten-free Hawaiian rolls. Scrape down the sides to incorporate everything evenly; this will promote a uniform texture.
Step 4: Shape Rolls
Lightly grease a 9×13 inch baking pan. With oiled hands or a scoop, portion out the dough into 12 equal amounts and place them in the prepared pan. Allow the rolls to touch slightly for an even rise, creating that classic soft texture. The dough may be sticky, so take your time to shape them gently without adding extra flour.
Step 5: Let Rise
Cover the pan with plastic wrap or a clean kitchen towel and allow the rolls to rise in a warm, draft-free spot for 45-60 minutes. The dough should double in size and become puffy, indicating that your gluten-free Hawaiian rolls are ready for baking. Keep an eye on them; the ideal rise creates the delightful fluffiness you desire.
Step 6: Bake
Preheat your oven to 375°F (190°C) while the rolls are rising. Once risen, place the pan in the oven and bake for 20-25 minutes, or until the tops are golden brown and the rolls sound hollow when tapped. A shiny finish can be achieved by brushing them with melted butter shortly after removing them from the oven; this step adds a lovely luster and flavor.
Step 7: Cool
Once baked, let the gluten-free Hawaiian rolls cool in the pan for about 30 minutes before serving. This cooling period allows the rolls to set properly, enhancing their texture and making them easier to handle. The aroma wafting through your kitchen will surely entice everyone to gather around the table for these delightful treats.
Expert Tips for Gluten-Free Hawaiian Rolls
Measure Correctly: Ensure you measure the gluten-free flour accurately using the spoon and level method to prevent dense rolls.
Don’t Fear the Stickiness: Embrace the sticky dough! Gluten-free mixes require hydration for that soft, pillowy texture, so avoid adding more flour.
Room Temperature Ingredients: Make sure your eggs and any liquids are at room temperature to promote better mixing and a more effective rise in your gluten-free Hawaiian rolls.
Fresh Yeast is Key: Always check the freshness of your yeast. If the rolls don’t rise adequately, they could collapse during baking.
Enjoy Flavors: For a tropical twist, experiment with pineapple juice as your liquid; it enhances both flavor and yeast activation for perfect rolls!
Make Ahead Options
These gluten-free Hawaiian rolls are perfect for meal prep enthusiasts looking to save time during busy weeknights! You can prepare the dough up to 24 hours in advance and refrigerate it covered to prevent sticking. Moreover, you can shape the rolls and place them in the pan, covering them tightly with plastic wrap, and let them rise overnight in the fridge. When you’re ready to bake, simply allow them to come to room temperature while preheating the oven, then bake as directed. This means you can enjoy fresh, soft rolls without the last-minute rush, providing a taste of paradise at your dinner table with minimal effort!
Gluten-Free Hawaiian Rolls Variations
Don’t hesitate to get creative with these gluten-free Hawaiian rolls and make them your own! Each variation adds a unique twist that can elevate your baking game.
- Dairy-Free: Swap melted butter for dairy-free butter to cater to lactose intolerant guests while keeping that lovely flavor.
- Honey Sweetness: Use honey instead of granulated sugar for a deeper, more complex sweetness and a slightly denser roll.
- Coconut Milk: Substitute warm milk with coconut milk to infuse a tropical essence and richer flavor into the rolls; you’ll love the twist it brings.
- Mini Sliders: Divide the dough into smaller portions to create delightful mini Hawaiian rolls, perfect for sliders at your next family gathering!
- Creative Toppings: Try brushing the tops with a mixture of honey and cinnamon before baking for an enticing sweet and spicy flavor burst.
- Fruity Infusion: Incorporate finely chopped dried pineapple or shredded coconut into the dough for extra tropical flair.
- Herb-Infused: Add fresh chopped herbs, like rosemary or thyme, to the dough for a savory twist that pairs beautifully with butter or spreads.
- Fun Add-Ins: Stir in chocolate chips for a sweet dessert roll that brings a fun element to your table.
For a deliciously sweet breakfast twist, try serving these alongside my Gluten Free Pancakes or freeze them for later enjoyment! Each option allows you to customize your rolls while preserving that delightful softness and sweetness you adore.
What to Serve with Gluten-Free Hawaiian Rolls
These delightful rolls are not just a treat on their own; they can enhance a variety of meals and flavors to create an unforgettable dining experience.
-
Grilled Pineapple:
Pair the sweetness of these rolls with grilled pineapple for a tropical flavor boost that complements the Hawaiian essence beautifully. The caramelized edges bring warmth and sweetness, creating a perfect harmony. -
Hawaiian BBQ Chicken:
Serve alongside juicy Hawaiian BBQ chicken for a complete island-inspired meal. The sweet and tangy sauce beautifully contrasts the rolls, making each bite a savory delight. -
Fresh Tropical Salad:
A vibrant salad with mango, avocado, and mixed greens can elevate your plate with a fresh crunch. The coolness of the salad offsets the warm, soft rolls, creating a delightful textural balance. -
Coconut Rice:
Fluffy coconut rice brings a creamy richness that pairs flawlessly with the rolls. The coconut flavor reinforces the tropical theme, making every meal feel like a mini-vacation. -
Creamy Coleslaw:
The creaminess and tang of coleslaw provide a perfect crunch that contrasts with the soft rolls. It adds a delightful crispness alongside your favorite protein dishes. -
Passion Fruit Iced Tea:
As an accompaniment drink, serve refreshing passion fruit iced tea. The fruity, sweet flavors create a cooling offset to warm rolls, enhancing your tropical dining experience. -
Chocolate Lava Cake:
Finish off your meal with a warm chocolate lava cake for dessert. The rich, gooey center will make your taste buds sing and offers a luxurious treat after the light sweetness of the rolls.
How to Store and Freeze Gluten-Free Hawaiian Rolls
Room Temperature: Store the gluten-free Hawaiian rolls in an airtight container at room temperature for up to 2 days to maintain their soft texture.
Fridge: If you want to extend freshness, refrigerate the rolls in an airtight container for up to 5 days, but be aware they may dry out slightly.
Freezer: For long-term storage, freeze the gluten-free Hawaiian rolls in a freezer-safe bag or container for up to 2-3 months. This preserves their flavor and texture.
Reheating: When ready to enjoy, reheat the rolls by warming them in the oven at 350°F (175°C) for about 10-15 minutes or in the microwave for 15-30 seconds until warm.
Gluten-Free Hawaiian Rolls Recipe FAQs
What type of gluten-free flour should I use?
I recommend using a high-quality gluten-free all-purpose flour blend that includes xanthan gum, as it provides the necessary structure and texture for your rolls. Avoid scooping directly from the bag—use the spoon and level method to measure accurately. This ensures the best results in achieving soft and fluffy rolls.
How should I store my gluten-free Hawaiian rolls?
Store your rolls in an airtight container at room temperature for up to 2 days. If you want to keep them longer, refrigerate them for up to 5 days, but be cautious, as they may dry out a bit. For longer storage, freeze them in a freezer-safe bag or container for up to 2-3 months.
Can I freeze gluten-free Hawaiian rolls?
Absolutely! To freeze, allow the rolls to cool completely after baking. Then, individually wrap each roll in plastic wrap and place them in a freezer-safe bag or container. When you’re ready to enjoy them, simply reheat in the oven at 350°F (175°C) for 10-15 minutes or microwave for 15-30 seconds until warm.
What should I do if my dough doesn’t rise properly?
If your gluten-free dough doesn’t rise, check the freshness of your instant yeast—expired yeast will inhibit rising. When mixing the wet ingredients, ensure they are warm but not too hot, as excessive heat can kill the yeast. Lastly, create a warm and draft-free environment for the dough; rising in a slightly warm oven or a sunny spot can help it rise effectively.
Are these rolls suitable for those with allergies?
This recipe is versatile and can be adapted to suit various dietary needs! If you have specific allergies, opt for dairy-free butter and ensure your gluten-free flour blend is free from allergens like nuts. Also, since the recipe includes eggs, for egg-free alternatives, consider using flaxseed meal (1 tablespoon mixed with 3 tablespoons of water per egg) to help bind the ingredients.
Deliciously Soft Gluten-Free Hawaiian Rolls for Every Occasion
Ingredients
Equipment
Method
- In a large bowl or the stand mixer, combine the gluten-free flour, xanthan gum (if using), sugar, instant yeast, and salt. Mix thoroughly until evenly distributed.
- In a separate jug, whisk together the warm milk (or pineapple juice), melted butter, and eggs until thoroughly combined.
- Carefully pour the wet ingredients into the bowl with the dry mixture. Start mixing on low speed, gradually increasing to medium for about 3 minutes.
- Lightly grease a 9x13 inch baking pan and portion out the dough into 12 equal amounts, placing them in the prepared pan.
- Cover the pan and allow the rolls to rise in a warm spot for 45-60 minutes until they double in size.
- Preheat your oven to 375°F (190°C) while the rolls are rising. Bake for 20-25 minutes until golden brown.
- Let the rolls cool in the pan for about 30 minutes before serving.
Leave a Reply