
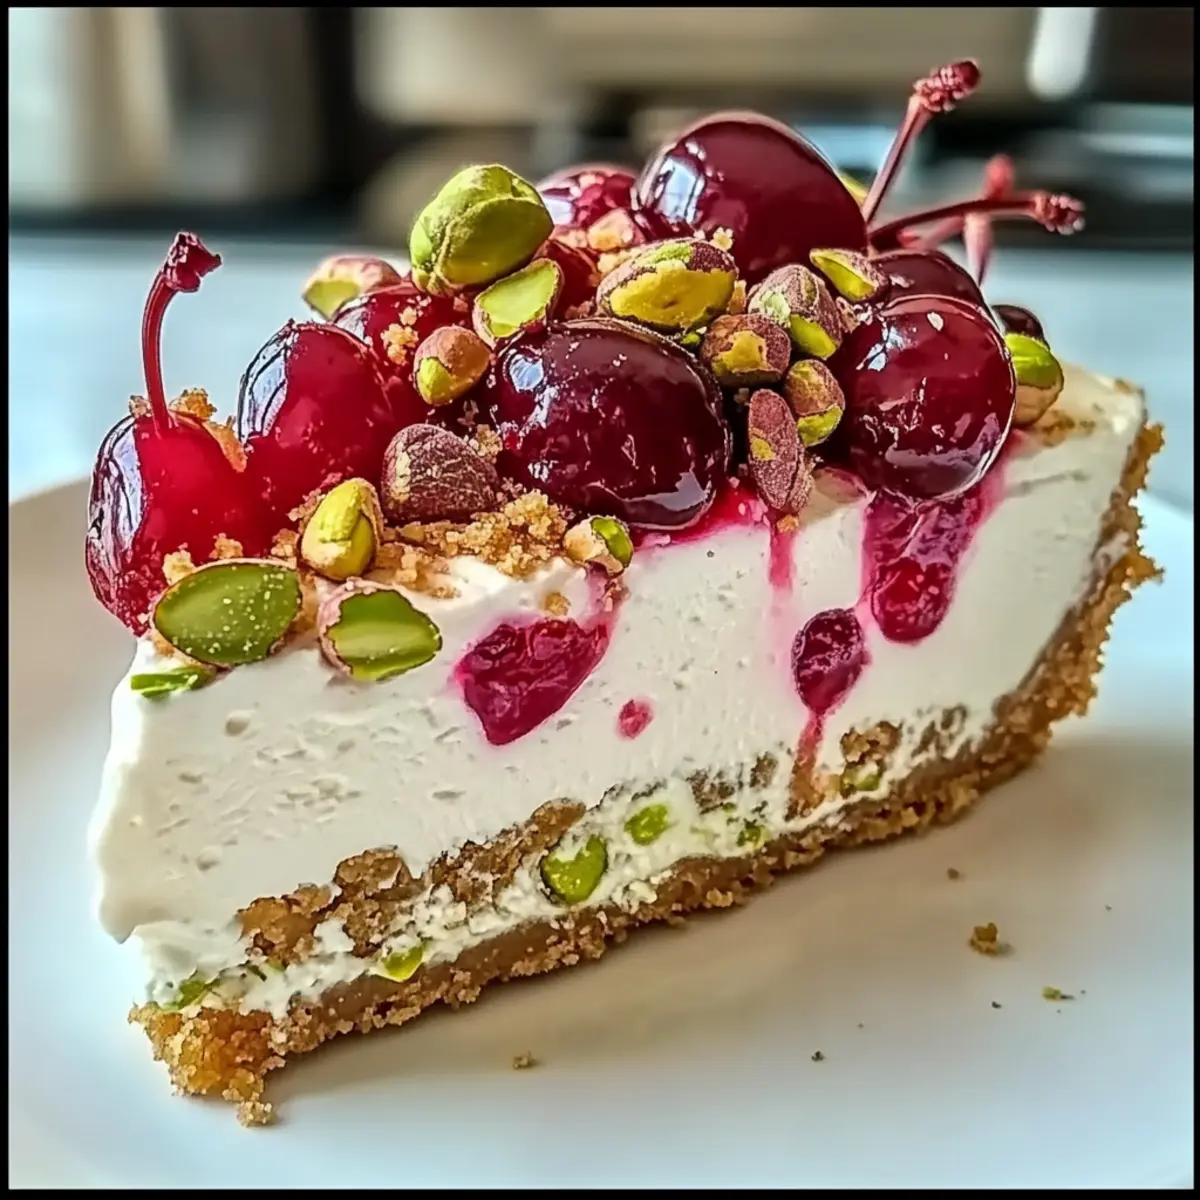
As I stood in my kitchen, the light streaming through the window, a whirlwind of flavors danced in my mind, and I knew it was time to create a Cherry Pistachio Cheesecake. This vibrant dessert is not only a visual show-stopper but a delicious crowd-pleaser that brings a festive spirit to any gathering. With its creamy, rich filling accentuated by nutty pistachios and tangy cherries, you’ll find that it’s surprisingly easy to whip up—a perfect way to elevate your dessert game without spending hours in the kitchen. Best of all, it’s easily adaptable for everyone; whether you prefer fresh cherries or need a nut-free option, this cheesecake has got you covered. So, are you ready to dive into a slice of happiness? Let’s get started!
Why is this Cherry Pistachio Cheesecake special?
Irresistible Flavor: The delightful blend of pistachios and cherries creates an explosion of flavor that will have everyone asking for seconds.
Ease of Preparation: With simple ingredients and straightforward steps, this cheesecake is perfect for both beginner and experienced cooks looking for a festive treat.
Versatile Options: Whether you choose fresh cherries or adapt it to be nut-free, this recipe allows for flexibility, ensuring that everyone can enjoy it.
Elegant Presentation: The vibrant colors and textures make this cheesecake not just a dessert, but a stunning centerpiece for any gathering.
Crowd-Pleaser: This Cherry Pistachio Cheesecake is sure to impress your guests, much like our Pistachio White Chocolate or Chocolate Cheesecake Decadent options.
Make-Ahead Friendly: You can prepare it ahead of time, saving you stress on the day of your celebration. Get ready to wow your friends and family!
Cherry Pistachio Cheesecake Ingredients
• A perfect array of flavors for your cheesecake!
For the Crust
- Graham Cracker Crumbs – Provide a sweet, buttery crust; may substitute with digestive biscuits or oreo crumbs for a different flavor.
- Ground Pistachios – Add a nutty flavor and texture to the crust; replace with ground almonds for a nut-free version.
- Granulated Sugar – Sweetens the crust and filling; can use coconut sugar for a less refined option.
- Melted Butter – Binds crust ingredients together and adds richness; coconut oil works as a dairy-free substitute.
For the Filling
- Cream Cheese – Main ingredient for the filling, creating a smooth texture; must be softened to room temperature to avoid lumps.
- Sour Cream – Adds richness and a slight tang; Greek yogurt can be used as a lighter alternative.
- Pistachio Pudding Mix – For flavor and creaminess in the filling; substitute with vanilla pudding mix if unavailable.
- Vanilla Extract – Enhances the flavor of the filling; almond extract can be used for a deeper nutty flavor.
For the Topping
- Maraschino Cherries – Topping that provides sweetness and color; fresh cherries can replace maraschino; pat dry to reduce moisture.
Step‑by‑Step Instructions for Cherry Pistachio Cheesecake
Step 1: Preheat the Oven
Begin by preheating your oven to 325°F (165°C). While it’s heating, prepare a 9-inch springform pan by greasing it lightly to ensure easy removal of your cheesecake later on. This step sets the perfect temperature for baking our delicious Cherry Pistachio Cheesecake.
Step 2: Make the Crust
In a mixing bowl, combine 1 ½ cups of graham cracker crumbs, ½ cup of ground pistachios, and ⅓ cup of sugar. Drizzle in ½ cup of melted butter, then mix until everything is well combined. Press this mixture firmly into the bottom of the springform pan. Bake for 8 minutes until lightly golden, then allow it to cool completely.
Step 3: Prepare the Filling
In a large mixing bowl, beat together 16 ounces of softened cream cheese and ¾ cup of granulated sugar until smooth and creamy. Add in 3 large eggs one at a time, mixing gently after each addition. Then, incorporate 1 cup of sour cream, 3.4 ounces of pistachio pudding mix, and 1 teaspoon of vanilla extract, blending until the mixture is fully combined and velvety.
Step 4: Bake the Cheesecake
Pour the creamy filling over the cooled crust and smooth the top evenly with a spatula. Place the springform pan in the preheated oven and bake for 45–50 minutes. The edges should be set, while the center will have a slight jiggle—this is the perfect indication that your Cherry Pistachio Cheesecake is ready.
Step 5: Cool Gradually
Once baked, turn off the oven and crack the door open, letting the cheesecake cool in the residual heat for about 1 hour. This gradual cooling process helps prevent cracks in the surface. Afterward, transfer the cheesecake to the fridge and let it chill for at least 4 hours or, better yet, overnight for maximum flavor.
Step 6: Top and Serve
After chilling, remove the cheesecake from the springform pan. Spread an even layer of maraschino cherry filling over the top. If you like, garnish with crushed pistachios to enhance the visual appeal. Your Cherry Pistachio Cheesecake is now ready to be sliced and enjoyed at your next festive gathering!
Expert Tips for Cherry Pistachio Cheesecake
-
Cream Cheese Care: Ensure cream cheese is at room temperature to avoid lumps in your filling. This small step makes a big difference for a smooth cherry pistachio cheesecake.
-
Gentle Mixing: When adding eggs to the mixture, avoid over-mixing. This helps prevent cracks from forming in your cheesecake during baking.
-
Cooling Technique: Gradual cooling is key. After baking, crack the oven door and leave the cheesecake inside to cool down slowly—this reduces the chances of cracking.
-
Right Pudding Mix: If you’re out of pistachio pudding mix, using vanilla pudding mix is a great alternative—just remember it will slightly alter the flavor profile.
-
Topping Tip: For fresh cherries, ensure they are patted dry before topping the cheesecake to prevent extra moisture from affecting the texture.
-
Make-Ahead Blessing: Consider making this cherry pistachio cheesecake the day before your celebration. Chilling it overnight enhances its flavors and saves time!
Cherry Pistachio Cheesecake Variations
Feel free to get creative with this recipe – your cheesecake can be as unique as you are!
- Nut-Free: Swap ground pistachios for ground almonds to create a nut-free crust without sacrificing flavor.
- Dairy-Free: Use vegan cream cheese and coconut yogurt for the filling, ensuring a delicious alternative for dairy-free friends.
- Fresh Cherries: Substitute maraschino cherries with fresh or frozen cherries for a more natural, vibrant flavor. Let them shine!
- Flavor Boost: Add a touch of almond extract instead of vanilla for a fragrant twist that beautifully complements the cherry flavor.
- Chocolate Lover’s Delight: Fold in some mini chocolate chips to the filling for a rich, decadent surprise in each bite.
- Mini Cheesecakes: Divide crust and filling into muffin tins for adorable mini cheesecakes; perfect for parties!
- Graham Swap: Try using crushed Oreo cookies instead of graham cracker crumbs for a chocolatey interpretation of this classic dessert.
- Festive Touch: Top with caramel sauce and a sprinkle of sea salt for that sweet-salty balance every dessert dreams of!
With the flexibility of this recipe, you can effortlessly adapt it to fit your tastes or dietary needs. Why not try serving it along with our delightful Pumpkin Cheesecake Balls or Cheesecake Stuffed Apples for a stunning dessert spread? Your loved ones will be utterly impressed!
How to Store and Freeze Cherry Pistachio Cheesecake
Fridge: Keep your leftover Cherry Pistachio Cheesecake tightly covered in the refrigerator for up to 5 days to maintain its lush texture and flavor.
Freezer: If you have leftovers or want to prepare it ahead of time, freeze your cheesecake for up to 2 months. Wrap it thoroughly in plastic wrap and aluminum foil to prevent freezer burn.
Thawing: When ready to enjoy, transfer the frozen cheesecake to the fridge to thaw overnight. This gentle thawing keeps the texture creamy and delicious.
Reheating: Serve chilled directly from the fridge; there’s no need to heat your cheesecake. It’s best enjoyed cold, showcasing its delightful flavors!
Make Ahead Options
This Cherry Pistachio Cheesecake is perfect for busy home cooks looking to save time while still impressing their guests! You can prepare the crust (graham cracker crumbs, ground pistachios, sugar, and melted butter) and store it in an airtight container for up to 3 days. The filling can also be made in advance; simply combine the ingredients and refrigerate it in a bowl for up to 24 hours. When you’re ready to bake, just pour the filling over the crust and bake as instructed. To maintain the cheesecake’s creamy texture and flavor, always cover it well while refrigerating. Once chilled and ready to serve, add the cherry topping just before your gathering for a fresh, beautiful presentation!
What to Serve with Cherry Pistachio Cheesecake
Elevate your Cherry Pistachio Cheesecake experience by pairing it with these delightful accompaniments that balance flavors and textures.
-
Light Whipped Cream: Adds a fluffy, airy element that contrasts beautifully with the dense cheesecake. A dollop of freshly whipped cream complements the rich flavors beautifully.
-
Fresh Berries: Berries like raspberries or blueberries introduce a tartness that cuts through the cheesecake’s sweetness, adding a refreshing touch.
-
Pistachio Brittle: This crunchy candy enhances the nutty pistachio flavor while providing a delightful crunch that contrasts with the creamy filling.
-
Citrus Sorbet: A scoop of lemon or orange sorbet offers a refreshing, zesty contrast to the richness of the cheesecake, making every bite feel light and balanced.
-
Vanilla Bean Ice Cream: The classic vanilla flavor pairs well, creating a warm and comforting combination that resonates with many dessert lovers.
-
Coffee or Espresso: A cup of strong coffee enhances the dessert experience, with its rich bitterness providing a perfect balance to the sweetness of the cheesecake.
-
Chocolate Ganache Drizzle: For a touch of luxury, a warm chocolate ganache adds richness and depth, making each slice even more indulgent.
-
Sparkling Wine or Champagne: These bubbly beverages add an element of celebration, their effervescence cutting through the cheesecake’s creaminess with each sip.
Cherry Pistachio Cheesecake Recipe FAQs
What type of cherries should I use for the topping?
You can use maraschino cherries for a sweet flavor, or opt for fresh cherries for a more vibrant, natural taste. If using fresh, make sure to pat them dry before topping the cheesecake to avoid excess moisture that can affect the texture.
How should I store the Cherry Pistachio Cheesecake?
To store your cheesecake, cover it tightly with plastic wrap or aluminum foil and keep it in the refrigerator for up to 5 days. This ensures that it retains its beautiful texture and flavor. If you want to keep it longer, you can store it in the freezer.
Can I freeze Cherry Pistachio Cheesecake?
Absolutely! You can freeze your cheesecake for up to 2 months. To do this, wrap it tightly in plastic wrap and then in aluminum foil to protect it from freezer burn. Defrost it overnight in the fridge before serving, and enjoy the creamy delight!
What can I do if my cheesecake cracks during baking?
If your cheesecake cracks, don’t worry—it’s still delicious! To minimize cracks, make sure to mix gently after adding eggs and allow the cheesecake to cool gradually in the oven with the door ajar after baking. For a final touch, you can sprinkle crushed pistachios over the cracks to hide them beautifully!
Is this cheesecake suitable for people with nut allergies?
You can make a nut-free version of this Cherry Pistachio Cheesecake by swapping out the ground pistachios in both the crust and filling with an alternative like ground almonds or simply using additional graham cracker crumbs. Always check your ingredients to ensure they are nut-free!
Can I make this cheesecake ahead of time?
Yes! You can absolutely make this cheesecake a day in advance to improve its flavor. Simply follow all the steps, refrigerate it overnight, and it’ll be ready to impress your guests the next day.
Decadent Cherry Pistachio Cheesecake for Festive Celebrations
Ingredients
Equipment
Method
- Preheat your oven to 325°F (165°C) and prepare a 9-inch springform pan by greasing it lightly.
- In a mixing bowl, combine graham cracker crumbs, ground pistachios, and sugar. Mix in melted butter, press into the pan, and bake for 8 minutes.
- In a large mixing bowl, beat cream cheese and sugar until smooth. Add eggs one at a time, then mix in sour cream, pistachio pudding mix, and vanilla extract.
- Pour the filling over the cooled crust and smooth the top. Bake for 45–50 minutes until the edges are set and center jiggles slightly.
- Once baked, turn off the oven and crack the door. Let the cheesecake cool in the oven for 1 hour, then chill in the fridge for at least 4 hours or overnight.
- Remove the cheesecake from the pan, spread maraschino cherries on top, and garnish with crushed pistachios if desired before serving.
Leave a Reply