
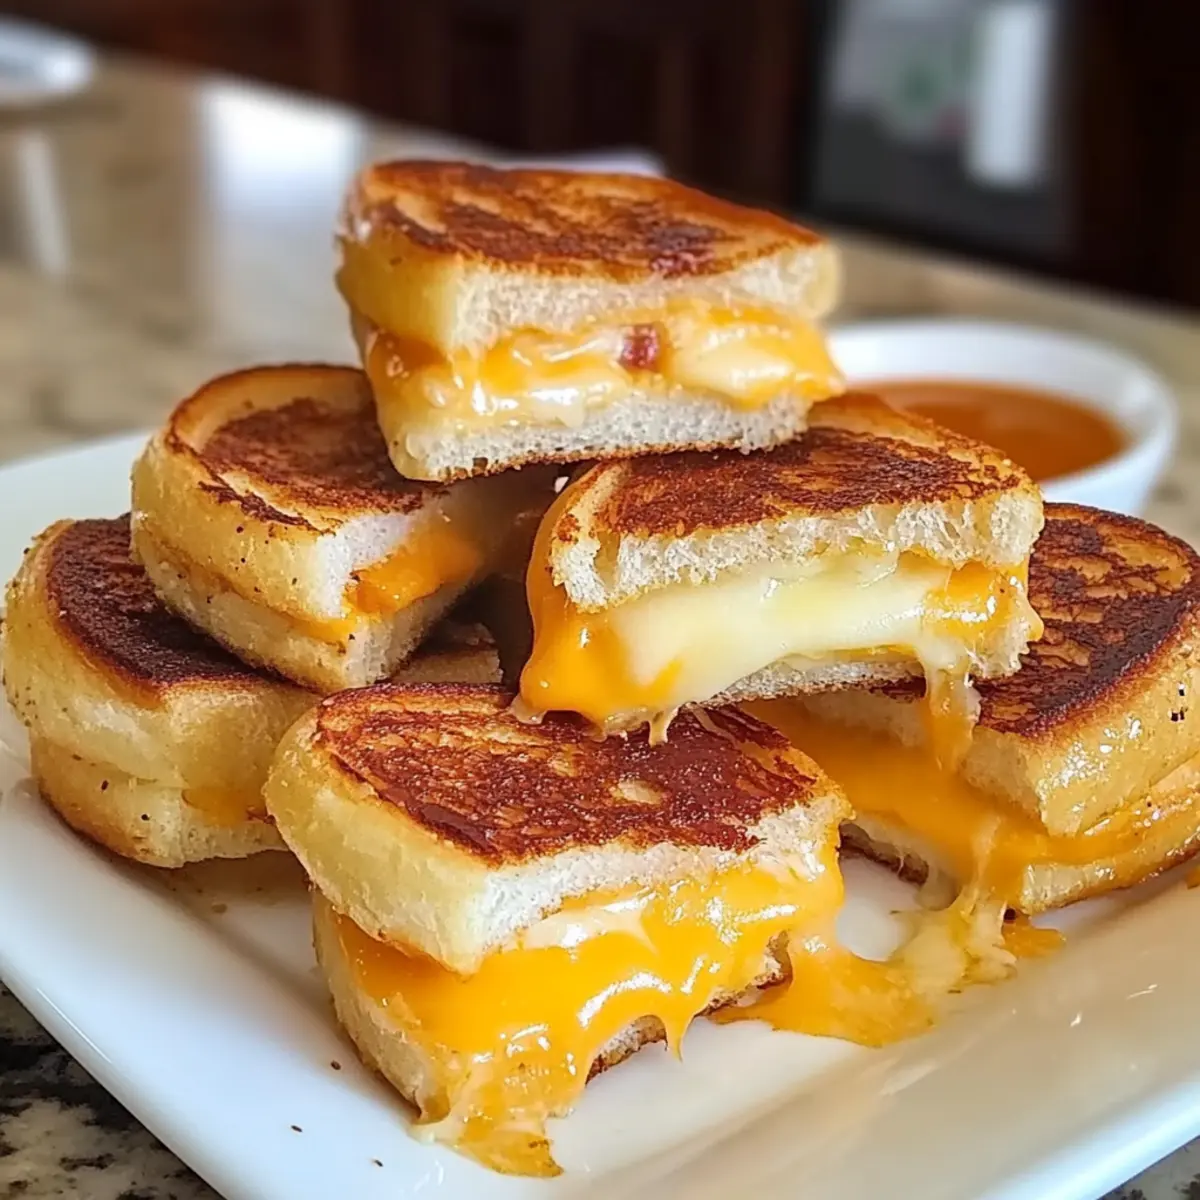
Walking through a cozy café, I was drawn in by the irresistible aroma of butter and melting cheese—a heavenly combination that instantly felt like a warm hug. Today, I’m excited to share my version of that comfort: Mini Grilled Cheese Hawaiian Rolls. This quick and easy recipe transforms sweet Hawaiian rolls into delightful bites that are crispy on the outside and gooey on the inside, making them perfect for any gathering or a family dinner. Plus, they’re incredibly customizable; simply swap in your favorite types of bacon and cheese to create your unique flavor profiles. With minimal prep time and cleanup, these mouthwatering Mini Grilled Cheese Hawaiian Rolls are sure to become a go-to comfort food in your kitchen! Are you ready to impress your friends and family with these cozy bites? Let’s dive in!
Why Are These Bites So Irresistible?
Comforting Bliss: These Mini Grilled Cheese Hawaiian Rolls combine soft, sweet rolls with melty cheese for a delightful twist on a classic favorite.
Quick Prep: Enjoy this recipe in under 30 minutes, making it perfect for busy weeknights or spontaneous gatherings.
Customizable Creations: Feel free to personalize your dish by swapping cheeses like mozzarella or cheddar, or experimenting with different types of bacon, just like you would with a Pumpkin Cheese Ball.
Crowd-Pleasing Snack: Whether you’re watching a movie or hosting a party, these little bites are sure to please fans of all ages.
Minimal Cleanup: With just a few ingredients and simple steps, you’ll spend less time in the kitchen and more time enjoying your delicious creation!
Mini Grilled Cheese Hawaiian Rolls Ingredients
For the Rolls
- Hawaiian Rolls – The soft and slightly sweet base that makes these bites extra special.
For the Cheese
- Cheddar Cheese – Offers a creamy melt; consider mixing with mozzarella for extra gooeyness.
- Mozzarella Cheese – Adds delightful stretch; pairing with cheddar enhances the melting experience.
For the Protein
- Turkey Bacon/Beef Bacon/Chicken Bacon – A flavorful protein option; can easily replace traditional pork bacon based on preference.
For the Flavor
- Butter – Essential for browning and flavoring; try adding garlic powder and herbs for a gourmet touch.
- Garlic Powder – Brings an aromatic depth; optional based on your taste.
- Onion Powder – Elevates the savory profile; feel free to adjust according to preference.
- Herbs (e.g., parsley, Italian seasoning) – Adds a fragrant freshness; use as per your taste.
These Mini Grilled Cheese Hawaiian Rolls are not only comforting but also highly customizable, making them a hit at any gathering!
Step‑by‑Step Instructions for Mini Grilled Cheese Hawaiian Rolls
Step 1: Prepare Rolls
Begin by preheating your oven to 350°F (175°C). While it’s warming up, carefully slice your Hawaiian rolls horizontally, ensuring not to separate the halves completely. This creates a cozy sandwich structure for your Mini Grilled Cheese Hawaiian Rolls. Place them on a baking tray lined with parchment paper for easy cleanup.
Step 2: Layer Ingredients
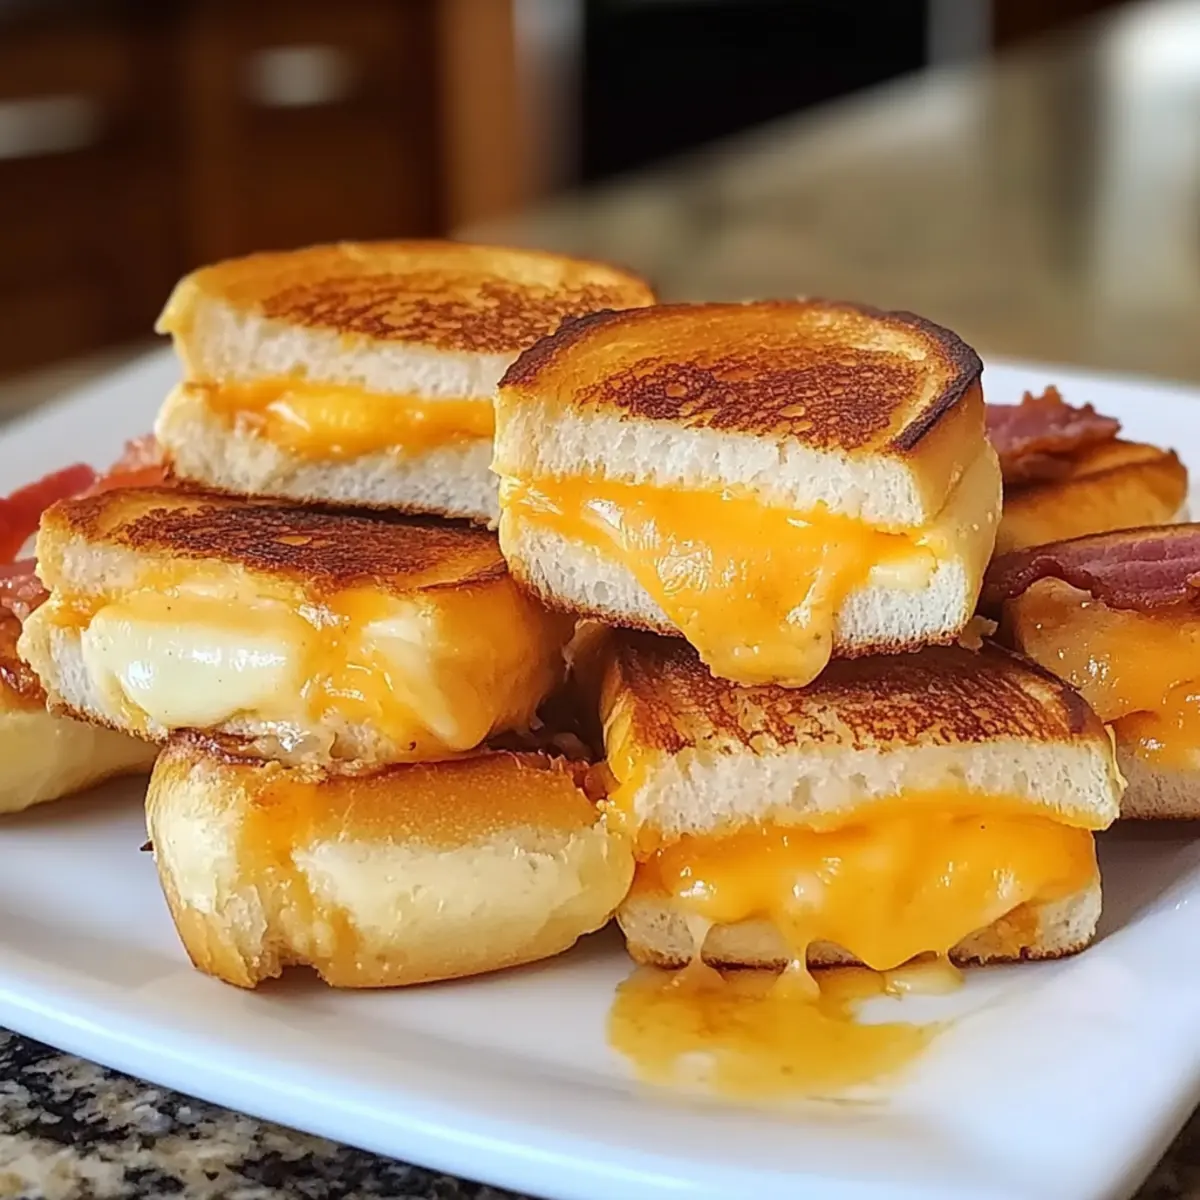
Take the bottom half of each Hawaiian roll and generously layer it with a mix of cheddar and mozzarella cheese. If you’re adding your choice of bacon—be it turkey, beef, or chicken—now’s the time to sprinkle it evenly over the cheese. The goal is to create a deliciously gooey filling that will melt beautifully as it bakes.
Step 3: Finalize Preparation
Once your cheese and bacon are layered, gently place the top halves of the Hawaiian rolls back on. In a small bowl, melt some butter and, if desired, mix in garlic powder, onion powder, or herbs for added flavor. Brush this seasoned butter generously over the tops of the rolls to enhance browning and flavor.
Step 4: Bake
Cover your baking tray with aluminum foil to prevent drying out and help the cheese melt evenly. Slide the tray into your preheated oven and bake for about 15 minutes. Halfway through, check to see if the cheese is getting melty. Remove the foil for the last 5 minutes to let the tops turn golden brown and crispy.
Step 5: Serve
Once your Mini Grilled Cheese Hawaiian Rolls are beautifully golden and the cheese is perfectly gooey, take them out of the oven. For an extra touch of flavor, brush on a little more melted butter while they’re warm. If you like, slice them into smaller portions for easy serving, and get ready to share these cozy bites with family and friends!

Storage Tips for Mini Grilled Cheese Hawaiian Rolls
- Room Temperature: Keep leftover Mini Grilled Cheese Hawaiian Rolls at room temperature for up to 2 hours to maintain freshness. After that, transfer them to the fridge to avoid spoilage.
- Fridge: Store any leftover rolls in an airtight container in the refrigerator for up to 3 days. This will help preserve their gooey texture and flavor.
- Freezer: For longer storage, freeze Mini Grilled Cheese Hawaiian Rolls in a sealed freezer bag for up to 1 month. Wrap each roll individually for easier reheating later.
- Reheating: To reheat, place frozen rolls directly in a preheated oven at 350°F (175°C) for 10-15 minutes until warmed through and crispy again. Avoid microwaving, as it can make the rolls tough.
Expert Tips for Mini Grilled Cheese Hawaiian Rolls
- Press Down Gently: Lightly press the rolls down before baking to avoid cheese pooling and ensure a perfect melt.
- Use Foil Wisely: Cover the baking pan with foil for even melting; remove it towards the end for a crisp, golden top.
- Avoid Tough Leftovers: Instead of microwaving, reheat leftover rolls in the oven to keep them soft and gooey.
- Make Ahead Magic: Prepare the rolls up to 24 hours in advance, then refrigerate before baking for a quick meal anytime.
- Experiment with Cheeses: Don’t hesitate to swap in different cheeses like provolone or Gouda for unique flavor experiences in your Mini Grilled Cheese Hawaiian Rolls.
Mini Grilled Cheese Hawaiian Rolls Variations
Feel free to let your creativity flow as you customize these delightful little rolls into your family’s favorites!
-
Cheese Swap: Experiment with different cheeses like provolone or gouda for a twist on flavor. Imagine the rich, buttery goodness of gouda melting inside, elevating each bite!
-
Meat Options: Try swapping in grilled chicken or shredded beef brisket instead of bacon for a hearty change. This will truly make the rolls a meal on their own.
-
Herb Infusions: Add fresh herbs like basil or dill to your butter mix for an aromatic kick. Just a sprinkle can transport your rolls straight to a sunny Italian garden!
-
Spicy Kick: If you crave heat, toss in some jalapeños or pepper jack cheese. The combination of sweet rolls and a spicy cheese will excite your taste buds!
-
Veggie Lover: Load up on thinly sliced veggies like tomatoes, spinach, or roasted peppers for a veggie-packed version. The freshness adds color and nutrition, making these rolls even more irresistible.
-
Sweet Treat Variation: For a fun dessert twist, use nut butter and banana slices between the rolls. Grilling them will create a warm, gooey delight perfect for any snack attack!
-
Garlic Bread Style: Sprinkle garlic powder and a pinch of salt onto the butter before brushing it on. This will create a garlicky, aromatic crust reminiscent of your favorite garlic bread!
-
Dipping Sauces: Pair these mini rolls with homemade marinara, spicy ketchup, or even ranch for a fun and interactive meal. The dipping adds an extra layer of fun while eating these cozy bites!
Elevate your dining experience with these variations while keeping it simple and delightful, just like a comforting Broccoli Cheese Soup!
Make Ahead Options
These Mini Grilled Cheese Hawaiian Rolls are a fantastic option for meal prep, allowing you to save time on busy nights! You can assemble the rolls up to 24 hours in advance by layering the cheese and bacon inside, then wrapping them tightly in plastic wrap or placing them in an airtight container in the refrigerator to prevent the bread from drying out. When you’re ready to serve, simply brush the tops with seasoned butter and bake as directed. For an even quicker option, you can prepare the filling (cheese and bacon) and store it separately. This way, you’ll enjoy fresh, gooey rolls with minimal effort and just as much deliciousness!
What to Serve with Mini Grilled Cheese Hawaiian Rolls?
These delightful bites are perfect for creating a heartwarming and satisfying meal that everyone will love.
-
Creamy Tomato Soup: The classic pairing enhances the gooey cheese, making for a cozy dip that warms the soul. Picture dipping each melty bite into the rich, tangy soup.
-
Crisp Garden Salad: A refreshing salad with vibrant greens and crunchy vegetables adds a nice contrast to the rich flavors, balancing each bite perfectly.
-
Vegetable Medley: A sautéed mix of colorful vegetables adds texture and a touch of sweetness, enhancing the meal without overshadowing the star of the show.
-
Fruit Salad: A light, sweet fruit salad provides a refreshing palate cleanser between bites, complementing the savory richness of the rolls.
-
Homemade Ranch Dip: Offer a tangy ranch dip on the side for those who enjoy a little extra flavor; it’s a fun addition that turns your meal into a snack feast!
-
Sparkling Lemonade: A chilled glass of fizzy lemonade adds a zesty, refreshing element to your meal, keeping the atmosphere light and enjoyable.
-
Potato Wedges: Crispy potato wedges give a satisfying crunch and heartiness to your meal, perfect for those who crave that extra texture.
-
Apple Slices with Peanut Butter: For a fun dessert, serving crisp apple slices with creamy peanut butter offers a delightful end to your meal, balancing sweetness and richness.
Mini Grilled Cheese Hawaiian Rolls Recipe FAQs
What kind of Hawaiian rolls should I use?
Absolutely! For the best results, use soft, sweet Hawaiian rolls, which provide a cozy base for your Mini Grilled Cheese Hawaiian Rolls. Look for rolls that are fresh and have no dark spots or signs of dryness to ensure a delightful texture.
How long can I store leftover Mini Grilled Cheese Hawaiian Rolls?
Very! You can store any leftover rolls in an airtight container in the refrigerator for up to 3 days. To maintain their gooey delight, ensure they are completely cooled before sealing.
Can I freeze these rolls for later?
Absolutely! To freeze your Mini Grilled Cheese Hawaiian Rolls, wrap each roll individually in plastic wrap and then place them inside a sealed freezer bag. This method helps prevent freezer burn and keeps them fresh for up to 1 month. When you’re ready to enjoy, simply reheat them in a preheated oven at 350°F (175°C) for 10-15 minutes to restore their crispy exterior.
What are some common troubleshooting tips for making these rolls?
If you notice that the cheese is pooling out rather than melting evenly, try gently pressing the rolls down before baking. Additionally, if the tops aren’t turning golden brown, removing the foil for the last few minutes of baking can help achieve that desired crispy finish.
Are there dietary considerations I should keep in mind when making these Mini Grilled Cheese Hawaiian Rolls?
Definitely! If you’re making these for guests, consider checking for allergies related to dairy (cheese), gluten (rolls), or pork (ham/bacon). You can easily substitute with gluten-free rolls and choose turkey, beef, or chicken bacon to cater to specific dietary needs. Always enjoy the cooking process while keeping everyone’s preferences in mind!
Can I prepare these ahead of time?
Yes, indeed! You can assemble the Mini Grilled Cheese Hawaiian Rolls up to 24 hours in advance. Just cover them with plastic wrap and refrigerate until you’re ready to bake. This makes for a quick meal solution on busy days!

Mini Grilled Cheese Hawaiian Rolls: Cozy Bites for Everyone
Ingredients
Equipment
Method
- Preheat your oven to 350°F (175°C). Slice the Hawaiian rolls horizontally, but do not separate the halves completely. Place them on a baking tray lined with parchment paper.
- Layer the bottom half of each roll with cheddar and mozzarella cheese. Add your chosen bacon on top of the cheese.
- Place the top halves back on the rolls. Melt the butter and mix in garlic powder, onion powder, or herbs if desired. Brush this mixture over the tops of the rolls.
- Cover the tray with aluminum foil and bake for about 15 minutes. Check halfway through; remove the foil for the last 5 minutes to crisp the tops.
- Remove from oven when golden and cheese is gooey. Optionally brush more melted butter on top and slice into smaller portions for serving.
Leave a Reply