
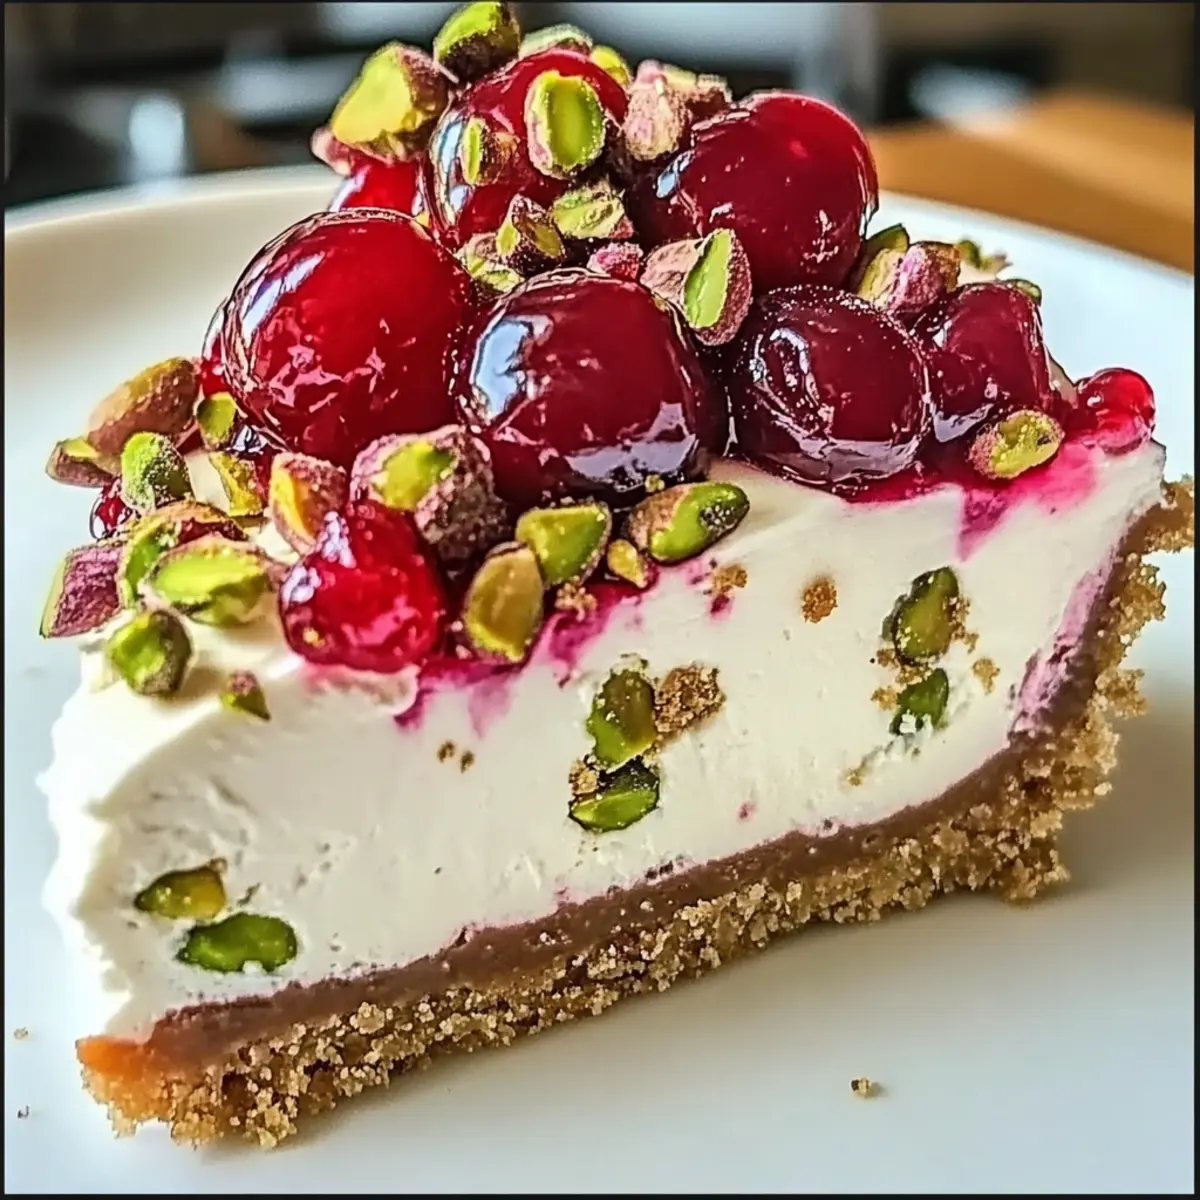
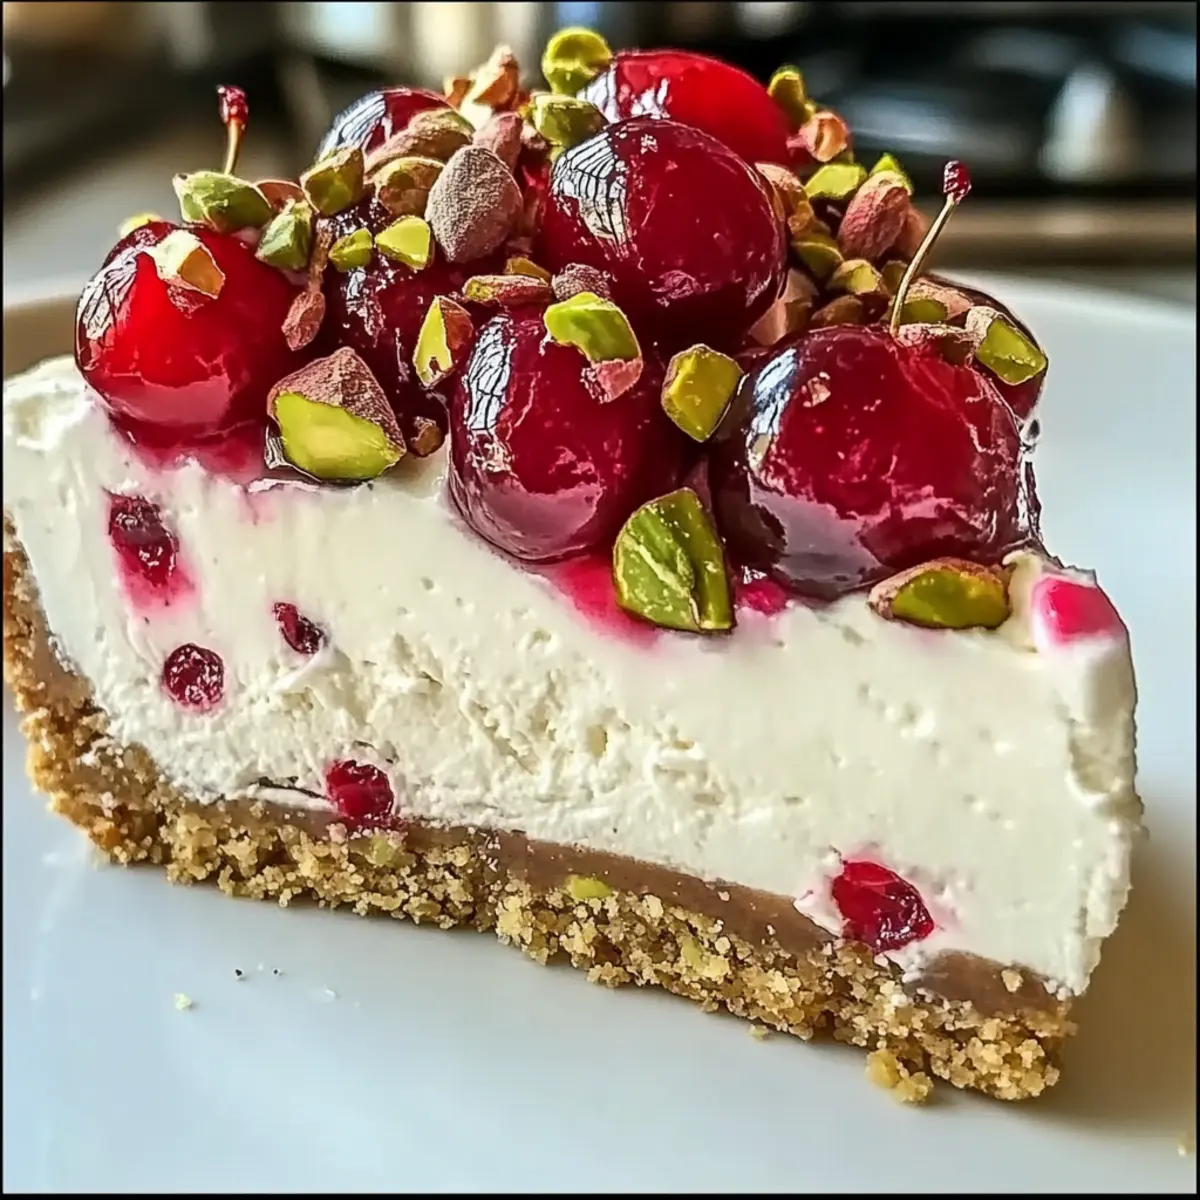
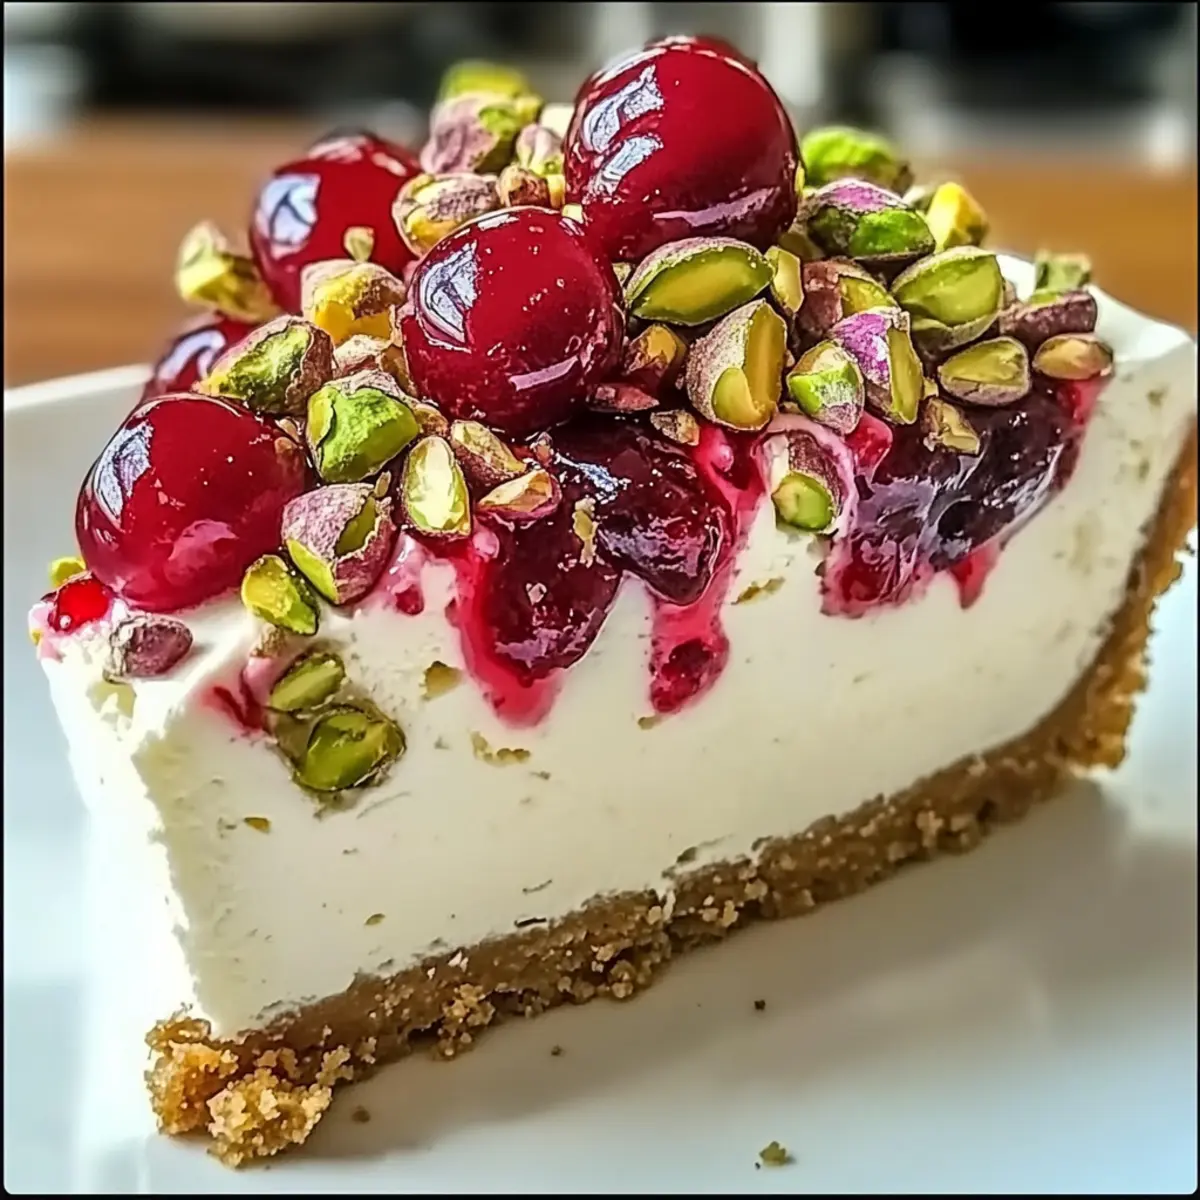
The moment I took my first bite of Cherry Pistachio Cheesecake, I was whisked away to a festive gathering, surrounded by laughter and the warmth of family. This creamy delight harmonizes the sweet-tart notes of maraschino cherries with the buttery crunch of pistachios, making it not just a dessert but a show-stopping centerpiece for any special occasion. What I love most about this cheesecake is how effortlessly it comes together; you’ll look like a pro in the kitchen without the stress! Plus, it’s the kind of treat that brings everyone together, making it a perfect way to celebrate life’s sweet moments. Curious about how to create this lush, unforgettable dessert? Let’s dive into the recipe that will have everyone asking for seconds!
Why is Cherry Pistachio Cheesecake a Must-Bake?
Irresistible Fusion: This dessert perfectly balances sweet-tart maraschino cherries with nutty pistachios.
Show-Stopping Presentation: Its vibrant colors make it an eye-catching centerpiece for any gathering.
Quick and Easy: The recipe comes together effortlessly, so anyone can shine in the kitchen!
Versatile Enjoyment: Perfect for holidays, birthdays, or just a sweet treat after dinner. Pair it with a scoop of vanilla ice cream or some fresh whipped cream for an exquisite experience!
Unforgettable Flavor: Each slice offers a harmonious blend of creamy texture and delightful crunch that will have your guests raving! Don’t miss out on this delightful Cherry Pistachio Cheesecake—you can even explore variations or try similar treats like Pistachio White Chocolate Cheesecake or Pumpkin Cheesecake Balls for more delicious ideas!
Cherry Pistachio Cheesecake Ingredients
• The perfect foundation for your show-stopping dessert begins here!
For the Crust
- Graham Cracker Crumbs – Provides a sweet and crunchy base; substitute with gluten-free graham crackers for a gluten-free option.
- Ground Pistachios – Adds nutty flavor and texture to the crust; chopped almonds will work well too.
- Granulated Sugar – Sweetens the crust; brown sugar can deepen the flavor profile.
- Melted Butter – Binds the crust ingredients; coconut oil can be used for a dairy-free alternative.
For the Filling
- Cream Cheese – Creates the luscious, creamy filling; low-fat cream cheese is a lighter option.
- Granulated Sugar – Adds sweetness to the filling; consider a sugar substitute for lower sugar options.
- Large Eggs – Provides structure and richness; egg replacers make it vegan-friendly.
- Sour Cream – Enhances creaminess and tang; Greek yogurt offers a healthier swap.
- Pistachio Pudding Mix – Adds flavor and helps set the filling; natural thickeners can be used as a substitute.
- Vanilla Extract – Enhances flavor; try almond extract for an intensified nutty taste.
For the Topping
- Cherry Pie Filling – Serves as a sweet-tart topping; fresh cherries can bring a delightful twist.
- Chopped Pistachios – Optional garnish that enhances both presentation and flavor.
Get ready to impress your family and friends with this irresistible Cherry Pistachio Cheesecake!
Step‑by‑Step Instructions for Cherry Pistachio Cheesecake
Step 1: Preheat the Oven
Begin by preheating your oven to 325°F (165°C). While that’s warming up, take your 9-inch springform pan and coat it with a layer of grease or line it with parchment paper. This ensures your delicious Cherry Pistachio Cheesecake will glide right out after baking!
Step 2: Make the Crust
In a mixing bowl, combine graham cracker crumbs, ground pistachios, sugar, and melted butter until well blended. Press this mixture firmly into the bottom of your prepared springform pan, creating an even layer. Bake the crust in your preheated oven for about 8 minutes, until it’s golden brown, and then allow it to cool completely.
Step 3: Prepare the Filling
In a large mixing bowl, beat the softened cream cheese and granulated sugar together until smooth and creamy. This should take about 2-3 minutes. Gradually add eggs one at a time, mixing just until combined, then fold in the sour cream, pistachio pudding mix, and vanilla extract until your filling is silky and well incorporated.
Step 4: Bake the Cheesecake
Pour the cheesecake filling over the cooled crust, spreading it evenly with a spatula. Place your cheesecake in the oven and bake for 45-50 minutes. The edges should look set, while the center remains slightly jiggly—it will firm up as it cools.
Step 5: Cooling Process
Once the baking time is up, turn off the oven but keep the cheesecake inside with the door slightly ajar. Let it cool gradually for about 1 hour. This step is crucial for preventing cracks in your beautiful Cherry Pistachio Cheesecake!
Step 6: Chill the Cheesecake
After the initial cooling, transfer the cheesecake to the refrigerator and chill for at least 4 hours, or ideally overnight. This extended chill time allows the flavors to meld and gives the cheesecake its signature creamy texture.
Step 7: Top and Serve
Before serving, gently spread the cherry pie filling over the top of the chilled cheesecake. For an extra touch of elegance, sprinkle the top with chopped pistachios. You’re now ready to slice and serve your stunning Cherry Pistachio Cheesecake, delighting everyone at the gathering!
Make Ahead Options
These Cherry Pistachio Cheesecakes are a fantastic choice for meal prep enthusiasts! You can prepare the crust and filling up to 24 hours in advance to save time on baking day. For optimal results, complete Steps 1 and 2, then refrigerate the crust until you’re ready to bake the filling. Once the cheesecake is baked and cooled, it can be kept in the refrigerator for up to 3 days. To maintain quality, avoid adding the cherry topping until just before serving, as this will prevent the crust from getting soggy. When ready to impress your guests, simply spread on the cherry pie filling, garnish with chopped pistachios, and serve your stunning Cherry Pistachio Cheesecake!
Storage Tips for Cherry Pistachio Cheesecake
Fridge: Store leftover Cherry Pistachio Cheesecake in an airtight container for up to 5 days. The flavors deepen after a day, making it even more delicious!
Freezer: This cheesecake can be frozen for up to 2 months. Wrap it tightly in plastic wrap and aluminum foil to prevent freezer burn before freezing.
Thawing: To enjoy your frozen cheesecake, transfer it to the refrigerator a day before serving to thaw gently. This helps maintain its creamy texture.
Reheating: If you prefer enjoying it slightly warm, you can pop individual slices in the microwave for about 10-15 seconds. Enjoy the delightful blend of flavors!
What to Serve with Cherry Pistachio Cheesecake?
Create an unforgettable dining experience by pairing this luscious dessert with delightful accompaniments that enhance its rich flavors.
- Whipped Cream: A light, airy topping that adds a creamy counterpoint to the cheesecake’s richness, perfect for that extra indulgence.
- Fresh Berries: Plump raspberries or strawberries provide a fresh, tart contrast, balancing the sweetness of the cheesecake beautifully.
- Chocolate Sauce: Drizzling a rich chocolate sauce over the cheesecake adds a decadent twist, making it even more irresistible.
- Mint Leaves: A sprig of fresh mint not only garnishes the cheesecake but also adds a refreshing aroma that enhances every bite.
- Citrus Zest: Sprinkling lemon or orange zest intensifies the citrus notes in the cheesecake and brightens the palate.
- Coffee or Espresso: A warm cup of brewed coffee complements the dessert perfectly, enhancing its flavors and providing a rich sensory experience.
- Vanilla Ice Cream: The creaminess of vanilla ice cream pairs wonderfully with the cheesecake, creating a delightful contrast in texture.
- Pistachio Crust Cookies: Serve alongside or as a fun side treat to tie in those nutty flavors seamlessly.
- Sparkling Water with Lime: A light, bubbly drink refreshes the palate between bites, making each slice of cheesecake more enjoyable.
Cherry Pistachio Cheesecake Variations
Feel free to explore these delightful variations that will put a unique spin on your classic Cherry Pistachio Cheesecake and tickle your taste buds!
-
Fresh Cherries: Swap out maraschino cherries for fresh ones for a vibrant, seasonal twist that enhances the natural flavors.
-
Nut-Free Delight: Omit pistachios entirely for a nut-free cheesecake. Use crushed cookies or oats for an equally enticing crust!
-
Mini Cheesecakes: Create individual servings by pouring the batter into muffin tins, adjusting the baking time to 18-22 minutes for easy grab-and-go treats.
-
Chocolate Indulgence: Add a layer of chocolate ganache on top of your cheesecake for a rich, luscious contrast that pairs perfectly with fruit flavors.
-
Zesty Citrus: Incorporate lemon or orange zest into the filling for a refreshing citrus burst that brightens every bite—perfect for warm days!
-
Spiced Variation: Add a pinch of cinnamon or nutmeg to the crust for a warm, cozy flavor; it’s reminiscent of holiday baking traditions!
-
Berry Compote: Swap the cherry pie filling for a homemade berry compote made with blueberries or raspberries to add a delightful tartness.
-
Vegan Adaptation: Use coconut cream in place of cream cheese and your favorite egg replacer to whip up a dairy-free version that everyone will love.
Consider pairing your cheesecake with a scoop of vanilla bean ice cream or exploring other desserts like Pumpkin Cheesecake Balls to satisfy all your dessert cravings!
Expert Tips for Cherry Pistachio Cheesecake
- Room Temperature Cream Cheese: Ensure your cream cheese is at room temperature before mixing to avoid lumps that detract from the cheesecake’s creamy filling.
- Respect Mixing Time: Avoid overmixing the batter after adding eggs. This simple step prevents cracks and ensures a smooth finish for your Cherry Pistachio Cheesecake.
- Gradual Cooling: Always cool the cheesecake slowly in the oven with the door ajar after baking to minimize risk of cracks—patience is key!
- Fresh Cherries Prep: If you choose to use fresh cherries, make sure to dry them thoroughly to eliminate excess moisture, ensuring the perfect texture of your cheesecake.
- Chill to Perfection: Don’t rush the chilling process. Allow your cheesecake to chill for at least 4 hours, or overnight if possible, to fully develop rich flavors and achieve the desired consistency.
Cherry Pistachio Cheesecake Recipe FAQs
How do I select ripe cherries for the topping?
Absolutely! When choosing cherries, look for firm, plump ones with a deep red color. Avoid cherries with dark spots or those that feel soft. If you’re using maraschino cherries, simply pick a jar that has bright, vibrant cherries without signs of discoloration. Freshness makes a significant difference in flavor!
What is the best way to store leftover cheesecake?
Very good question! Store your Cherry Pistachio Cheesecake in an airtight container in the refrigerator for up to 5 days. The flavors actually deepen as it sits, so the second day might be even tastier! Just make sure to cover it well to keep it fresh.
Can I freeze Cherry Pistachio Cheesecake, and how?
Of course! This cheesecake can be frozen for up to 2 months. To freeze, wrap it tightly in plastic wrap and then in aluminum foil to prevent freezer burn. When you’re ready to enjoy it, let it thaw gently in the refrigerator overnight. This helps maintain its creamy texture and flavor!
What should I do if my cheesecake cracks during baking?
Common concern! If your cheesecake cracks, don’t worry; it can happen even to the best of us. To avoid this, make sure to cool your cheesecake gradually by letting it sit in the oven with the door slightly ajar for about an hour after baking. If you do find cracks, you can confidently cover them with cherry pie filling or whipped cream to make them less noticeable—no one will even notice!
Does this recipe contain any allergens I should be aware of?
Great question! This Cherry Pistachio Cheesecake contains gluten, eggs, and dairy. If you have allergies, you can make substitutions: use gluten-free graham crackers, egg replacers like applesauce or flaxseed for the eggs, and low-fat cream cheese or a dairy-free alternative for the creamy filling. Always check labels for potential allergens if you’re serving someone with dietary restrictions.
Can I substitute ingredients for a lighter version of this cheesecake?
Absolutely! For a lighter Cherry Pistachio Cheesecake, consider using low-fat cream cheese and Greek yogurt instead of sour cream. You can also cut down on sugar by halving the granulated sugar or using a natural sugar substitute. These simple swaps will maintain the delightful essence while reducing calories. Enjoy experimenting!

Delightful Cherry Pistachio Cheesecake for Every Celebration
Ingredients
Equipment
Method
- Preheat your oven to 325°F (165°C). Grease or line a 9-inch springform pan with parchment paper.
- In a mixing bowl, combine graham cracker crumbs, ground pistachios, sugar, and melted butter until well blended. Press mixture into the bottom of the prepared pan. Bake for 8 minutes and allow to cool.
- Beat softened cream cheese and granulated sugar together in a large bowl until smooth. Gradually add eggs, mixing until combined. Fold in sour cream, pistachio pudding mix, and vanilla.
- Pour the filling over the cooled crust. Bake for 45-50 minutes until the edges are set, and the center is slightly jiggly.
- Turn off the oven and let the cheesecake cool inside with the door slightly ajar for 1 hour to prevent cracks.
- Transfer to the refrigerator and chill for at least 4 hours or overnight.
- Spread cherry pie filling over the top of the chilled cheesecake and sprinkle with chopped pistachios before serving.
Leave a Reply