
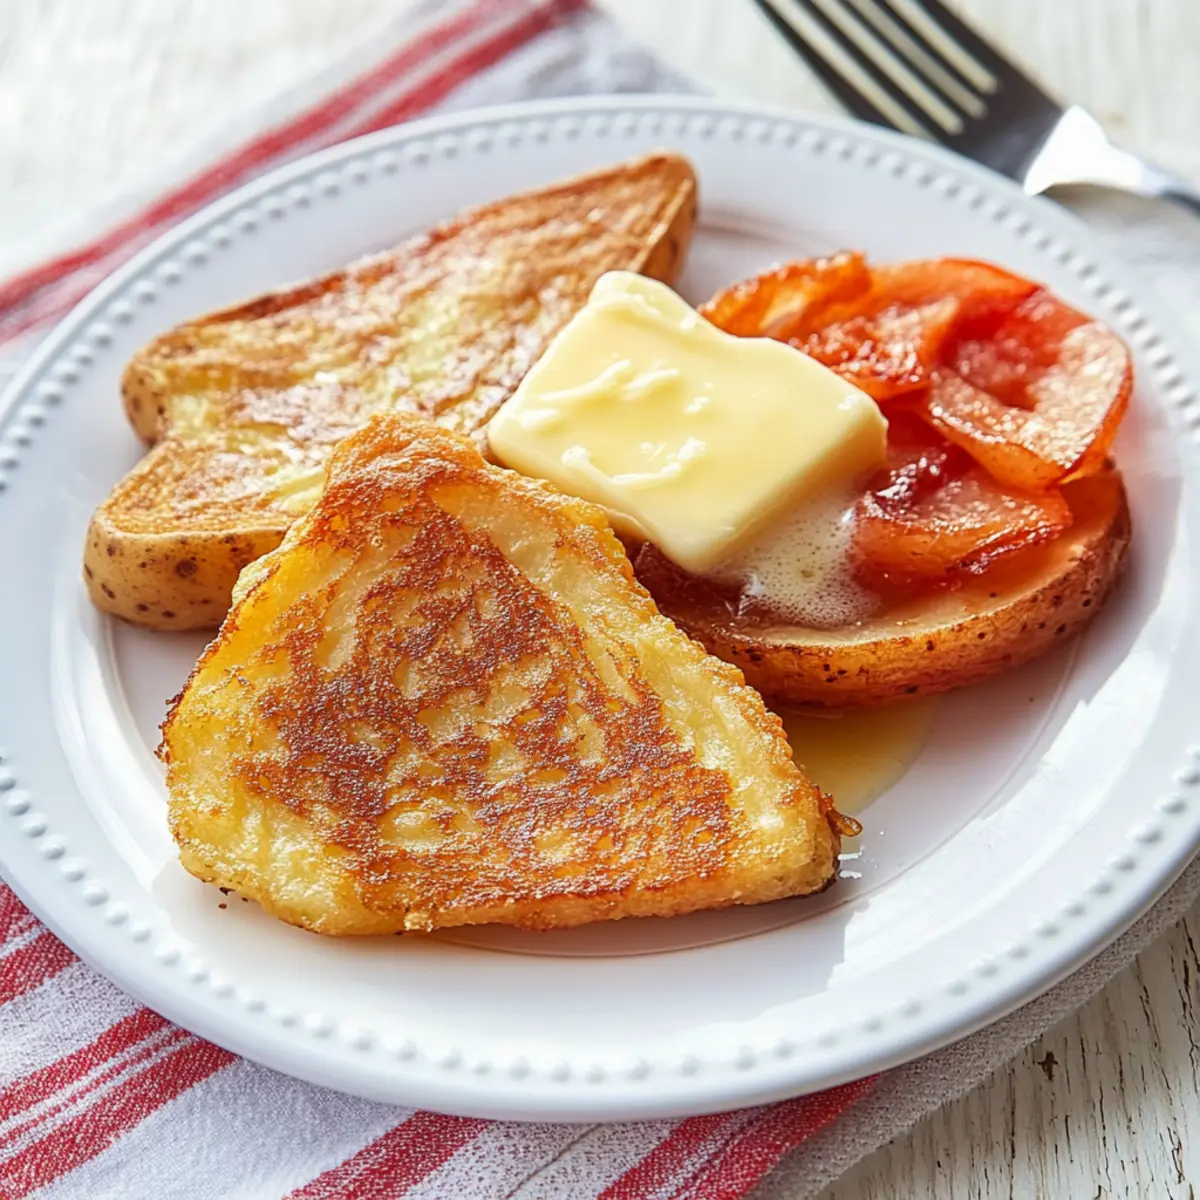
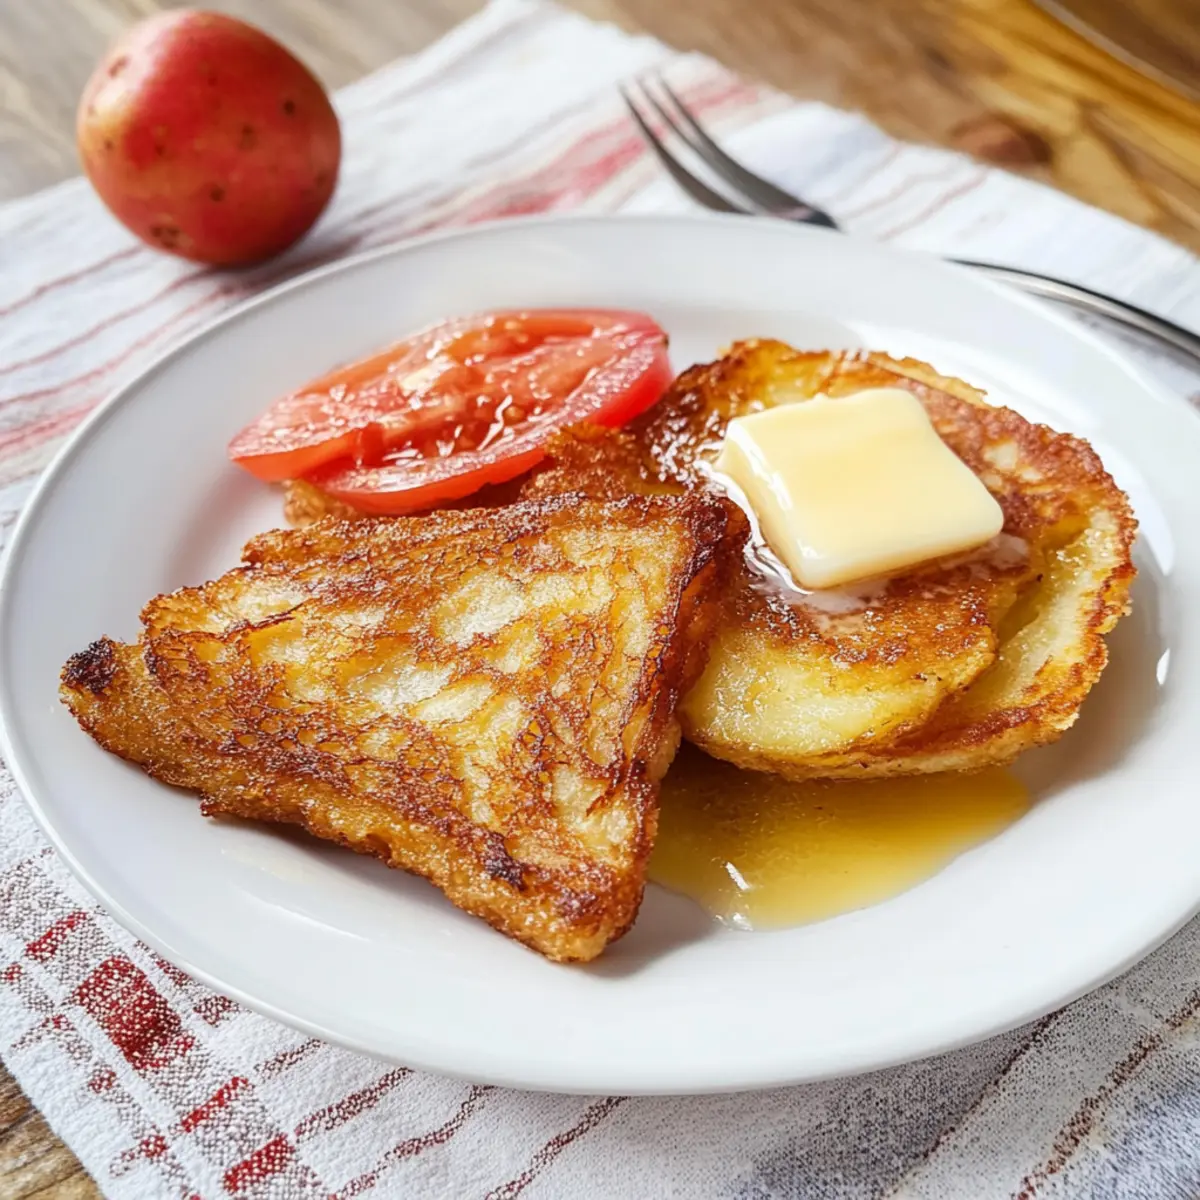
A whiff of sizzling butter and the promise of a hearty breakfast transport me straight to a cozy Irish kitchen. With these Authentic Irish Potato Farls, you’ll discover a delightful way to savor the essence of traditional Irish cooking without spending hours at the stove. Just four simple ingredients come together in under 30 minutes, creating crispy, golden cakes that yield a fluffy bite reminiscent of comforting breakfasts enjoyed across Ireland. Not only do they complement eggs and crispy bacon beautifully, but they also invite endless possibilities with dips and toppings. They’re perfect for any busy morning or leisurely weekend brunch! What will you pair yours with?

Why Are Irish Potato Farls Amazing?
Crispy Perfection: The exterior has a delightful crunch that gives way to a warm, fluffy interior, making every bite satisfying.
Quick and Easy: With just four ingredients and under 30 minutes, this recipe is ideal for weekday breakfasts or weekend indulgence.
Versatile Delight: Pair them with eggs, bacon, or even a dollop of sour cream for a rich twist; the customization options are endless!
Nostalgic Tradition: Embrace the heart of Ireland in your kitchen with this comforting dish that reflects its rich agricultural heritage. You might find yourself loving it alongside other classics like Baked Potato Soup or Butter Chicken Pasta.
Crowd-Pleasing: Perfect for sharing at brunch gatherings, these farls are sure to impress friends and family alike!
Irish Potato Farls Recipe Ingredients
For the Potato Base
- Potatoes – 3 medium (Russet, Maris Piper, or Roosters) are best for a fluffy texture.
- Sea Salt – 1 ½ teaspoons enhances the overall flavor; adjust to taste for best results.
For the Binding
- All-Purpose Flour – ¾ cup (4oz/115g) helps to bind the potatoes; can be swapped for a gluten-free blend if necessary.
- Black Pepper – ½ teaspoon adds warmth; feel free to adjust according to preference.
For Cooking
- Butter – 2 tablespoons, plus more for frying, offers richness and a crispy finish; you can choose olive oil for a dairy-free option.
Embrace the comforting essence of Irish Potato Farls Recipe with these simple ingredients that come together to create a savory breakfast delight!
Step‑by‑Step Instructions for Irish Potato Farls Recipe
Step 1: Prepare Potatoes
Begin by peeling and chopping 3 medium potatoes into even chunks. Place them in a medium pot, cover with water, and bring to a boil over high heat. Reduce to a simmer and cook for 20–25 minutes until tender; use a fork to check that they can easily be pierced. Drain the potatoes in a colander once fully cooked.
Step 2: Drain & Dry
Transfer the drained potatoes to a sieve set over a bowl to help them dry out for about 5 minutes. This step is crucial to avoid a soggy texture in your Irish Potato Farls. Allow any excess moisture to drip off, ensuring the potatoes are as dry as possible before proceeding to the next step.
Step 3: Mash Potatoes
While the potatoes are still warm, either pass them through a ricer for a fine, fluffy texture or mash them thoroughly with a fork or masher. Aim for a smooth consistency with no lumps; this will create the ideal base for your Irish Potato Farls. Set the mashed potatoes aside in a mixing bowl, allowing them to cool slightly.
Step 4: Combine Ingredients
Gradually mix in ¾ cup of all-purpose flour, 1 ½ teaspoons of sea salt, ½ teaspoon of black pepper, and 2 tablespoons of melted butter into the mashed potatoes. Use your hands or a wooden spoon to blend everything until it forms a cohesive ball of dough that’s slightly sticky but holds together well.
Step 5: Shape Dough
Lightly flour a clean surface and turn the dough out onto it. Flatten the dough into an 8-inch round disc, ensuring it maintains an even thickness of about ½ inch. Use a sharp knife to cut the disc into 6 equal wedges, resembling pizza slices; this will help create uniform Irish Potato Farls that cook evenly.
Step 6: Cook Farls
Heat 2 tablespoons of butter in a large skillet over medium heat. Once melted and bubbling, add the potato wedges to the skillet. Fry them for about 5 minutes on one side until they are golden brown and crispy, then carefully flip them over and cook for another 4–5 minutes on the other side until they achieve the same beautiful color.
Step 7: Serve Hot
Once the Irish Potato Farls are golden brown and crispy on both sides, transfer them to a plate lined with paper towels to absorb any excess butter. Serve these delicious farls hot alongside your favorite breakfast items like eggs, bacon, or grilled tomatoes for a truly authentic taste of Ireland.

What to Serve with Authentic Irish Potato Farls
Indulge in a delightful breakfast experience by creating the perfect spread that complements these crispy, fluffy treats.
- Fried Eggs: The rich, runny yolk adds a sumptuous creaminess, making each bite even more satisfying.
- Crispy Bacon: This salty component contrasts beautifully with the farls, creating a savory balance that will awaken your taste buds.
- Grilled Tomatoes: Juicy, roasted tomatoes lend a fresh acidity that brightens the dish, enhancing the flavors beautifully.
- Baked Beans: The sweet and savory notes of baked beans create a hearty accompaniment, typical of a traditional Irish breakfast.
Pair them with drinks like freshly brewed tea or a robust Irish coffee for a complete morning ritual.
- Sour Cream: A dollop of sour cream brings a tangy twist, enhancing the farls’ savory notes wonderfully.
- Chive Dip: Add this fresh herb-infused dip for a burst of flavor that feels lively and refreshing.
- Ketchup: A classic choice, the tanginess of ketchup complements the fluffiness of the farls perfectly, making it a comforting combination.
- Fruit Smoothie: A refreshing, fruity beverage can round out the meal, providing a light, sweet contrast to the savory farls.
Irish Potato Farls Recipe Variations
Feel free to mix things up and add your personal touch to these delightful farls!
-
Herb Infusion: Stir in fresh herbs like chives or parsley for a burst of flavor and freshness. It adds a delightful twist for any herb lover!
-
Cheesy Bliss: Mix in finely grated cheese such as sharp cheddar or Parmesan for a cheesy, gooey interior. This adds richness and a savory depth every bite.
-
Onion Upgrade: Incorporate finely diced onions into the dough. They will caramelize during cooking, enhancing the overall flavor experience.
-
Spice it Up: Sprinkle in a dash of cayenne pepper or red pepper flakes for a touch of heat. This twist awakens the taste buds and adds excitement to your breakfast!
-
Baking Option: Instead of frying, try baking the farls in the oven at 400°F (200°C) for a lighter option that still delivers a crispy exterior. Simply place them on a baking sheet lined with parchment paper.
-
Sweet Twist: For a unique dessert-style farl, add sugar and cinnamon to the dough. Serve them with a drizzle of honey or maple syrup for a delightful treat.
-
Savory Pairing: Serve them alongside rich sauces or gravies, like those used in traditional Irish stews or with a creamy Cranberry Honey Butter. It makes for a hearty meal!
-
Full Irish Breakfast: They make a fantastic accompaniment to a traditional Irish breakfast, rounding out your plate with eggs, tomatoes, and bacon. Try it with Chicken Potato Broccoli for a full culinary experience!
Make Ahead Options
These Irish Potato Farls are a fantastic choice for meal prep! You can prepare the dough up to 24 hours in advance by following the first five steps and then refrigerating it in a covered bowl. To maintain the quality, be sure to form the dough into a ball and wrap it tightly to prevent drying out. When you’re ready to enjoy your farls, simply remove them from the fridge, shape them into wedges, and cook them in a skillet for about 5-6 minutes on each side until golden brown. This way, you’ll have fresh, delicious Irish Potato Farls ready for any busy morning or leisurely brunch with minimal effort!
How to Store and Freeze Irish Potato Farls
-
Room Temperature: Irish Potato Farls are best enjoyed fresh, but they can sit at room temperature for up to 2 hours if not served immediately.
-
Fridge: Store any uneaten farls in an airtight container in the refrigerator for up to 3 days. Reheat on a stovetop or oven for the best texture.
-
Freezer: For longer storage, freeze raw Irish Potato Farls before cooking. Lay them flat on a baking tray, freeze for an hour, then transfer to a freezer bag for up to 3 months. Cook from frozen directly on the stovetop.
-
Reheating: To reheat cooked farls, place them in a skillet over medium heat with a little butter or oil, cooking until warmed through and crispy again.
Expert Tips for Perfect Irish Potato Farls
- Potato Selection: Use fluffy potatoes like Russet or Maris Piper for the best texture. Waxy potatoes won’t create the fluffy interior you desire.
- Drying is Key: Ensure your drained potatoes are dry to prevent sogginess in your farls. This is essential for achieving that crispy outer layer!
- Mixing Technique: Combine the ingredients gently to avoid overworking the dough, which can lead to dense farls. Less is more when it comes to mixing!
- Cooking Temperature: Maintain medium heat when frying to prevent burning the outside while leaving the inside undercooked. A slow and steady approach yields beautifully browned farls.
- Customize It: Feel free to experiment by incorporating herbs, like chives or parsley, into your Irish Potato Farls recipe for added flavor.
Irish Potato Farls Recipe FAQs
What type of potatoes should I use for the best results?
Absolutely! For the best texture and flavor, opt for fluffy, starchy potatoes like Russet, Maris Piper, or Roosters. These types will yield a light and fluffy interior. Avoid waxy potatoes as they don’t mash well and can lead to denser farls.
How can I store leftover Irish Potato Farls?
To enjoy your delicious farls later, store any uneaten pieces in an airtight container in the refrigerator for up to 3 days. When you’re ready to indulge again, reheat them on a stovetop with a bit of butter or in the oven until they’re warmed through and crispy.
Can I freeze Irish Potato Farls?
Yes, you can! For longer storage, freeze raw Irish Potato Farls before cooking. Start by laying the formed farls flat on a baking tray and freeze for about an hour. Once set, you can transfer them to a freezer bag where they’ll keep well for up to 3 months. To cook from frozen, just add them directly to a preheated skillet, adding a few extra minutes to the cooking time.
What should I do if my farls come out too soggy?
Very good question! If your Irish Potato Farls turn out soggy, it may be due to excess moisture in the potatoes. Make sure to drain and dry the cooked potatoes thoroughly before mashing. Additionally, consider using a ricer instead of a masher for a fluffier texture. If they’re already cooked, you can re-fry them in a hot skillet to attempt to crisp them up a bit.
Are there any dietary considerations for making Irish Potato Farls?
Yes! This recipe is naturally egg-free and can easily be adjusted for various dietary needs. For a gluten-free version, simply swap the all-purpose flour for a gluten-free flour blend. If you’re looking for a dairy-free option, replace the butter with olive oil or another plant-based substitute.
Can I add extra ingredients for more flavor?
The more the merrier! Feel free to mix in finely chopped herbs like chives or parsley, or even diced onions or grated cheese into the dough for added flavor. Just remember to balance the additional moisture with a touch more flour if necessary. Enjoy customizing your Irish Potato Farls Recipe!
Irish Potato Farls Recipe - Taste the Heart of Ireland Today
Ingredients
Equipment
Method
- Begin by peeling and chopping 3 medium potatoes into even chunks. Place them in a medium pot, cover with water, and bring to a boil over high heat. Reduce to a simmer and cook for 20–25 minutes until tender; use a fork to check that they can easily be pierced. Drain the potatoes in a colander once fully cooked.
- Transfer the drained potatoes to a sieve set over a bowl to help them dry out for about 5 minutes.
- While the potatoes are still warm, either pass them through a ricer or mash them thoroughly with a fork or masher until smooth.
- Gradually mix in ¾ cup of all-purpose flour, 1 ½ teaspoons of sea salt, ½ teaspoon of black pepper, and 2 tablespoons of melted butter into the mashed potatoes.
- Lightly flour a clean surface and turn the dough out onto it. Flatten the dough into an 8-inch round disc, then cut it into 6 wedges.
- Heat 2 tablespoons of butter in a large skillet over medium heat. Add the potato wedges to the skillet and fry for about 5 minutes on one side until golden brown.
- Once golden brown and crispy, transfer them to a plate lined with paper towels and serve hot.
Leave a Reply