
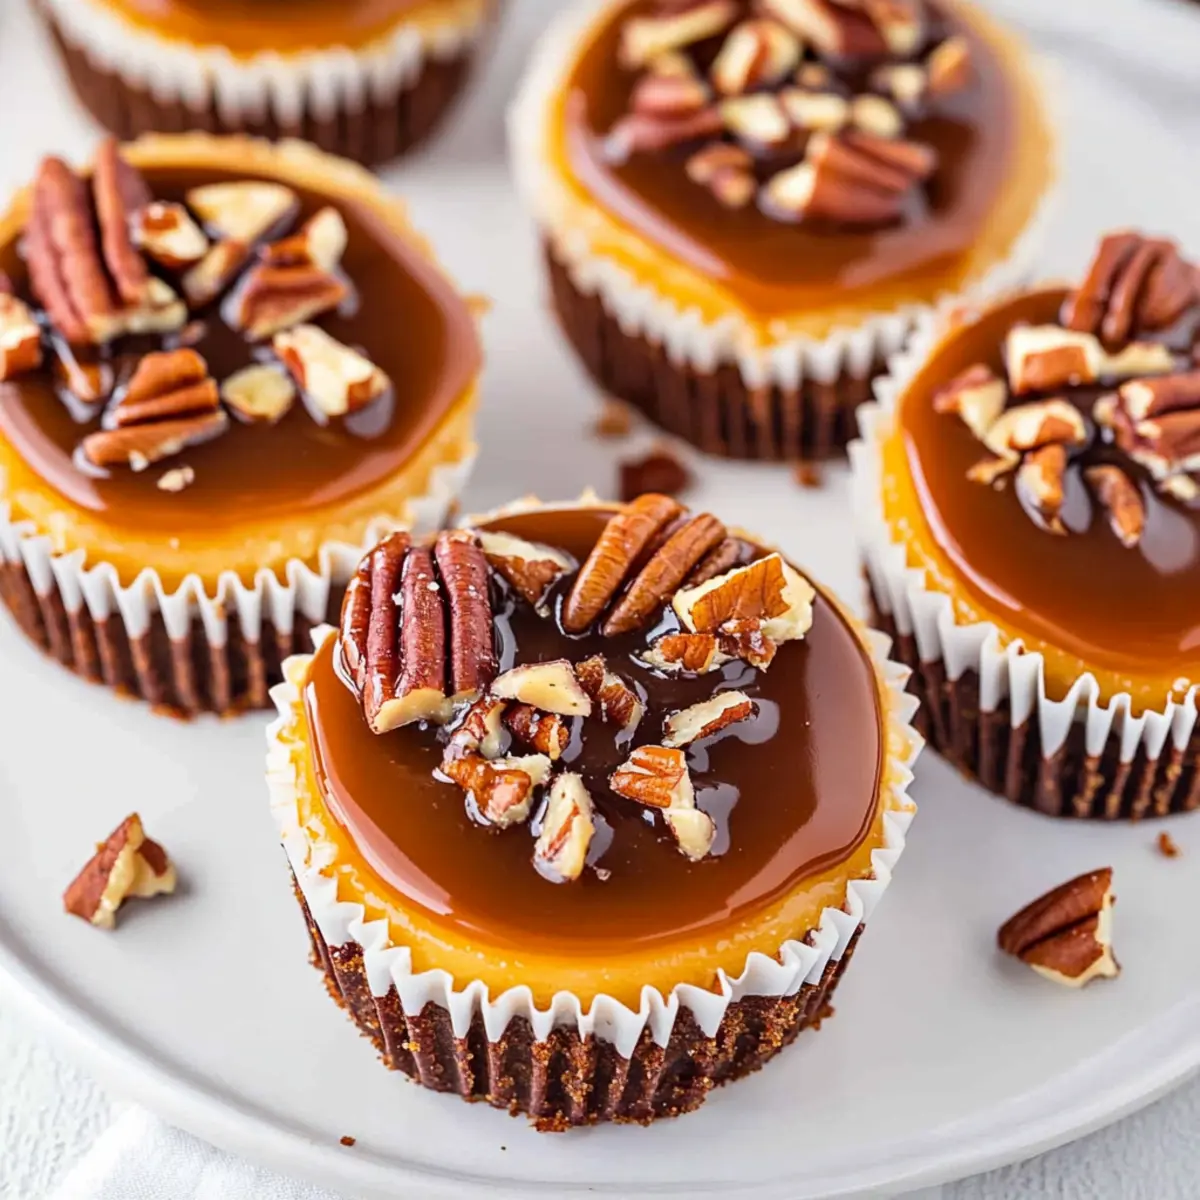
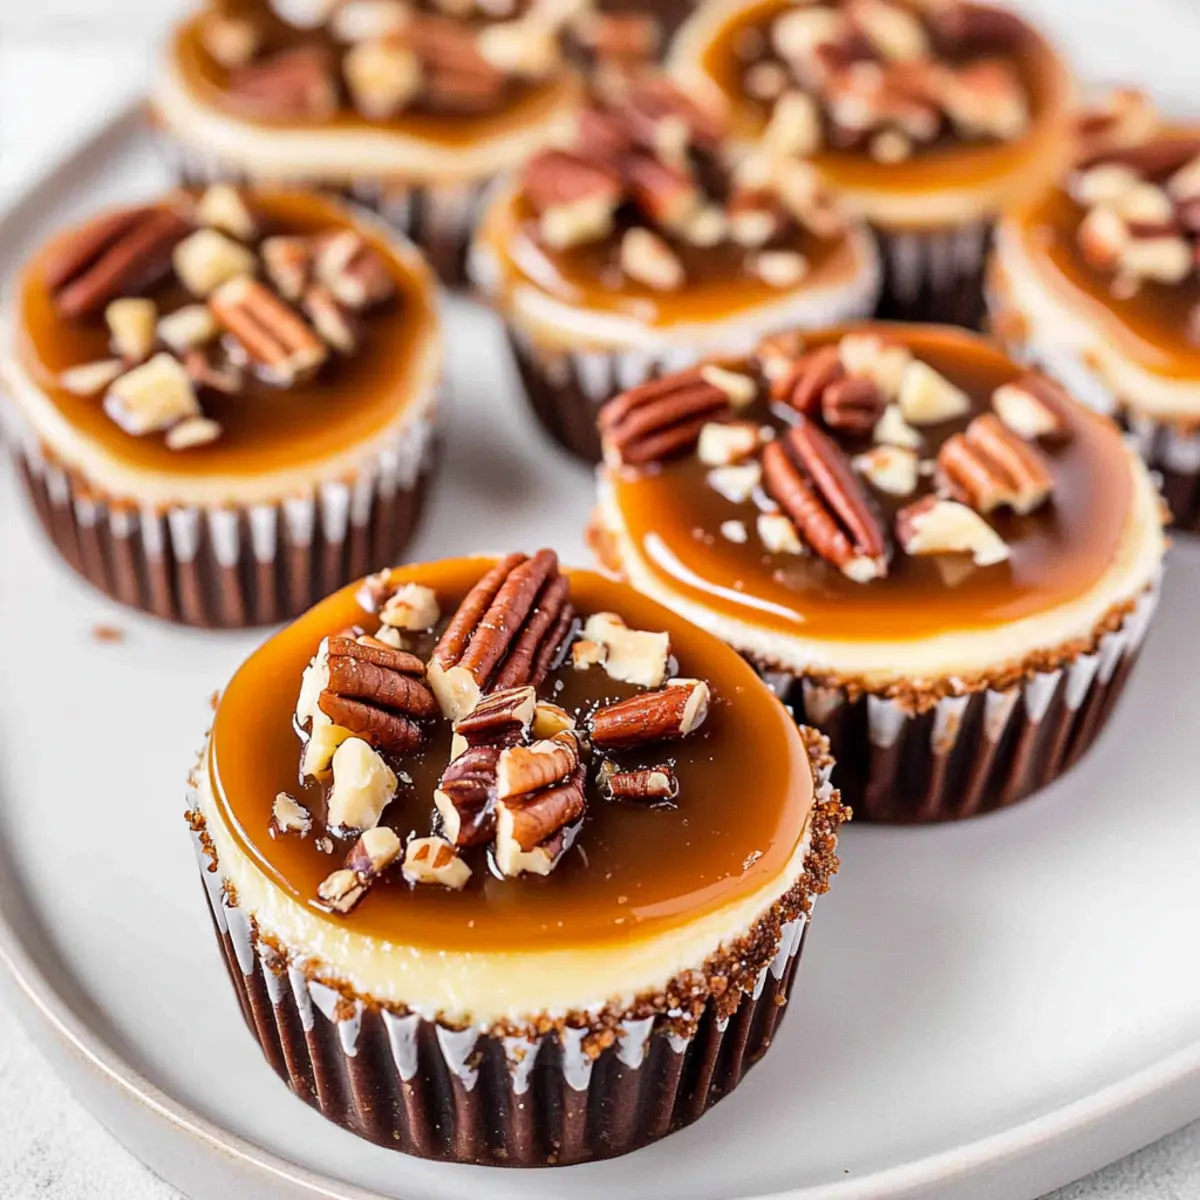
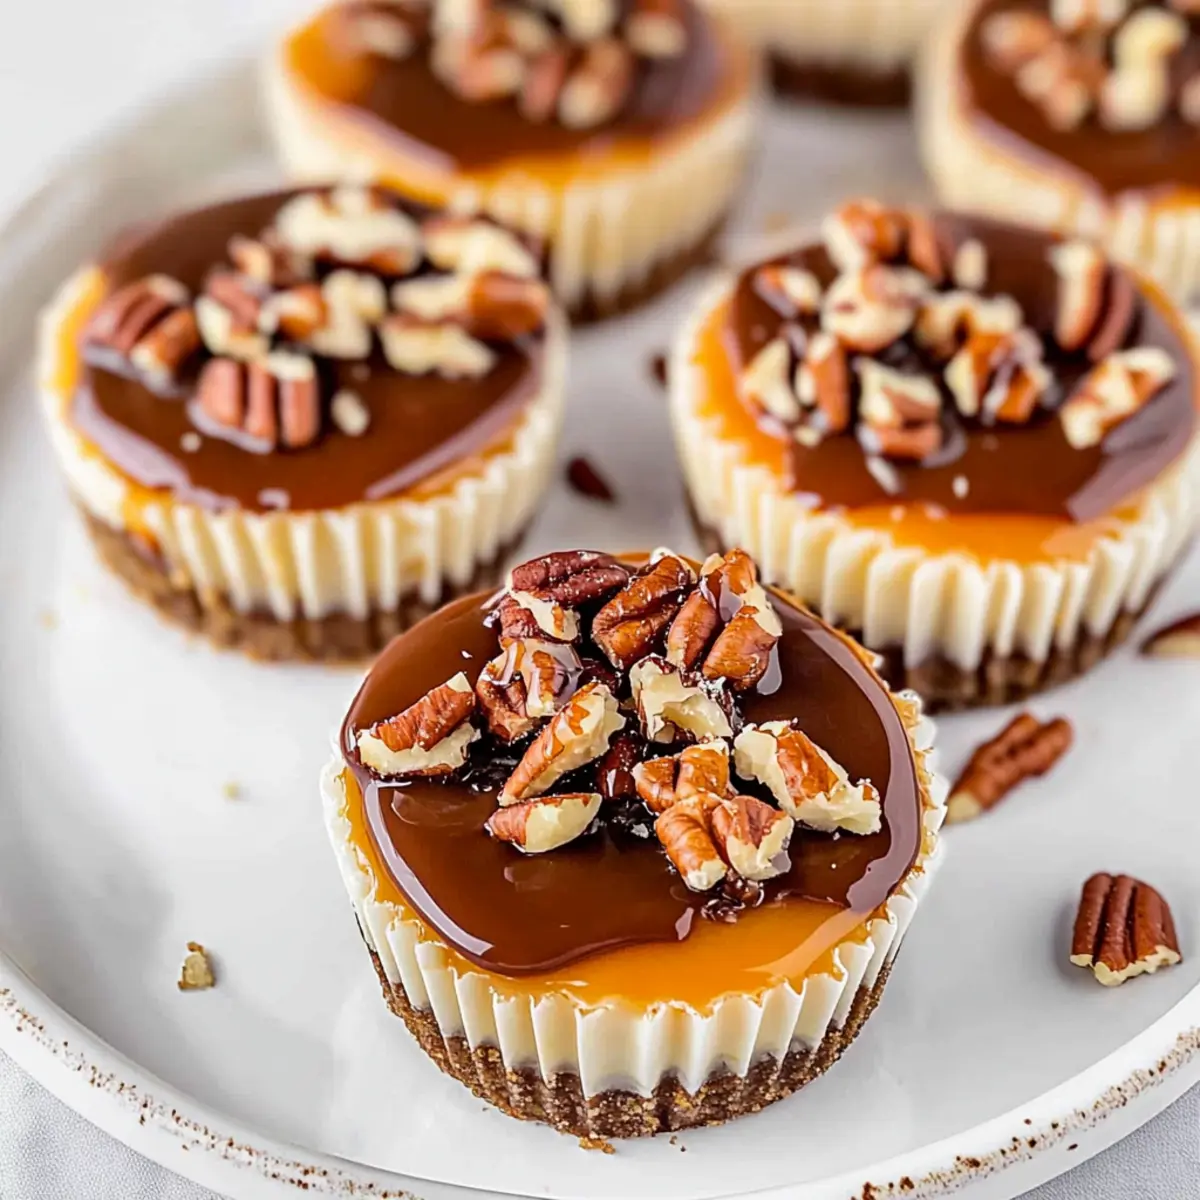
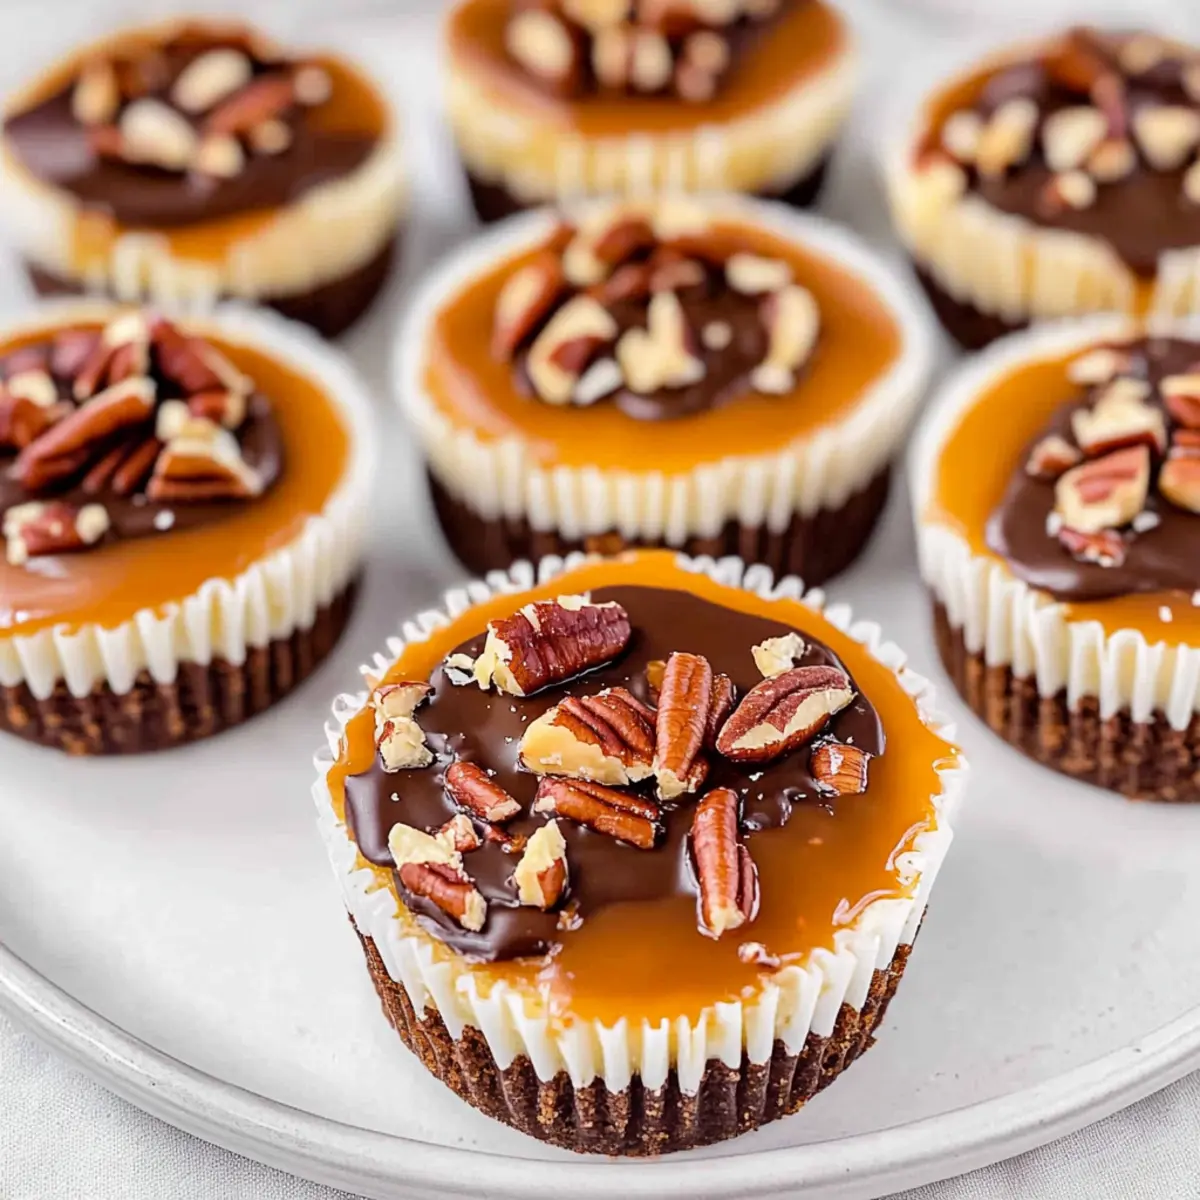
There’s something undeniably enchanting about desserts that evoke childhood memories, and these Mini Turtle Cheesecakes fit the bill perfectly. Combining creamy cheesecake with rich chocolate, luscious caramel, and a satisfying nutty crunch, they truly are the ultimate no-bake party dessert. The beauty of this recipe lies not only in its delightful flavors but also in its effortless preparation; you can whip them up in under an hour! Whether you’re looking for a sweet addition to a gathering or a special treat for yourself, these mini delights are sure to impress. So, are you ready to indulge your sweet tooth while creating a beautiful masterpiece in the kitchen? Let’s dive in!
Why Are Mini Turtle Cheesecakes So Irresistible?
Decadent Flavors: The lush combination of chocolate, caramel, and cream cheese in these mini cheesecakes creates a symphony of taste that delights the senses.
Effortless Preparation: No baking means you can whip up these gems quickly and get back to celebrating with your guests.
Perfect Party Treat: Their mini size makes them not only adorable but also easy to serve, making them a hit at any gathering.
Versatile Variations: Feel free to customize with different nuts or by swapping chocolate ganache for fluffy whipped cream, ensuring something for everyone.
Satisfying Texture: Each bite balances creamy, crunchy, and gooey textures, reminiscent of the classic chocolate turtle candy that everyone loves.
Whether you’re hosting a soirée or just craving a treat, you’ll want to check out our Salted Honey Pie for another incredible dessert idea!
Mini Turtle Cheesecake Ingredients
• Get ready to create this indulgent treat with the following key ingredients!
For the Crust
- Graham Cracker Crumbs – Provides structure and a sweet, crumbly base; feel free to use gluten-free crumbs for a gluten-free version.
- Unsalted Butter – Binds the crust ingredients together while adding richness; margarine works too in a pinch.
For the Cheesecake Filling
- Full Fat Cream Cheese – Forms the smooth base of the cheesecake, contributing creaminess and flavor; low-fat cream cheese can be used but may affect texture.
- Granulated Sugar – Sweetens the cheesecake filling; sugar alternatives suitable for baking are great too!
- Vanilla Extract – Enhances the overall flavor profile; consider almond extract for a unique twist.
- Large Eggs – Adds structure and moisture to the cheesecake; important not to overbeat to avoid air bubbles, and no substitutions needed.
For the Toppings
- Jarred Caramel Sauce – Perfect for drizzling on top for sweetness and decoration; try homemade caramel sauce for a fresher taste!
- Chocolate Ganache – A rich, chocolatey topping made from semi-sweet chocolate and heavy cream; dark chocolate can provide an even richer flavor.
- Chopped Nuts (Pecans) – Adds a crunchy texture and nutty flavor; walnuts or almonds are delightful substitutions.
Step‑by‑Step Instructions for Mini Turtle Cheesecakes
Step 1: Preheat the Oven
Begin by preheating your oven to 350°F (175°C). While waiting for it to reach the right temperature, line a muffin pan with paper liners. This ensures that your Mini Turtle Cheesecakes come out easily and stay beautifully presented, ready for your guests to enjoy.
Step 2: Make the Crust
In a mixing bowl, combine the graham cracker crumbs with melted unsalted butter until the mixture resembles coarse sand. Firmly press 1–2 tablespoons of this crumb mixture into the bottom of each muffin cup. Bake the crust for 5 minutes, or until it’s set, then let it cool completely while you prepare the filling.
Step 3: Prepare Cheesecake Filling
Using an electric mixer, beat the full-fat cream cheese and granulated sugar together in a large bowl until the mixture is smooth and creamy, about 1-2 minutes. Add in the vanilla extract, then crack in the large eggs one at a time, mixing gently until just combined. Remember, avoid overmixing to keep your Mini Turtle Cheesecakes light and fluffy.
Step 4: Assemble and Bake
Carefully fill each cooled muffin cup with the cheesecake filling, distributing it evenly. Place the muffin pan in your preheated oven and bake the cheesecakes for 15–17 minutes. They’re done when the centers are slightly jiggly but the edges appear set, indicating a perfectly baked Mini Turtle Cheesecake.
Step 5: Cool and Chill
Once baked, remove the muffin pan from the oven and let the cheesecakes cool at room temperature for about 30 minutes. After they cool, transfer the cheesecakes to the refrigerator, allowing them to chill for a minimum of 4 hours, preferably overnight, for the best flavor and texture.
Step 6: Garnish
Before serving, drizzle each mini cheesecake with luscious caramel sauce and rich chocolate ganache. Finally, sprinkle chopped pecans on top for that delightful crunch. These finishing touches elevate your Mini Turtle Cheesecakes, making them visually stunning and irresistible to anyone with a sweet tooth.
Storage Tips for Mini Turtle Cheesecakes
Fridge: Store mini cheesecakes in an airtight container in the refrigerator for up to 7 days. A snug fit will help maintain their creamy texture and flavors.
Freezer: For long-term storage, freeze the mini turtle cheesecakes without toppings in a freezer-safe container for up to 3 months. Thaw them in the fridge before serving for the best experience.
Reheating: While these treats are best enjoyed chilled, if you want to warm them up slightly, place them in a microwave for a few seconds. Just be careful not to melt the toppings!
Serving Suggestions: When ready to eat, garnish with fresh caramel, chocolate ganache, and chopped nuts to reinforce the delicious layers of your Mini Turtle Cheesecakes!
Expert Tips for Mini Turtle Cheesecakes
-
Room Temperature Cream Cheese: Ensure your cream cheese is at room temperature to prevent lumps and achieve a silky-smooth filling.
-
Jiggle Test: Use the jiggle test to check for doneness; the centers should jiggle slightly when you remove them from the oven, indicating they’ll set perfectly in the fridge.
-
Avoid Overmixing: Mix the cheesecake filling just until combined; overmixing can introduce air bubbles that may affect the texture of your Mini Turtle Cheesecakes.
-
Chill Time: Allowing the cheesecakes to chill for at least 4 hours, preferably overnight, is crucial for achieving the best flavor and firm texture.
-
Creative Garnishes: Feel free to get creative with your toppings; consider adding a sprinkle of sea salt to enhance the caramel’s flavor and make your cheesecakes truly unique!
Make Ahead Options
These Mini Turtle Cheesecakes are perfect for busy home cooks looking to save time during meal prep! You can prepare the crust and filling up to 24 hours in advance. Simply bake the crust and let it cool, then mix the cheesecake filling and store it separately in the refrigerator. To maintain the quality, cover everything tightly to prevent drying out. When you’re ready to bake, simply fill the pre-prepared crusts with the cheesecake filling and follow the baking instructions. After cooling, chill them for at least 4 hours (or overnight) before garnishing with caramel sauce, chocolate ganache, and nuts, guaranteeing that these treats will be just as delicious and fresh!
What to Serve with Mini Turtle Cheesecakes?
Delightful toppings and the right accompaniments can elevate these sweet morsels into a complete dining experience.
- Fresh Berries: Strawberries or raspberries add vibrant color and a fruity contrast, enhancing the lusciousness of the cheesecakes.
- Whipped Cream: A dollop of freshly whipped cream adds a light, airy texture, balancing the richness of the mini cheesecakes.
- Chocolate Covered Pretzels: For a sweet and salty crunch, serve chocolate-covered pretzels on the side, creating a delightful contrast in flavors.
Pairing your Mini Turtle Cheesecakes with these additions transforms a simple dessert into a stunning and memorable table centerpiece.
- Coffee: A warm cup of coffee complements the decadent flavors and richness of cheesecakes, enhancing the overall tasting experience.
- Vanilla Ice Cream: A scoop of vanilla ice cream gives a creamy texture that beautifully pairs with the chocolate and caramel.
- Nutty Granola: Sprinkle some nutty granola on the side for a crunchy texture that echoes the nuts in the mini cheesecakes while adding a wholesome touch.
- Green Tea: Fresh green tea offers a refreshing contrast, cleansing the palate and balancing the sweetness of the cheesecakes.
Mini Turtle Cheesecakes Variations to Try
Feel free to let your creativity shine and customize these Mini Turtle Cheesecakes to suit your taste buds or dietary needs!
-
Gluten-Free: Use gluten-free graham cracker crumbs for a gluten-free base that everyone can enjoy.
-
Sugar-Free: Substitute granulated sugar with a sugar alternative like erythritol for a guilt-free treat.
-
Nut-Free: Leave out the nuts and add a sprinkle of crushed cookies on top for a delicious crunch without the allergens.
-
Chocolate Twist: Use chocolate graham cracker crumbs for the crust to enhance that chocolaty goodness even further.
-
Dairy-Free: Try using dairy-free cream cheese and coconut cream for the ganache, making them suitable for a dairy-free diet.
For those looking to experiment with flavor, consider using flavored cream cheeses, like caramel or chocolate, that give a delightful twist to the traditional taste. They pair so wonderfully with the rich chocolate ganache and caramel sauce! And if you love rich desserts, don’t miss our Salted Honey Pie—it’s a crowd-pleaser that’s just as simple to make!
-
Whipped Cream Topping: Swap out the chocolate ganache for light and fluffy whipped cream for a refreshing change that’s equally delicious.
-
Spiced Up: Add a dash of cinnamon or instant coffee to the cheesecake filling for an unexpected flavor boost.
These variations ensure your Mini Turtle Cheesecakes can accommodate any taste preference while still being the star of the dessert table!
Mini Turtle Cheesecakes Recipe FAQs
How do I choose the best ingredients for my Mini Turtle Cheesecakes?
Absolutely! For the graham cracker crumbs, look for a brand without any added sugars for the best flavor. For the cream cheese, ensure it’s at room temperature for smooth mixing. Eggs should be large and fresh for optimal moisture and structure. When it comes to caramel sauce, jarred options are convenient, but if you have the time, homemade caramel may elevate your dessert experience significantly!
How can I store Mini Turtle Cheesecakes?
Very simple! Store your mini cheesecakes in an airtight container in the refrigerator for up to 7 days. Ensure they’re kept tightly sealed to preserve their creamy texture. You can also freeze them without toppings in a freezer-safe container for up to 3 months. When you’re ready to enjoy them again, allow the cheesecakes to thaw in the refrigerator overnight for a delicious comeback!
What’s the best way to freeze Mini Turtle Cheesecakes?
I recommend following these steps for successful freezing:
- Allow the mini cheesecakes to cool completely after baking.
- Remove them from the muffin pan and place them on a baking sheet lined with parchment paper.
- Freeze them for about 2 hours until they’re solid.
- Once frozen, transfer the cheesecakes to a freezer-safe container, separating layers with parchment paper to prevent sticking.
- Label the container with the date for easy tracking, and enjoy them within 3 months for the best flavor.
What if my Mini Turtle Cheesecakes have cracks or sink in the center?
No worries! If your cheesecakes crack, it could be due to overmixing or baking at too high a temperature. Next time, mix the filling just until combined and using the jiggle test for doneness is crucial. If they sink in the center, try reducing the baking time slightly. Remember, these little imperfections can still taste delicious, and they’ll be covered with caramel and nuts, so you can serve them with pride!
Are Mini Turtle Cheesecakes safe for those with allergies?
If you’re serving these to guests, it’s important to inquire about their allergies! The ingredients include dairy (cream cheese and butter), gluten (graham cracker crumbs), and nuts (pecans). You can easily make them gluten-free by using certified gluten-free graham cracker crumbs. For nut allergies, consider omitting the nuts or using a safe alternative like crushed cookies or even fresh fruit for decoration instead.
How can I add a twist to my Mini Turtle Cheesecakes?
The more the merrier! You can switch things up by experimenting with different nuts, such as walnuts or almonds for that delightful crunch. Try using flavored cream cheese like chocolate or caramel for an exciting taste variation. Additionally, swap the chocolate ganache for a fluffy whipped cream topping for a lighter finish. Each twist can bring new joy to the already delightful Mini Turtle Cheesecakes!
Indulge in Mini Turtle Cheesecakes That Wow Every Party
Ingredients
Equipment
Method
- Preheat your oven to 350°F (175°C) and line a muffin pan with paper liners.
- In a mixing bowl, combine the graham cracker crumbs with melted unsalted butter and press into muffin cups. Bake for 5 minutes and let cool.
- Beat cream cheese and sugar until smooth, then add vanilla and eggs, mixing gently.
- Fill each muffin cup with cheesecake filling and bake for 15-17 minutes until centers jiggle slightly.
- Let the cheesecakes cool for 30 minutes before chilling in the refrigerator for at least 4 hours.
- Before serving, drizzle caramel sauce and chocolate ganache over the cheesecakes, topping with chopped pecans.
Leave a Reply