
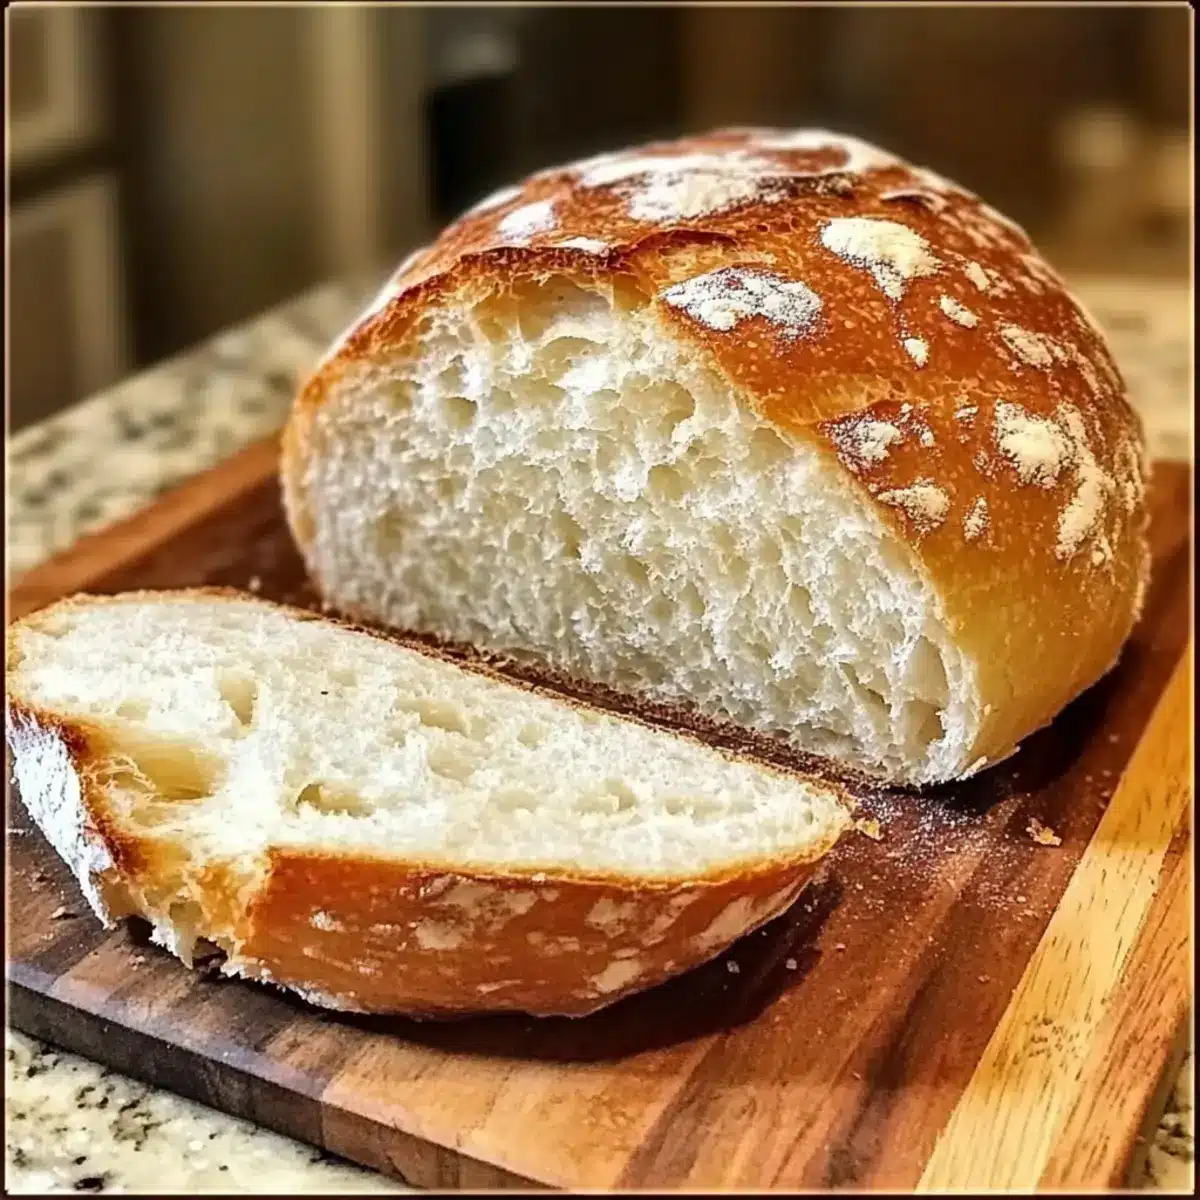
As I stood in my kitchen, the aroma of freshly baked bread wafting through the air, I couldn’t help but smile at how effortless this process had become. With my Easy No Knead Gluten Free Bread, there’s no need for that tiring kneading—just a bit of mixing and a little patience. This recipe not only opens the door to delightful homemade bread but it also ensures you’re eating wholesome ingredients, free from all the unknowns of store-bought options. What I love most is how quick and simple it is to make, making it an ideal choice for busy weeknights or lazy weekends when you crave the joy of fresh bread without the fuss. Ready to transform your baking routine? Let’s dive into the world of homemade gluten-free bread that’s sure to impress!
Why is this bread a game-changer?
Simplicity at its finest: This No Knead Gluten Free Bread removes the stress of traditional kneading techniques, making it accessible for beginners. Wholesome ingredients mean you’re in control of what goes into your loaf, giving peace of mind. Time-saving preparation takes just minutes, allowing you to focus on other tasks in your busy day. Versatility shines through, as it pairs beautifully with toppings like avocado or homemade jam. Perfect for crowd-pleasing gatherings, it always gets compliments! Embrace the joy of easy baking and introduce this delightful loaf to your meals, alongside dishes like [Gluten Free Pancakes](https://rosewoodmeal.com/fluffy-gluten-free-pancakes/) or [Gingerbread Cream Pie](https://rosewoodmeal.com/gingerbread-cream-pie/) for a full experience.
No Knead Gluten Free Bread Ingredients
• Get ready to bake!
For the Dough
- Gluten-Free All-Purpose Flour – This provides structure for the bread; ensure it contains xanthan gum for the best texture.
- Salt – Essential for enhancing the flavor of your loaf.
- Instant Yeast – Acts as the leavening agent for that perfect rise.
- Sugar (or Honey) – Adds a hint of sweetness and helps feed the yeast for better fermentation.
- Warm Water – Hydrates the mixture and activates the yeast—make sure it’s warm but not hot!
- Olive Oil – Adds delightful moisture and enhances the bread’s flavor.
Embrace the ease of crafting your very own No Knead Gluten Free Bread, and watch how quickly it becomes a favorite at your table!
Step‑by‑Step Instructions for No Knead Gluten Free Bread
Step 1: Combine Your Dry Ingredients
In a large mixing bowl, whisk together 3 cups of gluten-free all-purpose flour, 1 teaspoon of salt, 1 teaspoon of instant yeast, and 1 tablespoon of sugar until thoroughly mixed. The combination of these dry ingredients sets the foundation for your No Knead Gluten Free Bread, giving it structure and flavor.
Step 2: Add Wet Ingredients
Pour in 1 ½ cups of warm water and 2 tablespoons of olive oil. Using a wooden spoon, mix the ingredients until fully combined. The dough should be sticky but cohesive, forming a shaggy mixture without any dry patches. This step is crucial for activating the yeast and developing the dough’s texture.
Step 3: Let the Dough Rise
Cover the bowl with a kitchen towel and place it in a warm spot in your kitchen. Allow the dough to rise for 1 to 2 hours, or until it has doubled in size. You’ll know it’s ready when the surface looks bubbly and the dough has dramatically increased in volume.
Step 4: Preheat Your Oven
While the dough is rising, preheat your oven to 450°F (230°C) and place a Dutch oven inside to heat up. This heavy pot will help create a crusty exterior for your No Knead Gluten Free Bread, so it’s essential that it gets nice and hot while the dough continues to rise.
Step 5: Shape the Dough
Once the dough has risen, turn it out onto a lightly floured surface. Using floured hands, gently shape it into a round loaf without overworking it. This shaping step is important for retaining the airy structure while preparing your bread for baking.
Step 6: Rest the Dough
Let the shaped dough rest for an additional 30 minutes. While it rests, the Dutch oven will continue to heat up, ensuring the crust on your No Knead Gluten Free Bread becomes perfectly golden and crispy during baking.
Step 7: Prepare for Baking
Carefully remove the hot Dutch oven from the oven and line it with parchment paper. Transfer your rested dough onto the parchment, ensuring it’s centered. Cover the pot with its lid and place it back into the oven for baking, trapping steam crucial for that lovely crust.
Step 8: Bake the Bread
Bake the covered dough for 30 minutes. The steam from the Dutch oven will help the bread rise and create a tender crumb. You’ll know it’s time to uncover when your kitchen fills with a delightful aroma and the loaf begins to rise.
Step 9: Finish Baking
After 30 minutes, take the lid off and bake for an additional 15 minutes until the bread is golden brown. Keep an eye on the crust; it should be deep golden and firm to the touch. This final exposure enhances the crusty texture that accompanies each slice of your No Knead Gluten Free Bread.
Step 10: Cool and Slice
Once baked, carefully remove the Dutch oven from the oven and transfer the bread to a wire rack. Allow it to cool completely before slicing. This cooling step is essential, as it enhances the flavors and texture of your delicious homemade bread, making each bite irresistible.
No Knead Gluten Free Bread Variations
Feel free to personalize your No Knead Gluten Free Bread with these delicious twists and substitutions!
-
Herb-Infused: Add 2 tablespoons of dried herbs like rosemary or thyme for an aromatic flavor boost. Picture a warm loaf infused with herby goodness!
-
Sweet Twist: Include 1 teaspoon of cinnamon and 1 tablespoon of maple syrup for a delightful sweet breakfast bread. Enjoy slathered with your favorite jam!
-
Nutty Flavor: Mix in 1 cup of chopped nuts or seeds, such as walnuts or sunflower seeds, to add a delightful crunch. It not only enhances texture but also brings a wholesome heartiness to each slice.
-
Cheesy Delight: Stir in 1 cup of shredded cheese, like cheddar or mozzarella, for a savory version that’s perfect for sandwiches or as a side. Imagine the melty goodness with every bite!
-
Spicy Kick: If you love a bit of heat, add 1 teaspoon of red pepper flakes for a zesty twist. This variation brings warmth and excitement to your bread, ideal for pairing with hearty soups or spreads.
-
Dairy-Free: For a dairy-free version, simply omit the cheese or substitute it with a dairy-free alternative, ensuring that everyone can enjoy this delicious treat. It’s the same great taste, minus the dairy!
-
Multi-Grain: Use a blend of gluten-free whole grain flour in place of all-purpose flour. This not only enhances the flavor but also adds nutritional benefits for a wholesome loaf.
-
Gluten Free Vegan: If you’re looking for a vegan-friendly version, replace olive oil with aquafaba or unsweetened applesauce. Your loaf will be just as tasty and inclusive, perfect for any gathering!
Give these variations a try, and don’t forget that you can also enjoy this lovely loaf alongside dishes like [Gingerbread Cream Pie](https://rosewoodmeal.com/gingerbread-cream-pie/) for a celebratory feast!
Storage Tips for No Knead Gluten Free Bread
Room Temperature: Wrap the leftover bread in a clean kitchen towel and place it in a bread bag. It will stay fresh for up to 3 days, preserving its delightful texture.
Fridge: If you’d like to extend its life, you can refrigerate your No Knead Gluten Free Bread for up to a week. Be sure to wrap it tightly to avoid drying out.
Freezer: For longer storage, slice the bread and separate the pieces with parchment paper. Place in an airtight container or freezer bag, where it can stay fresh for up to 3 months.
Reheating: To enjoy the bread again, simply toast it or warm the slices in an oven at 350°F (175°C) for about 5-10 minutes, bringing back that lovely crust and soft interior.
Make Ahead Options
These Easy No Knead Gluten Free Bread recipes are perfect for busy home cooks looking to save time! You can prepare the dough up to 24 hours in advance. Simply mix all your dry ingredients and then add in the wet ingredients as outlined in the recipe. Cover the bowl tightly and refrigerate it until you’re ready to bake. When you’re ready to enjoy fresh bread, let the dough sit out at room temperature for about 30 minutes before shaping it and allowing it to rise again. This process helps to maintain the bread’s texture, ensuring it turns out just as delicious! With these make-ahead options, you’ll have fresh, homemade gluten-free bread with minimal effort any day of the week.
What to Serve with Easy No Knead Gluten Free Bread
Nothing enhances the joy of fresh-baked bread like a thoughtfully curated meal that brings warmth and comfort to your table.
-
Creamy Tomato Soup: A classic pairing that complements the rustic flavor, with rich acidity cutting through the tender bread.
-
Savory Avocado Toast: Spread creamy avocado on a slice for a delightful mix of textures and flavors; add crushed red pepper for an extra kick.
-
Herbed Olive Oil Dip: A splash of extra virgin olive oil infused with fresh herbs makes for a fragrant, flavorful accompaniment that’s perfect for dipping.
-
Roasted Vegetable Salad: Bright, colorful veggies drizzled in balsamic glaze offer freshness and contrast to the bread’s warm crust.
-
Garlic Butter Mushrooms: Sautéed mushrooms in garlic butter provide an umami punch, making each bite of bread a celebration of flavors.
-
Classic Egg Salad: Creamy and seasoned well, this filling provides a hearty option that spreads wonderfully over your homemade loaf.
-
A Glass of Chardonnay: Pair with a chilled Chardonnay; its crisp notes complement the lightness of the bread while adding elegance to your meal.
Expert Tips for No Knead Gluten Free Bread
-
Gluten-Free Flour Choice: Ensure you select a gluten-free flour blend containing xanthan gum. If it doesn’t, add 1 teaspoon separately for optimal texture.
-
Sticky Dough Caution: Remember, the dough should be sticky! Avoid overworking it during shaping, as this will upset its airy nature and lead to denser bread.
-
Hot Dutch Oven: Always preheat your Dutch oven; it’s crucial for achieving that crusty exterior you desire in your No Knead Gluten Free Bread.
-
Rising Time: Don’t rush the rise! Allow the dough to double in size, as this is key for creating a light and fluffy loaf.
-
Cooling is Key: Let the bread cool completely on a wire rack before slicing. This step is essential to enhance the flavor and texture of your beautiful homemade bread.
No Knead Gluten Free Bread Recipe FAQs
What should I look for when selecting gluten-free flour?
When choosing gluten-free flour for this No Knead Gluten Free Bread, look for a blend that contains xanthan gum, which helps mimic the elasticity of traditional wheat flour. Avoid gluten-free flours that are too coarse, as they may affect the texture. Brands like Bob’s Red Mill or King Arthur Gluten-Free All-Purpose Flour are great choices!
How should I store leftover bread?
To keep your No Knead Gluten Free Bread fresh, wrap it in a clean kitchen towel and place it in a bread bag at room temperature for up to 3 days. If you want to extend its shelf life, consider refrigerating it for up to a week, ensuring it’s tightly wrapped to prevent drying out.
Can I freeze No Knead Gluten Free Bread?
Absolutely! To freeze your bread, slice it first and place parchment paper between the slices. This prevents them from sticking together. Store the slices in an airtight container or a freezer bag, and they will stay fresh for up to 3 months. When ready to enjoy, you can toast the slices directly from the freezer or warm them in the oven at 350°F (175°C) for 5-10 minutes.
What if my dough doesn’t rise?
If your dough doesn’t rise, it might be due to inactive yeast. Make sure that your instant yeast is fresh by checking its expiration date. Additionally, ensure your warm water is at the right temperature—ideally between 100°F to 110°F (37°C to 43°C). If all else fails, you can give it a little more time to rise in a warmer spot, as yeast thrives in warmth!
Can I add flavors or mix-ins to the dough?
Yes, you can certainly customize your No Knead Gluten Free Bread! Consider adding herbs, spices, or even seeds to the dough for extra flavor and texture. Just remember to account for additional dry ingredients if you’re adding a significant amount of mix-ins, so you maintain the bread’s overall consistency.

Simple No Knead Gluten Free Bread for Effortless Baking
Ingredients
Equipment
Method
- In a large mixing bowl, whisk together gluten-free all-purpose flour, salt, instant yeast, and sugar until thoroughly mixed.
- Pour in warm water and olive oil. Mix with a wooden spoon until fully combined.
- Cover the bowl with a kitchen towel and let the dough rise for 1 to 2 hours, or until doubled in size.
- Preheat your oven to 450°F (230°C) and place a Dutch oven inside to heat.
- Turn the dough out onto a lightly floured surface and shape it into a round loaf.
- Let the shaped dough rest for an additional 30 minutes.
- Carefully remove the hot Dutch oven, line it with parchment paper, and transfer your rested dough.
- Bake the covered dough for 30 minutes.
- After 30 minutes, take the lid off and bake for an additional 15 minutes until golden brown.
- Remove from the oven and transfer the bread to a wire rack to cool completely before slicing.
Leave a Reply