
Stepping into my kitchen the other day, the air filled with the comforting aroma of sugar and milk melding into a warm custard. It took me back to my childhood, where every family gathering meant one special treat: Old-Fashioned Homemade Banana Pudding. This delightful Southern classic is a heartfelt nod to tradition, prepared without any pudding mix and brimming with layers of sweet vanilla custard, crunchy vanilla wafers, and ripe bananas. One of the best parts? It’s incredibly straightforward to whip up, perfect for anyone looking to impress guests or simply indulge in a nostalgic dessert at home. Plus, by making it from scratch, you’ll avoid store-bought shortcuts and create a flavor that will linger in memory long after the last bite. Ready to dive into this creamy, comforting dessert that can be a centerpiece at your next gathering? Let’s get started!
Why is Banana Pudding a Classic?
Nostalgic Flavor: This Old-Fashioned treat brings back childhood memories with every creamy bite.
Made From Scratch: Say goodbye to pre-made mixes, as this recipe uses simple ingredients to create a richer taste.
Easy Prep: With just a few steps, you can quickly assemble this dessert, making it ideal for busy cooks.
Crowd-Pleasing Delight: Perfect for any occasion, from summer picnics to holiday gatherings, everyone will love this comforting classic.
Customizable Layers: Feel free to add your twist with graham crackers or flavored extracts for a unique spin! Dive into the world of homemade desserts and impress your loved ones with this classic comfort.
Old-Fashioned Homemade Banana Pudding Ingredients
For the Custard
- Sugar – Sweetens the custard beautifully; you can also use brown sugar for a deeper flavor.
- Flour – Acts as a thickening agent; stick with all-purpose flour for the best texture.
- Salt – A pinch enhances the sweetness; sea salt works well for a refined taste.
- Milk – The rich base for the pudding; whole milk delivers a creamy custard, but substitute with non-dairy milk if needed.
- Eggs – Essential for creaminess; use the freshest eggs for the richest flavor.
- Vanilla Extract – Adds warmth and depth; opt for pure vanilla extract for superior taste.
For the Layers
- Vanilla Wafers – Provides structure and crunch; about 8 oz. will be perfect for layering, but graham crackers can work too.
- Bananas – Natural sweetness and texture; use ripe but firm bananas for the best results.
Topping (Optional)
- Crushed Vanilla Wafers – Sprinkle on top before serving for an added crunch and visual appeal.
Let these ingredients come together to create a classic Old-Fashioned Homemade Banana Pudding that will make your taste buds sing!
Step‑by‑Step Instructions for Old-Fashioned Homemade Banana Pudding
Step 1: Combine Dry Ingredients
In a medium saucepan, whisk together 1 cup of sugar, 1/3 cup of flour, and a pinch of salt. These dry ingredients will create a solid base for your custard. Once combined, set the saucepan over medium heat and smoothly incorporate 4 cups of whole milk while stirring continuously, which will prevent any lumps from forming.
Step 2: Cook the Custard
Continue to cook the mixture over medium heat for approximately 4-5 minutes, stirring constantly until it thickens and begins to bubble gently. You’ll notice a rich, creamy consistency forming; ensure it doesn’t stick to the bottom of the pan. Once this happens, lower the heat and continue cooking for an additional 2 minutes, then remove from heat.
Step 3: Temper the Eggs
In a separate bowl, crack 4 large eggs and whisk them until they are smooth and slightly frothy. Slowly temper the eggs with a small scoop of the hot custard mixture—this helps to prevent the eggs from scrambling. Gradually mix this tempered egg back into the saucepan with the rest of the custard and return it to the heat for about 2 more minutes, stirring until it reaches a gentle boil.
Step 4: Flavor the Custard
After boiling the custard for 2 minutes, remove it from the heat and stir in 1 tablespoon of pure vanilla extract. This will enhance the traditional flavors of your Old-Fashioned Homemade Banana Pudding. Allow the mixture to cool for about 15 minutes, stirring occasionally to keep it smooth and creamy.
Step 5: Layer the Pudding
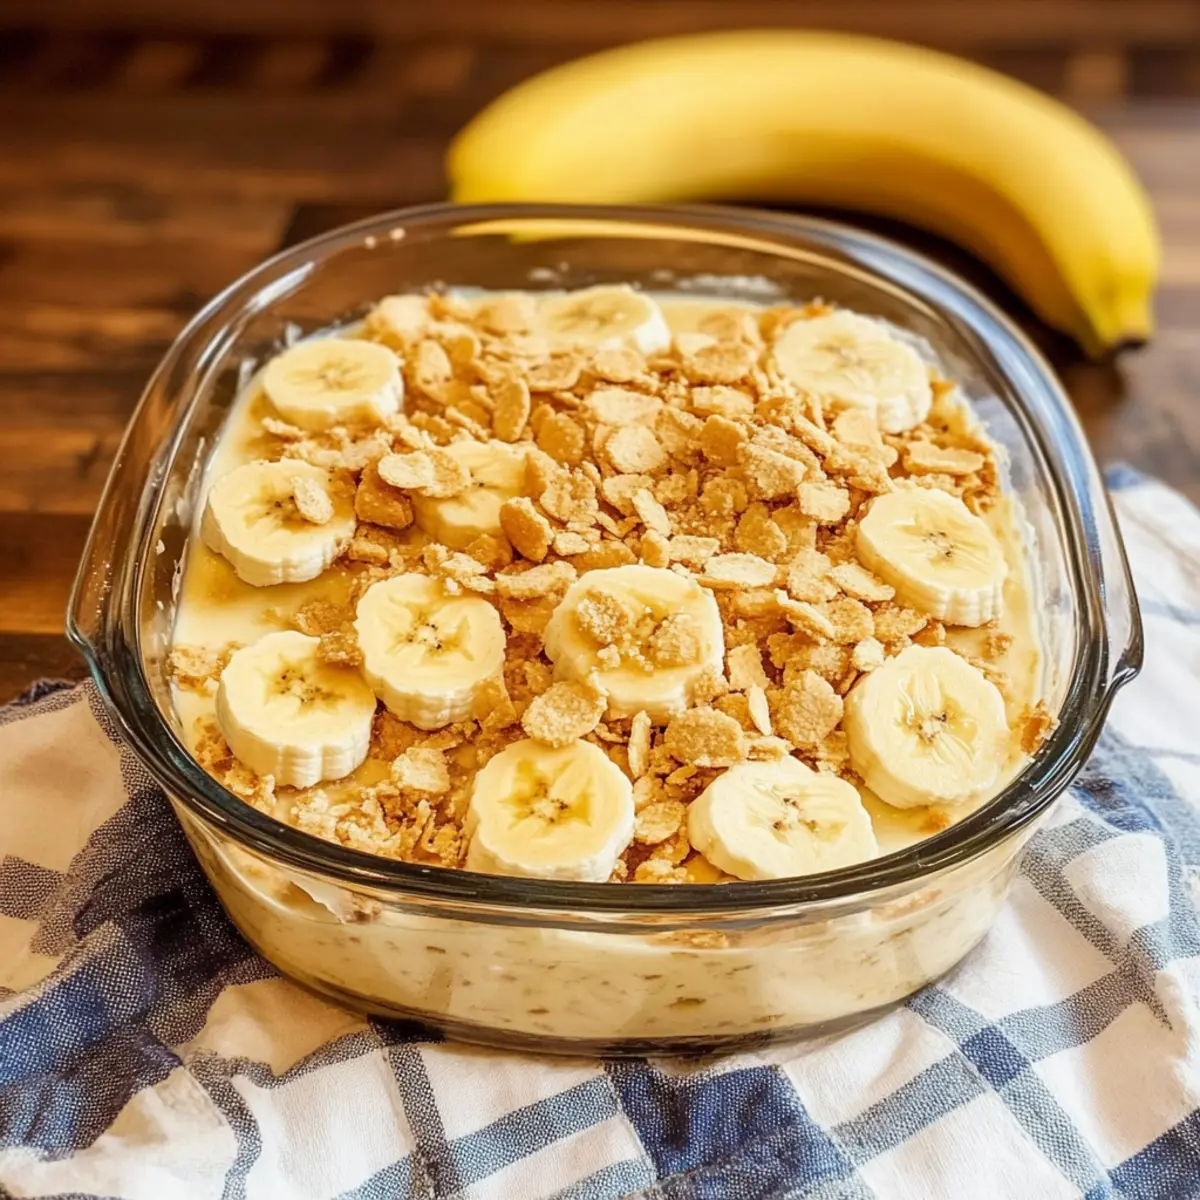
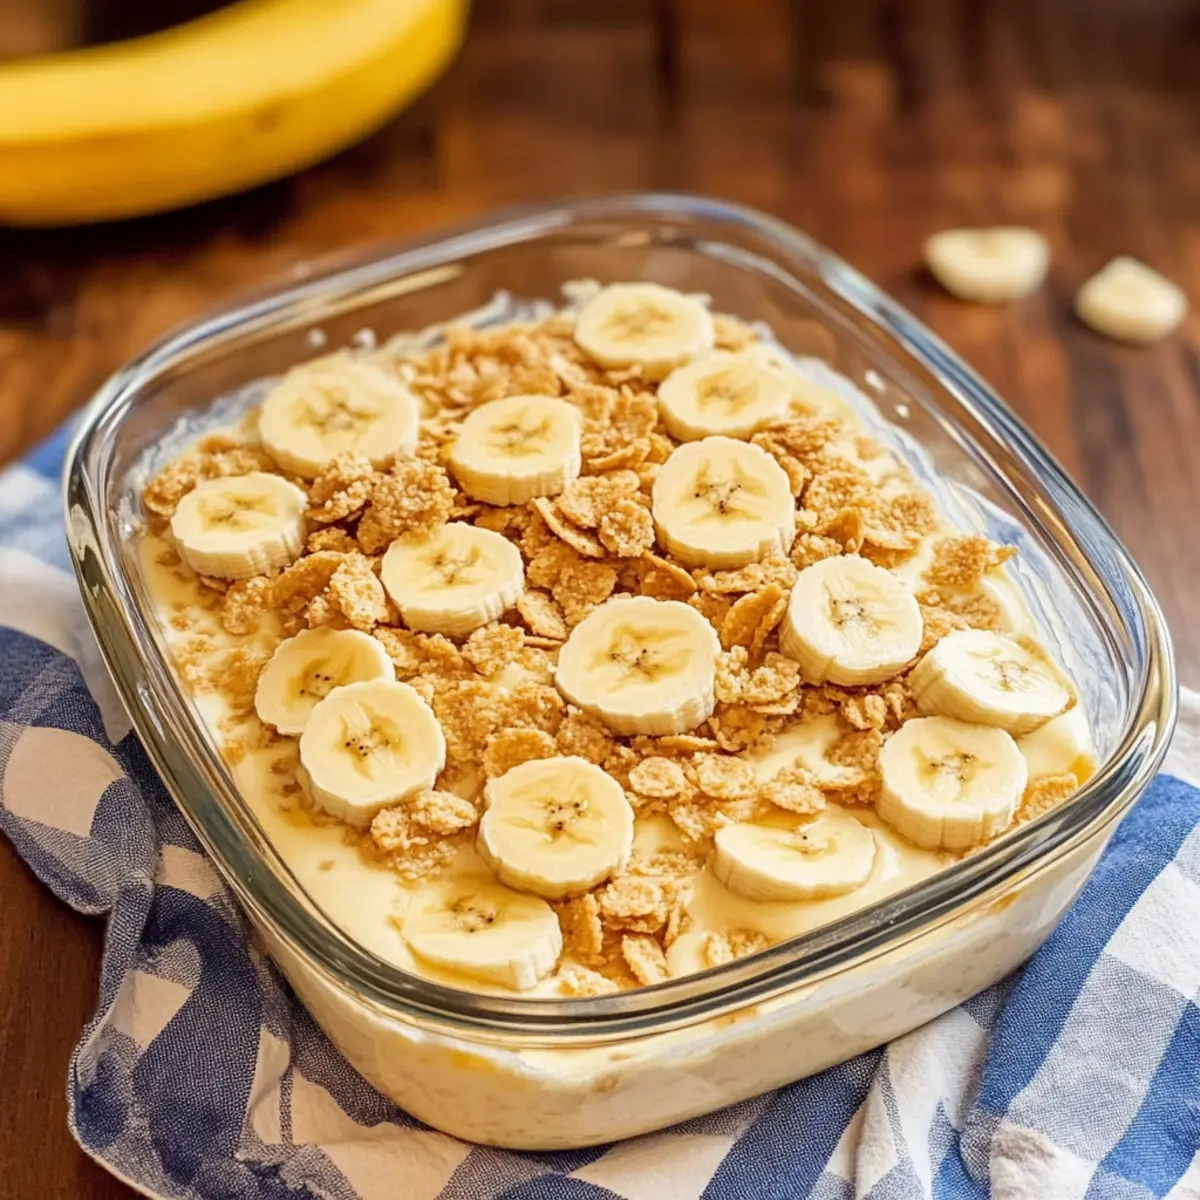
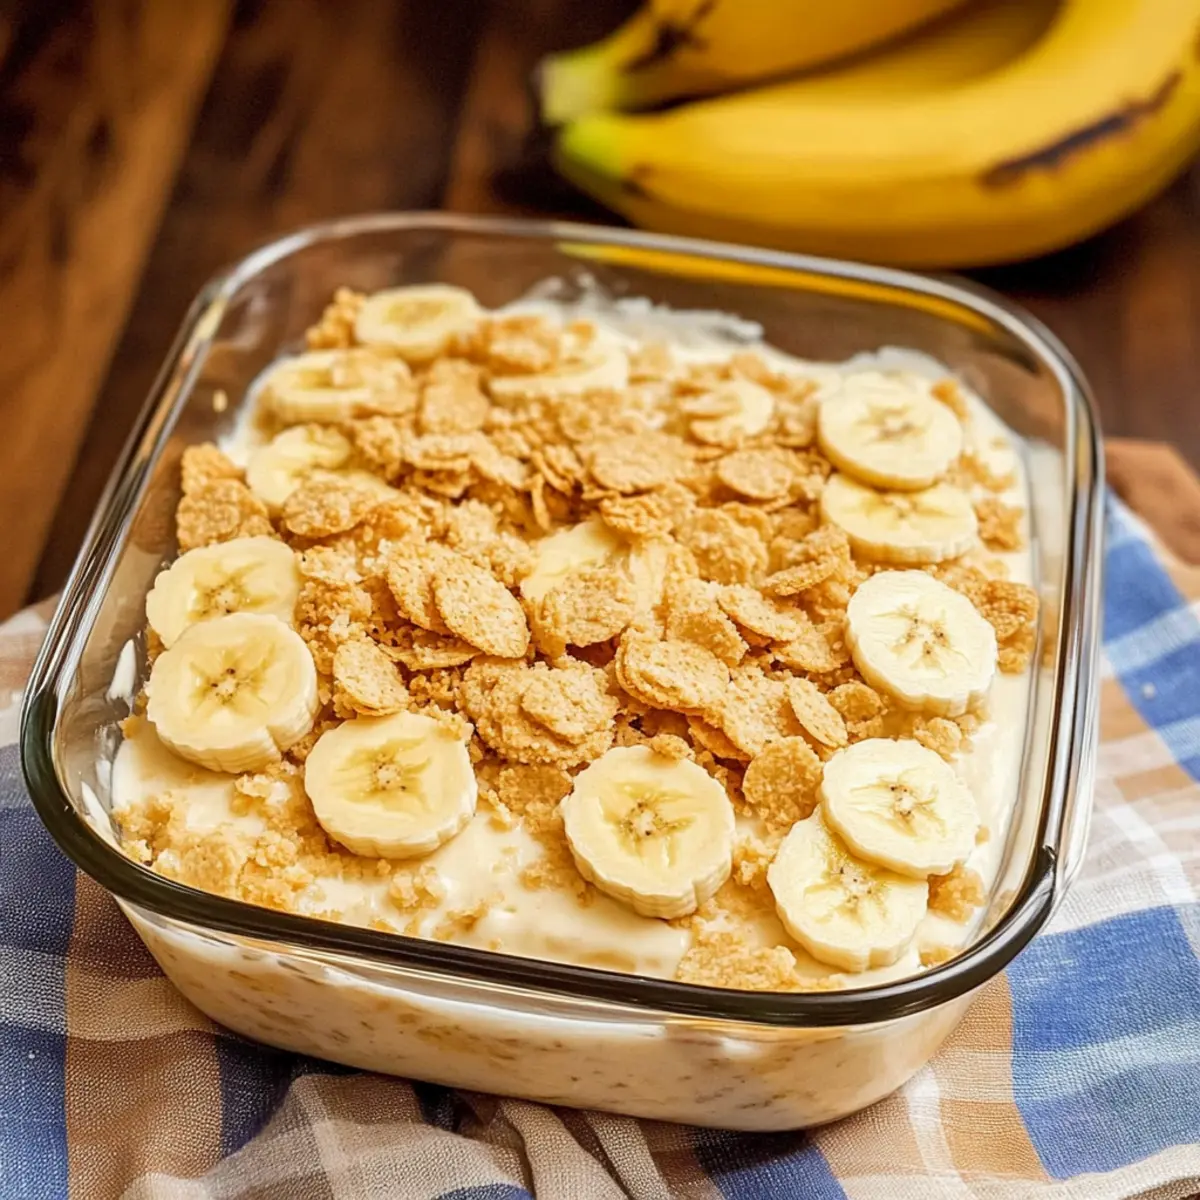
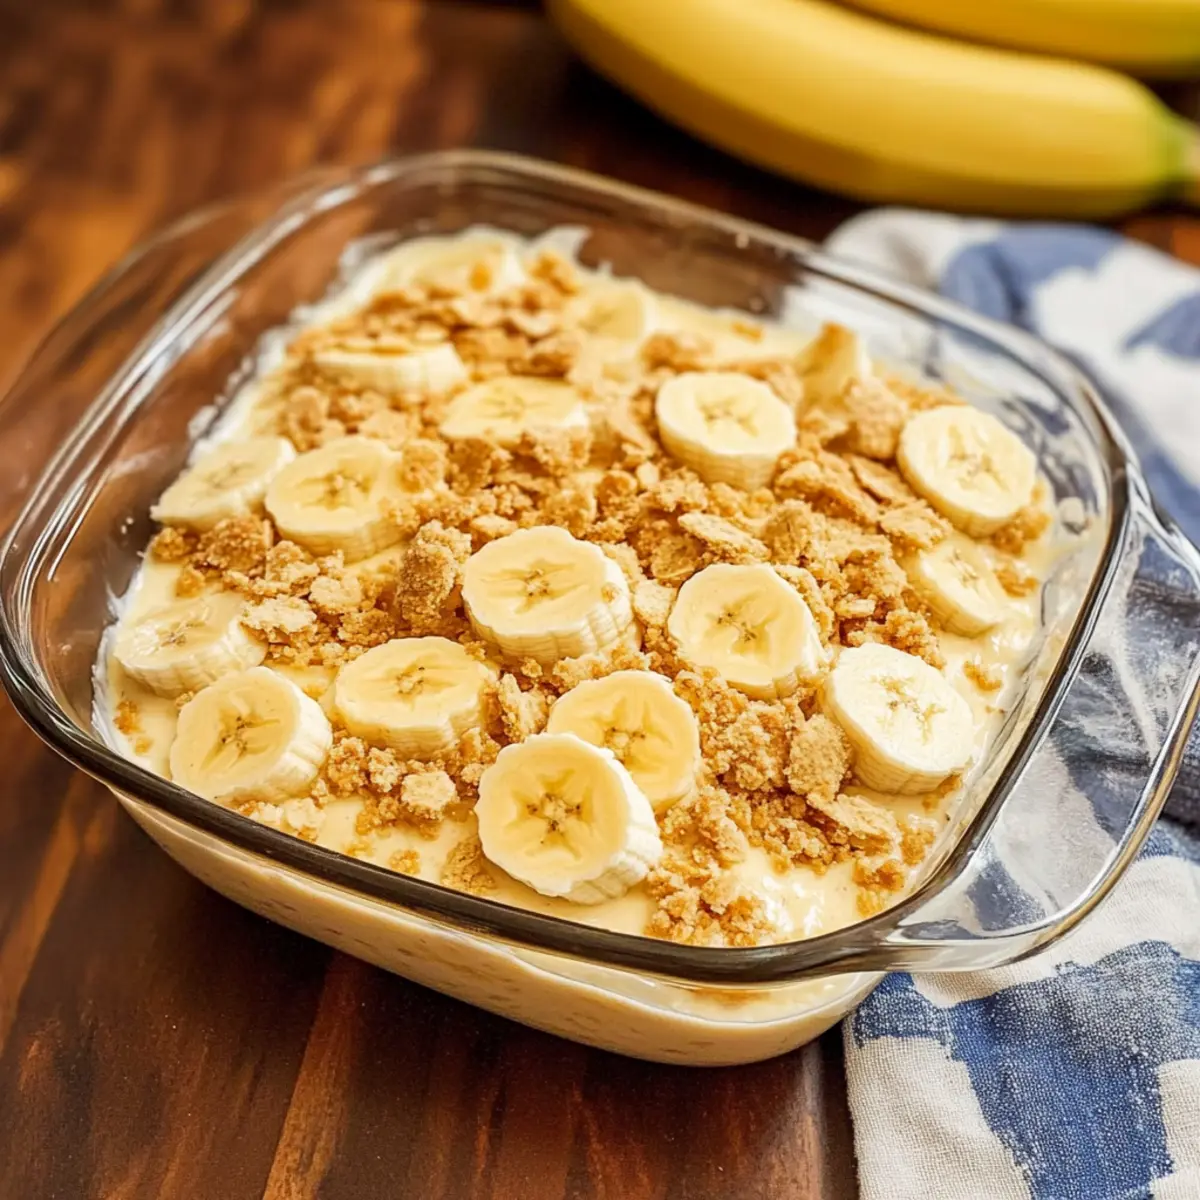
In an ungreased 8-inch square pan, start layering your pudding. Begin with about 25 vanilla wafers, followed by half of the sliced bananas. Pour half of the cooled custard mixture over the layers, ensuring even coverage. Repeat the process with another layer of wafers, bananas, and finish with the remaining custard, creating a delightful assembly of flavors and textures.
Step 6: Chill for Best Results
Cover your layered banana pudding tightly with plastic wrap to preserve its freshness, then refrigerate for a minimum of 4 hours. For optimal flavor fusion, letting it chill overnight is recommended; this allows the vanilla wafers to soften and the flavors to meld beautifully.
Step 7: Final Touch Before Serving
Just before serving, crush any remaining vanilla wafers and sprinkle them on top for an added crunch. This final touch will provide a delightful texture contrast to your creamy custard and tender bananas. Serve chilled, and savor the nostalgic flavors of your homemade dessert.
Storage Tips for Old-Fashioned Homemade Banana Pudding
Fridge: Store your Old-Fashioned Homemade Banana Pudding covered in the refrigerator for up to 4 days to maintain its freshness and flavor.
Room Temperature: It’s best to avoid leaving the pudding out at room temperature for more than 2 hours to prevent spoilage.
Freezing: Do not freeze this dessert, as the texture and creaminess of the custard will be negatively affected.
Reheating: If chilled custard firms up too much, gently reheat in the microwave in short bursts, stirring between intervals until just soft without cooking.
What to Serve with Creamy Old-Fashioned Banana Pudding
Bring your dessert experience to life with perfect pairings that’ll make everyone swoon.
- Whipped Cream: A light, fluffy topping that adds a delightful creaminess, enhancing the pudding’s texture and richness.
- Fresh Berries: Juicy strawberries or tart raspberries provide a refreshing burst of flavor that complements the sweetness of the pudding beautifully.
A fruit salad can offer both color and contrast, making each bite of banana pudding even more enjoyable.
- Chocolate Sauce: Drizzling warm chocolate sauce over your pudding introduces a rich, indulgent twist to this classic treat.
- Ice Cream: A scoop of vanilla bean ice cream adds an extra layer of creaminess and a cold contrasting temperature to the pudding.
Serve it alongside for an irresistible sundae vibe that invites nostalgia with every spoonful!
- Sweet Tea or Lemonade: These refreshing beverages balance the sweetness of the dessert, making them perfect companions for a Southern-inspired feast.
- Graham Crackers: Crunchy texture from well-toasted graham crackers can be served on the side, offering a little extra bite alongside your pudding.
Try these pairings to create a full meal experience that will delight your family and friends!
Expert Tips for Old-Fashioned Homemade Banana Pudding
- Optimal Chilling Time: Chill your pudding overnight for deeper flavor and softer wafers; don’t rush this crucial step!
- Fresh Banana Slices: To keep banana slices from browning, add them just before serving, ensuring vibrant color and taste.
- Avoid Runny Custard: Make sure your custard mixture is thick before adding eggs; undercooking will lead to a runny consistency.
- Layering Technique: For visually appealing layers, gently press down after each layer; this helps everything meld together beautifully.
- Flavor Variations: Feel free to experiment with flavored extracts, but keep the balance of the classic Old-Fashioned taste front and center.
Old-Fashioned Homemade Banana Pudding Variations
Feel free to make this nostalgic dessert your own with these delightful twists that enhance flavor and texture.
- Graham Cracker Layers: Swap out the vanilla wafers for graham crackers for a different crunch and flavor that still complements your pudding beautifully.
- Chocolate Delight: Add a layer of chocolate pudding between the custard and bananas for a rich, indulgent twist that’s sure to please chocolate lovers.
- Almond Extract: Substitute a teaspoon of vanilla extract with almond extract for a nutty flavor that adds a surprising depth to your banana pudding.
- Peanut Butter Swirl: For a nutty richness, mix in a few spoonfuls of peanut butter into the custard before layering. It creates a delightful, creamy swirl.
- Coconut Cream: For a tropical touch, incorporate shredded coconut into the pudding and garnish with toasted coconut flakes on top before serving.
- Spiced Pudding: Add a sprinkle of cinnamon or nutmeg to the custard for a warm, aromatic twist that beautifully complements the bananas.
- Berry Layer: Introduce a layer of fresh blueberries or strawberries between the custard and bananas for a pop of color and tartness.
- Whipped Topping: Elevate your serving with a dollop of homemade whipped cream on top, or mix it into the custard for an extra creamy finish.
Each variation brings its own charm, making your Old-Fashioned Homemade Banana Pudding truly unique. Enjoy experimenting, and don’t forget to check out how to store your creations properly for lingering flavors!
Make Ahead Options
These Old-Fashioned Homemade Banana Pudding layers are perfect for making ahead, saving you time on busy days! You can prepare the custard up to 24 hours in advance and layer it with the vanilla wafers and bananas. Simply complete steps 1-4 of the recipe, cool the custard, and then assemble the layers in a pan as directed. Cover the pudding tightly with plastic wrap and refrigerate overnight for the best flavor fusion. Just a crucial tip: to maintain the quality and prevent bananas from browning, slice them fresh and layer them just before serving. This way, you’ll enjoy a delightful, creamy, and beautifully layered dessert with minimal effort!
Old-Fashioned Homemade Banana Pudding Recipe FAQs
What type of bananas should I use for the best flavor?
Absolutely! The best bananas for this recipe are ripe but still firm. Look for bananas that are yellow with no dark spots all over, as they will provide a sweet and pleasant flavor without being overly soft.
How should I store Old-Fashioned Homemade Banana Pudding?
To keep your delicious pudding fresh, store it covered in the refrigerator for up to 4 days. Make sure it’s tightly sealed to prevent any odors from affecting its taste. Avoid leaving it out at room temperature for more than 2 hours to ensure it remains safe to eat.
Can I freeze this banana pudding?
I recommend against freezing Old-Fashioned Homemade Banana Pudding, as freezing can alter the texture of the custard and make it grainy once thawed. The creaminess you love about the pudding just won’t be the same! Instead, enjoy it fresh or store it in the fridge.
What should I do if my custard is too runny?
If your custard mixture turns out runny, don’t fret! This is often due to undercooking. When you first combine the milk, flour, and sugar, ensure it thickens properly during the cooking phase—this usually takes about 4-7 minutes at medium heat. Additionally, when you temper the eggs, ensure you’ve mixed them well before returning them to the heat. If it’s still runny after chilling, consider adding a little cornstarch slurry on low heat to thicken it up!
Can I make this recipe suitable for allergies?
Certainly! For those with dietary restrictions, you can substitute regular milk with a non-dairy alternative, like almond or oat milk. For egg allergies, try using a custard powder mix or a thickening agent like cornstarch combined with non-dairy milk. Just remember, these substitutions may slightly alter the texture and flavor of your Old-Fashioned Homemade Banana Pudding. Adjusting to your needs is always a good approach!
How long will the pudding last in the fridge?
You can enjoy your Old-Fashioned Homemade Banana Pudding for up to 4 days when stored properly in the refrigerator. Just remember, if you want the bananas to stay fresh and vibrant, add them in layers just before serving!
Creamy Old-Fashioned Homemade Banana Pudding You’ll Love
Ingredients
Equipment
Method
- In a medium saucepan, whisk together 1 cup of sugar, 1/3 cup of flour, and a pinch of salt. Set the saucepan over medium heat and smoothly incorporate 4 cups of whole milk while stirring continuously.
- Continue to cook the mixture over medium heat for approximately 4-5 minutes, stirring constantly until it thickens and begins to bubble gently. Lower the heat and continue cooking for an additional 2 minutes, then remove from heat.
- In a separate bowl, crack 4 large eggs and whisk them until smooth. Slowly temper the eggs with a small scoop of the hot custard mixture, then mix it back into the saucepan and return it to heat for about 2 minutes.
- After boiling for 2 minutes, remove the custard from heat and stir in 1 tablespoon of pure vanilla extract. Allow the mixture to cool for about 15 minutes, stirring occasionally.
- In an ungreased 8-inch square pan, layer about 25 vanilla wafers, half of the sliced bananas, and pour half of the cooled custard mixture over the layers. Repeat with another layer of wafers, bananas, and the remaining custard.
- Cover tightly with plastic wrap and refrigerate for a minimum of 4 hours. For optimal flavor, chill overnight.
- Just before serving, crush any remaining vanilla wafers and sprinkle them on top. Serve chilled.
Leave a Reply