
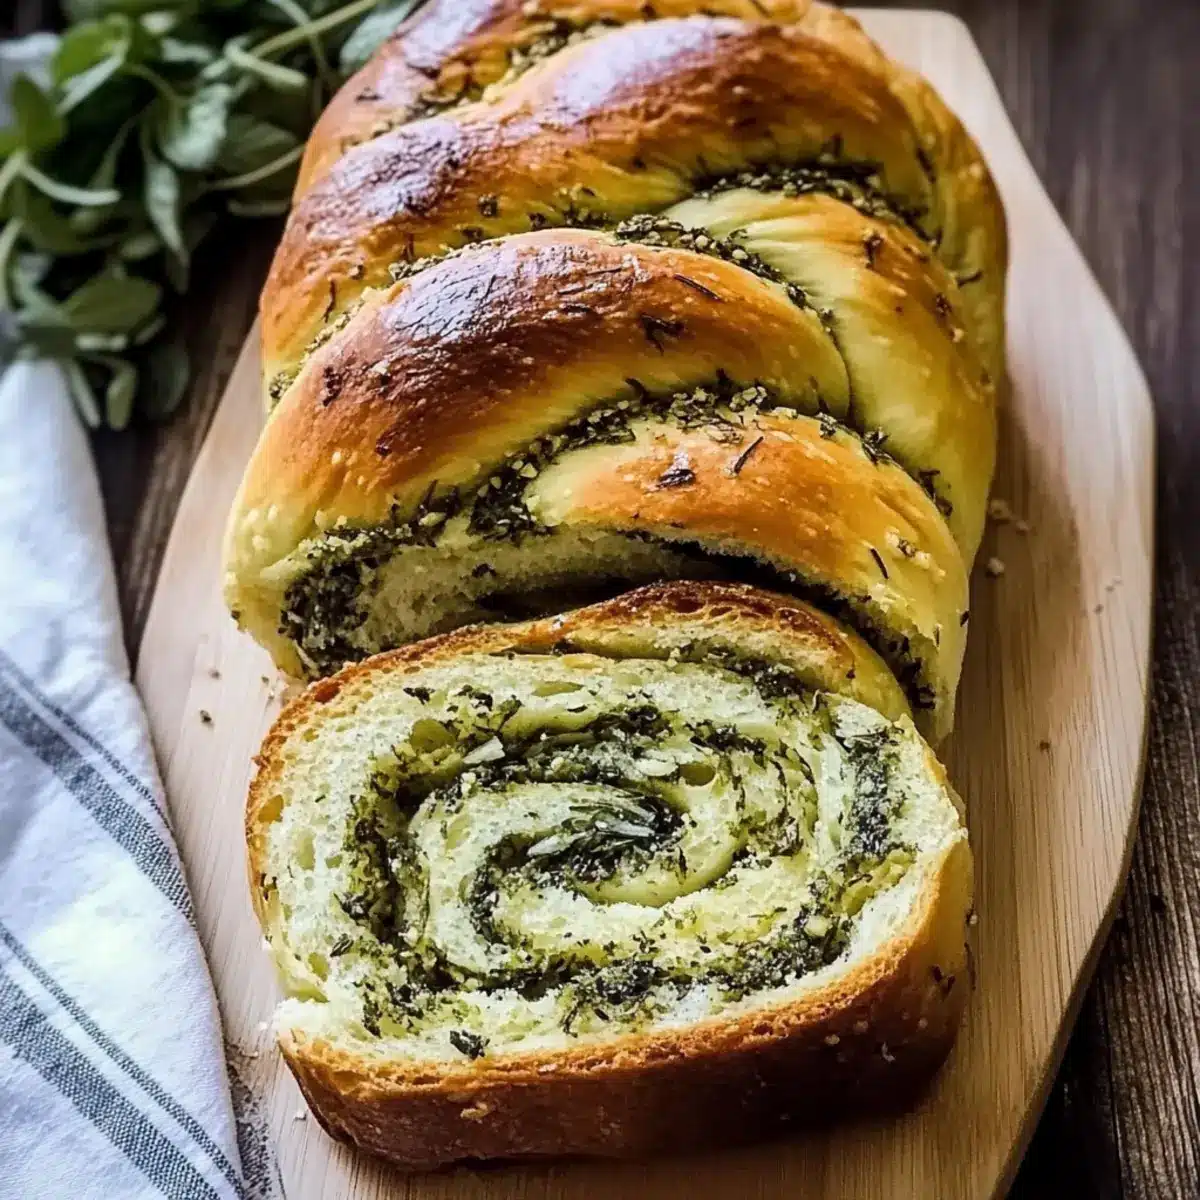
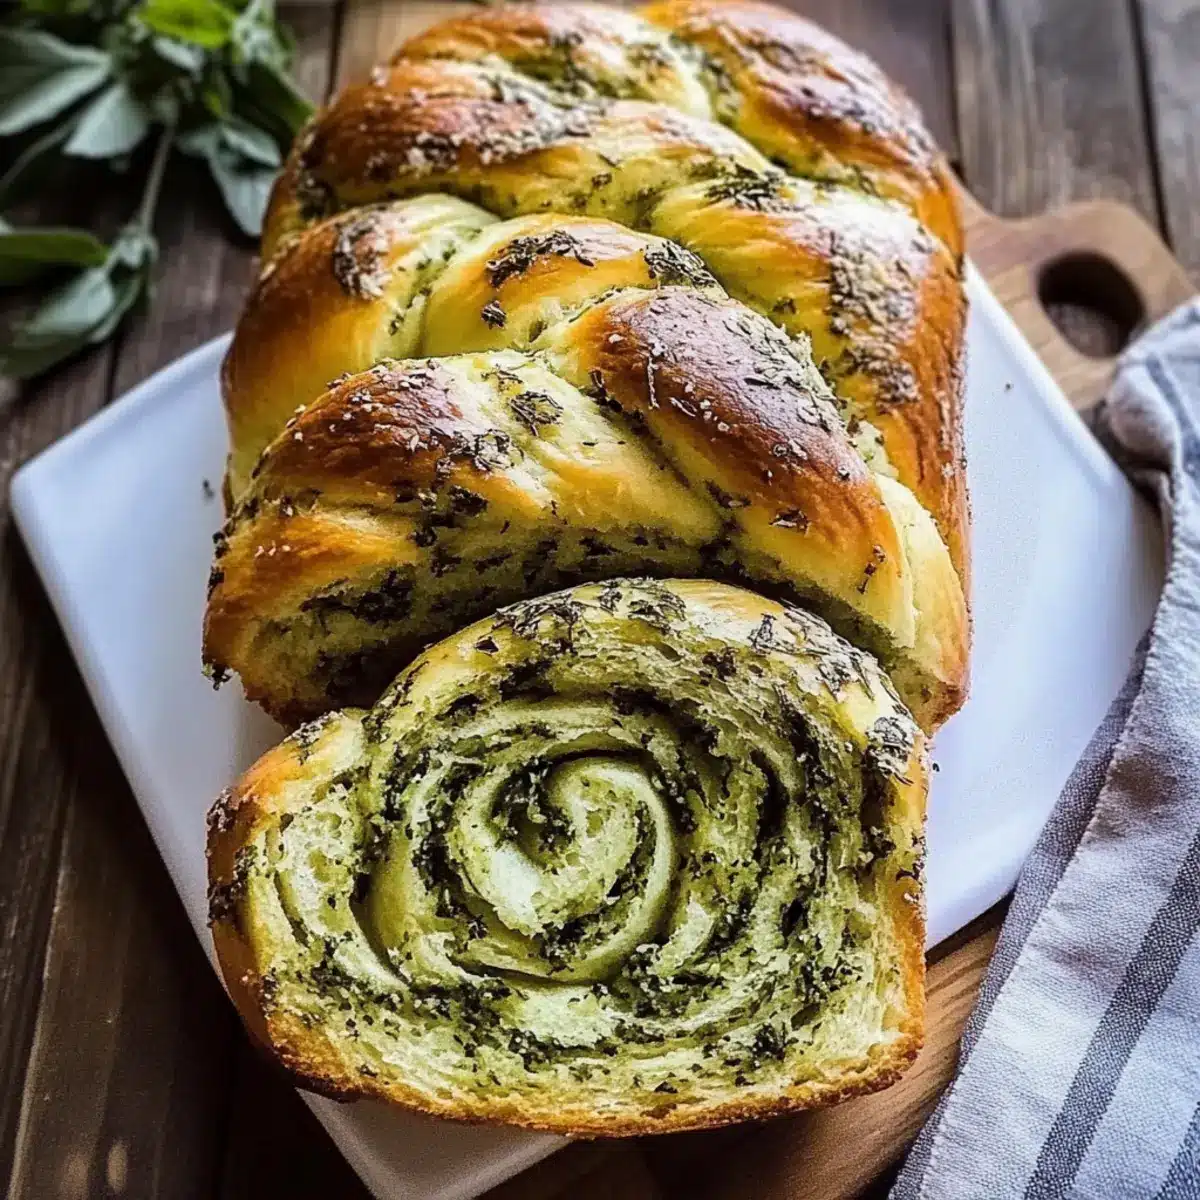
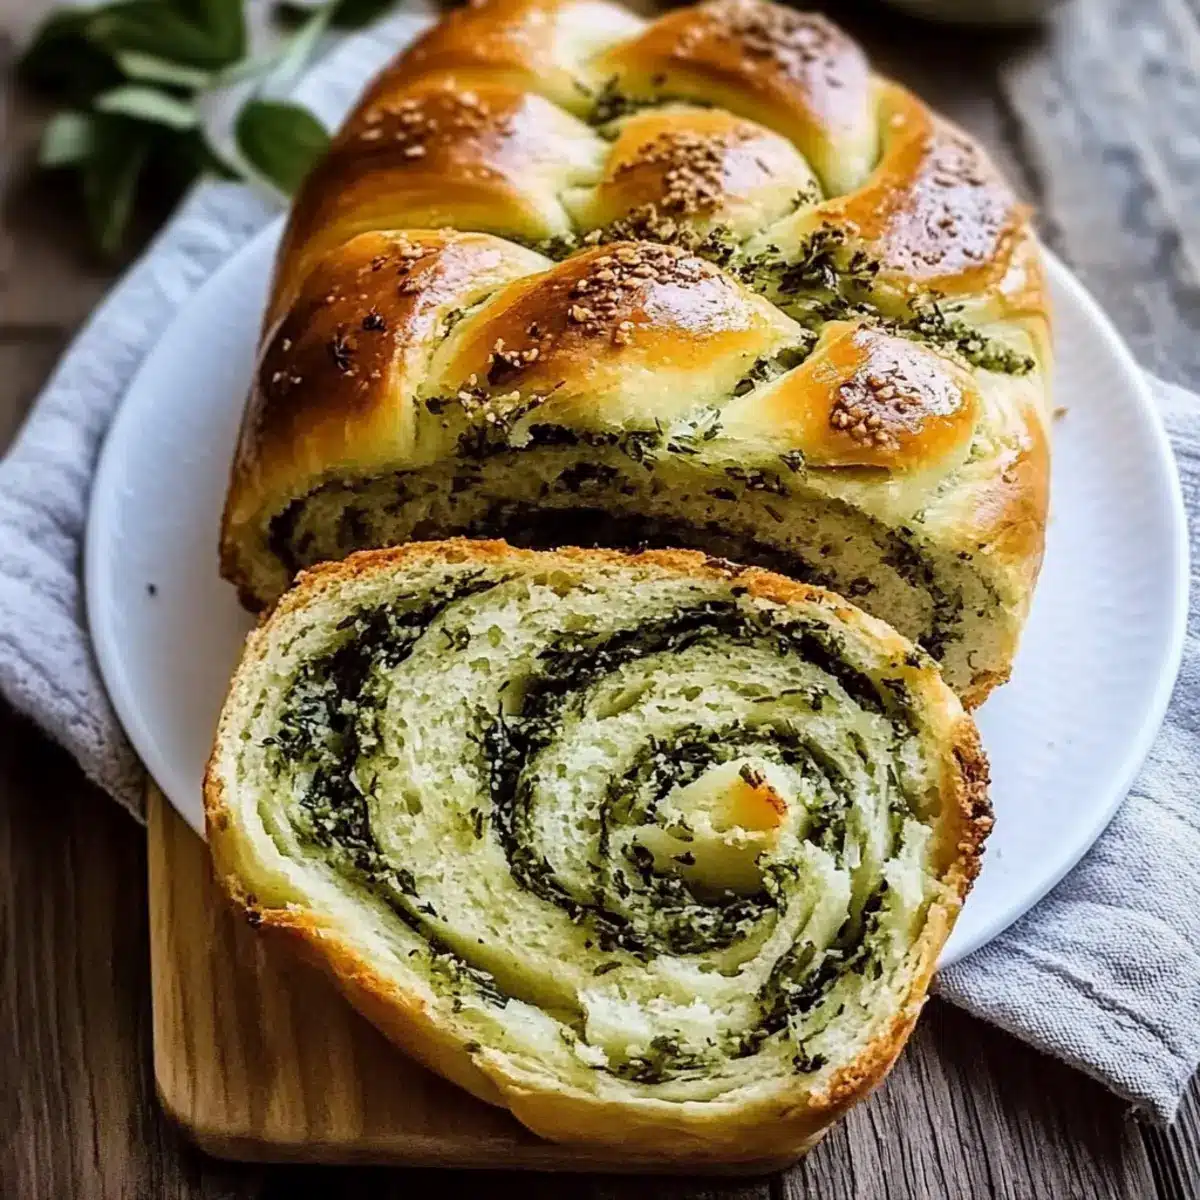
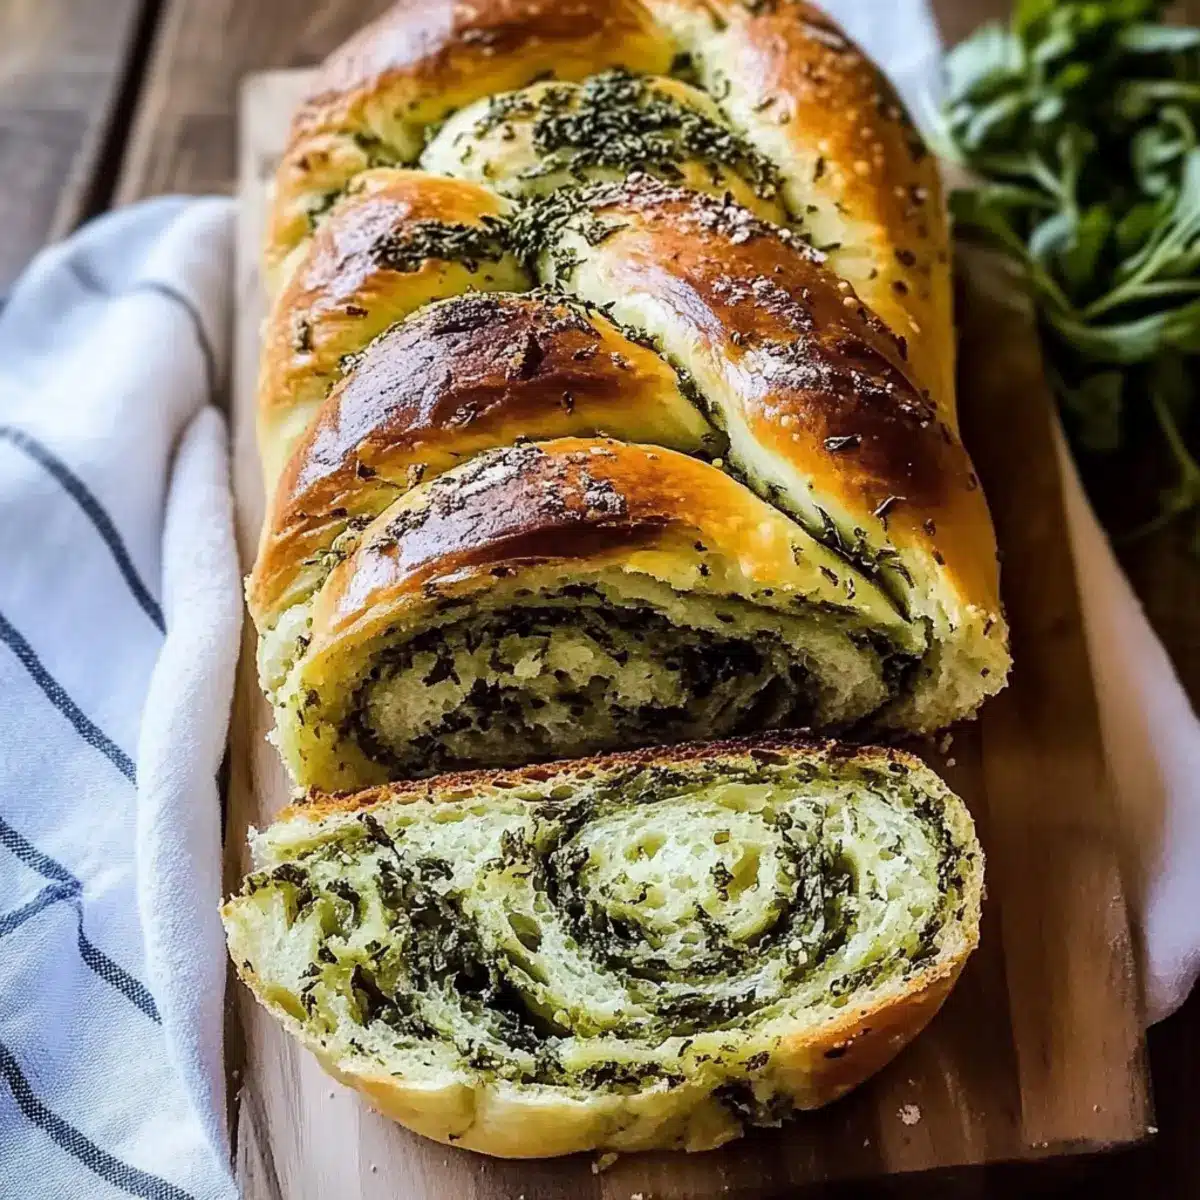
While savoring a cozy Saturday, I stumbled upon the idea of crafting a loaf that would lift the spirits of anyone who takes a bite. Say hello to my Swirled Garlic Herb Bread! This beginner-friendly recipe marries the crisp, delightful aroma of garlic with the fragrant notes of herbs, creating a buttery loaf that’s perfect for a family gathering or snuggling up with a bowl of soup. Not only does this recipe simplify bread-making, but it also allows for easy ingredient substitutions, ensuring everyone can enjoy it—vegan or not! With its fluffy texture and charming swirls, your kitchen will be transformed into a warm haven. Are you ready to experience the magic of homemade bread? Let’s get started!
Why is This Bread So Special?
Irresistible Aroma: Your kitchen will fill with enticing scents as the garlic and herbs meld together.
Beginner-Friendly: Even novice bakers can feel like pros with this simple recipe that requires no special skills.
Versatile Flavors: Customize the bread to your liking by swapping herbs or cheeses, making it perfect for any occasion!
Perfect Pairing: Great alongside soups or as a delicious snack on its own. Enjoy it toasted with butter, or try it with a drizzle of olive oil and balsamic vinegar for a gourmet touch.
Quick to Make: With just a little patience, you can have this amazing loaf ready in no time, impressing family and friends alike!
Don’t forget to check out my other recipes, like Garlic Butter Steak Bites or Garlic Butter Chicken, for more delicious ways to enjoy garlic!
Swirled Garlic Herb Bread Ingredients
For the Dough
• Milk – Provides moisture and a soft texture; substitute with non-dairy milk for a dairy-free version.
• Instant Yeast – Ensures a nice rise and airy crumb; can use active dry yeast if needed.
• Honey – Adds subtle sweetness and activates the yeast; replace with sugar or maple syrup if desired.
• Eggs – Contribute richness and structure; for a vegan version, use flaxseed meal mixed with water.
• All-Purpose Flour – Forms the base of the bread; swap whole wheat flour for a denser loaf.
• Salted Butter – Enhances flavor and creates a tender crumb; unsalted butter works, adjusting added salt accordingly.
For the Filling
• Garlic – Infuses the dough with aromatic, savory notes; fresh garlic is best, but garlic powder can do in a pinch.
• Parmesan Cheese – Adds umami depth; substitute with cheddar or pecorino for a different twist.
• Fresh Basil, Thyme, and Sage – Provide fresh, earthy flavors; feel free to use dried herbs in smaller amounts for convenience.
Each ingredient plays a vital role in crafting the delightful Swirled Garlic Herb Bread that will have everyone coming back for seconds! Enjoy baking!
Step‑by‑Step Instructions for Swirled Garlic Herb Bread
Step 1: Prepare the Dough
In a large mixing bowl, combine 1 cup of warm milk, 2 teaspoons of instant yeast, and 2 tablespoons of honey. Allow the mixture to sit for about 5-10 minutes until it becomes frothy. Next, whisk in 2 beaten eggs, followed by 4 cups of all-purpose flour and 1 teaspoon of salt. Mix until combined, then add 3 tablespoons of softened salted butter and knead the dough for about 5-7 minutes until it becomes smooth and elastic.
Step 2: Let the Dough Rise
Once your dough is kneaded, shape it into a ball and place it in a lightly greased bowl. Cover the bowl with plastic wrap or a clean kitchen towel. Let it rise in a warm, draft-free area for about 1 hour, or until it doubles in size. You’ll know it’s ready when it has puffed up and feels airy to the touch.
Step 3: Prepare Garlic Herb Butter
While the dough is rising, prepare the garlic herb butter by mixing 1/2 cup of softened butter, 3 cloves of minced garlic, 1/2 cup of grated Parmesan cheese, and 2 tablespoons each of finely chopped fresh basil, thyme, and sage in a small bowl. Blend well until all ingredients are evenly combined, creating a flavorful spread for the bread.
Step 4: Roll and Fill
After the dough has risen, punch it down gently to release the air. On a floured surface, roll it out into a rectangle approximately 12×18 inches. Evenly spread your prepared garlic herb butter over the surface of the dough, ensuring you cover every inch for that rich flavor experience.
Step 5: Shape the Bread
Starting from one long edge, roll the dough tightly into a log. Once formed, use a sharp knife to cut the log lengthwise down the middle, exposing the beautiful swirls. Twist the two halves together as though you’re braiding, creating a lovely spiraled effect, and tuck the ends under.
Step 6: Second Rise
Transfer the twisted dough onto a parchment-lined baking sheet. Cover it loosely with a towel and let it rise again for an additional 45 minutes. You’ll notice it becoming puffy as it rises, indicating that it’s getting ready for baking.
Step 7: Bake the Bread
Preheat your oven to 350°F (175°C). Once the dough is ready, bake it in the preheated oven for 30-35 minutes or until the top is nicely golden. To enhance the flavor and shine, brush the top with melted butter right after pulling it out of the oven; it will make your Swirled Garlic Herb Bread irresistible!
Helpful Tricks for Swirled Garlic Herb Bread
-
Temperature Matters: Ensure your milk is warm, not hot. Too hot can kill the yeast, preventing your bread from rising properly.
-
Knead Carefully: Aim for a dough that’s tacky but not overly sticky. This indicates it’s ready for the first rise. If it’s too sticky, gradually add a little more flour.
-
Herb Variations: Experiment with herbs! For a unique twist, try substituting basil with rosemary or oregano to create a different flavor profile in your Swirled Garlic Herb Bread.
-
Watch the Browning: If your bread starts to brown too quickly during baking, loosely cover it with aluminum foil for the last 10 minutes to ensure even baking without burning.
-
Cool Before Slicing: Allow the bread to cool for at least 10 minutes before slicing. This helps the interior set properly, giving you clean, beautiful swirls on every slice.
Swirled Garlic Herb Bread Variations
Feel free to let your imagination run wild and make this recipe your own with these delightful twists!
- Herb Swap: Replace fresh basil with oregano or rosemary for a unique flavor profile.
- Cheese Change: Use cheddar or feta instead of parmesan for a bold, creamy taste that brings a new dimension to your bread.
- Vegan Friendly: Substitute milk and butter with non-dairy options like almond milk and coconut oil, while swapping eggs for flaxseed meal mixed with water.
- Garlic Intensity: Crank up the taste by adding roasted garlic or increasing the fresh minced garlic to suit your palate.
- Nutty Texture: Incorporate finely chopped nuts, like walnuts or pine nuts, into the filling for extra crunch and a lovely flavor contrast.
- Spicy Kick: Add a pinch of red pepper flakes to the garlic herb butter for a subtle heat that complements the bread’s flavors perfectly.
- Gluten-Free Delight: Swap all-purpose flour with a gluten-free flour blend to cater to gluten-sensitive friends and family.
- Sweet Twist: Try adding a sprinkle of cinnamon and a touch of sugar along with your garlic butter for an unexpected but delightful flavor contrast.
Enjoy experimenting, and don’t forget to check out my Garlic Butter Steak Bites or indulge in the creamy goodness of my Gingerbread Cream Pie for more culinary inspiration!
Make Ahead Options
These Swirled Garlic Herb Bread options are perfect for busy home cooks looking to save time! You can prepare the dough up to 24 hours in advance; simply cover it tightly and refrigerate after the first rise. This not only enhances the flavors but also allows for easy assembly later on. If you’re short on time, you can also make the garlic herb butter ahead of time and store it in the refrigerator for up to 3 days. When you’re ready to bake, remove the dough from the fridge, let it come to room temperature and rise for about 45 minutes before rolling and shaping. This way, your Swirled Garlic Herb Bread will be just as delicious and full of flavor, ready to impress your family!
Storage Tips for Swirled Garlic Herb Bread
Room Temperature: Store the bread in an airtight container at room temperature for up to 3 days to maintain its soft texture and flavor.
Fridge: If you need to extend freshness, it can be refrigerated for up to a week, but this may alter the bread’s fluffiness. Wrap it tightly to prevent drying out.
Freezer: Wrap the cooled bread tightly in plastic wrap, then in aluminum foil, for freezing. It can last up to 3 months; thaw and reheat before serving for optimal taste.
Reheating: To revive the flavors, slice and warm in the oven at 350°F (175°C) for about 10 minutes, or enjoy it toasted for a delightful crunch!
What to Serve with Swirled Garlic Herb Bread
As you pull that golden-brown loaf from the oven, imagine all the delicious pairings awaiting to enhance your meal experience.
-
Creamy Tomato Soup: The rich, velvety texture of tomato soup complements the fluffy bread beautifully, perfect for dipping to soak up every bit of flavor.
-
Garlic Butter Shrimp: With hints of garlic echoing in both dishes, the savory notes create a delightful synergy that elevates your dining experience.
-
Greek Salad: This fresh, crunchy salad adds a burst of brightness that balances the warm, buttery bread, making each bite feel refreshing.
-
Herbed Olive Oil Dip: A simple mix of olive oil and herbs provides a luxurious dipping experience, enhancing the aromatic flavors of the bread.
-
Roasted Vegetable Platter: The caramelized sweetness of roasted vegetables pairs wonderfully, adding depth and heartiness to your meal alongside the bread.
-
Cheesy Mushroom Risotto: This creamy, indulgent dish provides a rich backdrop that calls for a slice of Swirled Garlic Herb Bread to soak up the comforting flavors.
-
Sparkling Water with Lemon: For a refreshing drink, this invigorating beverage cleanses the palate and complements the savory elements of the bread wonderfully.
-
Chocolate Chip Cookies: End your meal on a sweet note! The classic flavors of cookies provide a delightful contrast to the savory bread, creating a satisfying finish.
Swirled Garlic Herb Bread Recipe FAQs
How do I choose the right garlic for this recipe?
Absolutely! For the best flavor in your Swirled Garlic Herb Bread, go for fresh garlic bulbs. Look for plump cloves with tight, unbroken skin and no dark spots or sprouting. If you only have garlic powder on hand, use about 1 teaspoon for 3 cloves of fresh garlic, but fresh will give you a much richer aroma and taste!
What’s the best way to store Swirled Garlic Herb Bread?
You can store your delicious bread at room temperature in an airtight container for up to 3 days. Be sure to keep it away from direct sunlight and humidity, which can make it stale faster. If you want it to last longer, wrap it tightly in plastic wrap and then in aluminum foil before placing it in the freezer, where it can stay fresh for up to 3 months.
Can I freeze Swirled Garlic Herb Bread?
Very much so! To freeze the bread, first let it cool completely after baking. Then wrap it tightly in plastic wrap, followed by aluminum foil to ensure that no air gets in. When you’re ready to enjoy it again, simply thaw it in the refrigerator overnight, then reheat it in the oven at 350°F (175°C) for about 10 minutes to restore its fluffy texture.
What should I do if my bread dough is too sticky?
If your dough feels overly sticky when you’re kneading it, don’t panic! Simply sprinkle a little more flour on your work surface and on the dough itself, kneading until you achieve that tacky but manageable consistency. Remember, a well-kneaded dough should be smooth and elastic without being overly gooey.
Can I make healthy substitutions for this bread?
Absolutely! If you’re looking for healthier options, consider substituting all-purpose flour with whole wheat flour for a denser bread. You can also use olive oil in place of butter for a dairy-free version. If you want to cut down on sugar, agave nectar or stevia are great alternatives to honey.
What if my yeast doesn’t froth?
If your yeast doesn’t froth after mixing it with warm milk and honey, it may be inactive. First, check the expiration date on your yeast package, as old yeast can lose its potency. If it’s still good, ensure your warm milk isn’t too hot; it should be about 110°F (43°C). If it’s too hot or cold, the yeast won’t activate properly. Always take care when measuring temperatures!
Swirled Garlic Herb Bread: Fluffy, Flavorful, and Fun to Make
Ingredients
Equipment
Method
- In a large mixing bowl, combine 1 cup of warm milk, 2 teaspoons of instant yeast, and 2 tablespoons of honey. Allow the mixture to sit for about 5-10 minutes until it becomes frothy.
- Whisk in 2 beaten eggs, followed by 4 cups of all-purpose flour and 1 teaspoon of salt. Mix until combined, then add 3 tablespoons of softened salted butter and knead the dough for about 5-7 minutes until it becomes smooth and elastic.
- Shape the dough into a ball and place it in a lightly greased bowl. Cover the bowl with plastic wrap or a clean kitchen towel. Let it rise in a warm, draft-free area for about 1 hour, or until it doubles in size.
- Prepare the garlic herb butter by mixing 1/2 cup of softened butter, 3 cloves of minced garlic, 1/2 cup of grated Parmesan cheese, and 2 tablespoons each of finely chopped fresh basil, thyme, and sage in a small bowl.
- Once the dough has risen, punch it down gently to release the air. On a floured surface, roll it out into a rectangle approximately 12x18 inches. Evenly spread the garlic herb butter over the surface of the dough.
- Starting from one long edge, roll the dough tightly into a log. Cut the log lengthwise down the middle, exposing the swirls. Twist the two halves together.
- Transfer the twisted dough onto a parchment-lined baking sheet. Cover it loosely with a towel and let it rise again for an additional 45 minutes.
- Preheat your oven to 350°F (175°C). Bake the dough in the preheated oven for 30-35 minutes or until the top is nicely golden. Brush with melted butter right after pulling it out of the oven.
Leave a Reply