
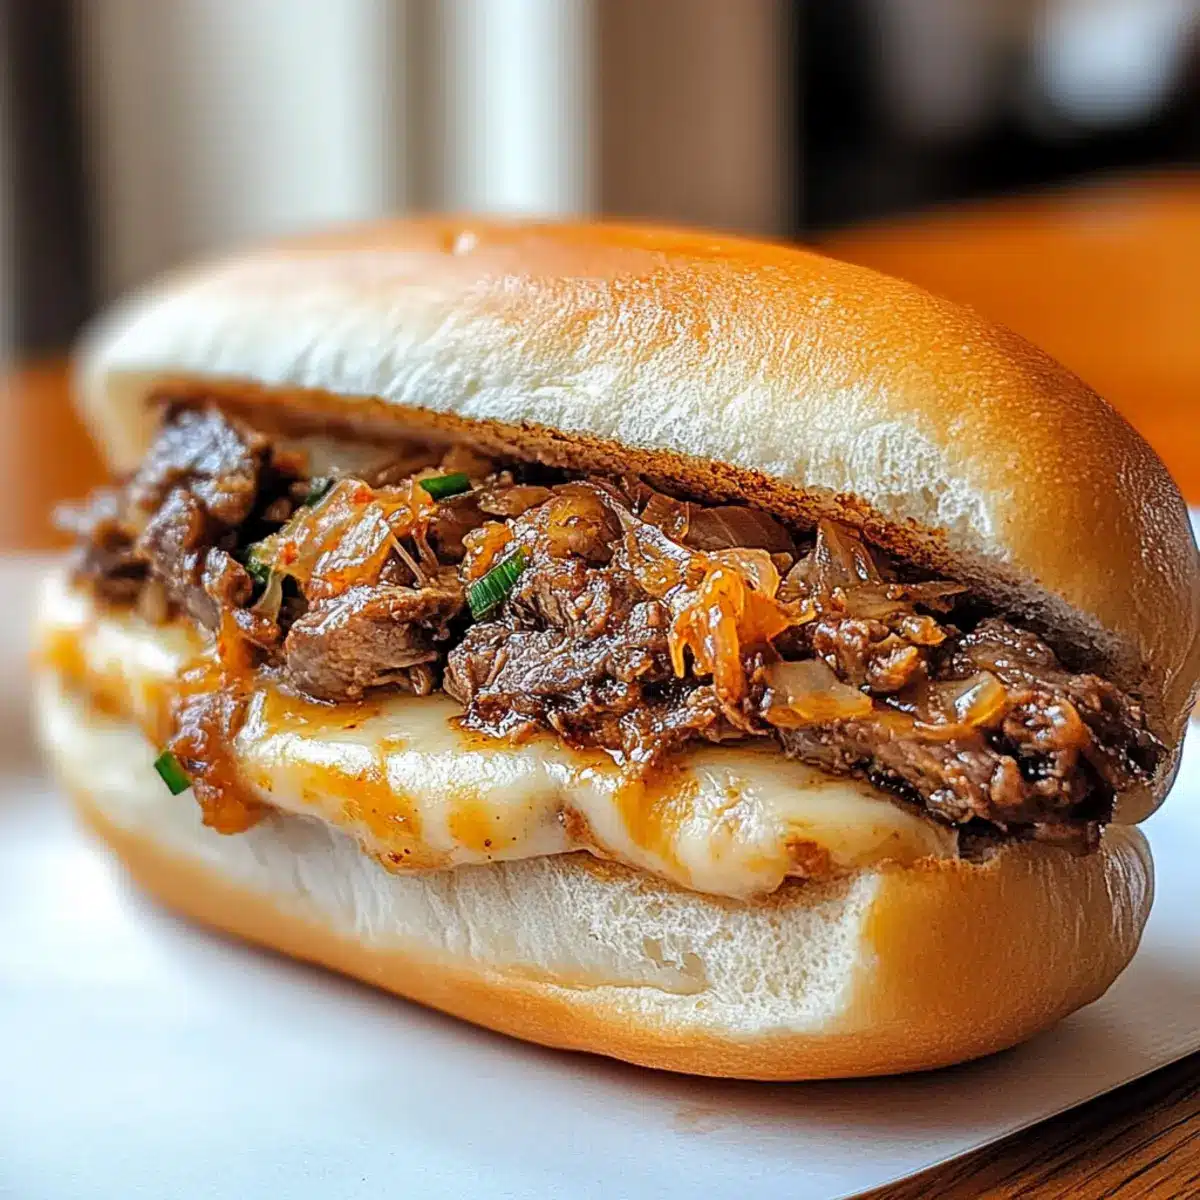
As the sun sets and the scent of marinated beef fills the kitchen, I can’t help but feel anticipation bubbling up. This Korean-Inspired Kimchi Bulgogi Cheesesteak is not just any sandwich; it’s a delightful mashup of flavors that tantalizes the taste buds. With its quick prep time, this dish is perfect for those busy evenings when you crave a homemade meal but don’t have hours to spare. Plus, it’s easily customizable—whether you prefer spicy kimchi or a milder twist, each version promises to impress. Ready to dive into a satisfying feast that’s full of vibrant flavors? Let’s get cooking and transform your dinner into a taste adventure!
Why is this cheesesteak so special?
Irresistible Flavor: The fusion of marinated beef with tangy kimchi creates a flavor explosion that’s far from your typical sandwich experience.
Quick and Easy: Ready in under 30 minutes, this dish is perfect for busy nights when homemade comfort food is a must!
Customizable Goodness: Adjust spice levels, swap proteins, or explore different cheeses to tailor this recipe to your taste! For more delicious options, check out our guide on customizable meal ideas.
Crowd-Pleasing Delight: Ideal for game days or family gatherings, this cheesesteak is sure to win over even the pickiest eaters.
Textural Harmony: Enjoy the crispy toasted bread, juicy beef, crunchy kimchi, and melting cheese in every delightful bite.
Kimchi Bulgogi Cheesesteak Ingredients
For the Beef Marinade
- Beef Sirloin – Cut thinly against the grain for maximum tenderness and robust flavor.
- Soy Sauce – Acts as a savory marinade base; substitute with tamari for a gluten-free option.
- Sesame Oil – Infuses a nutty flavor that perfectly complements the beef; vegetable oil can be used for a lighter taste.
- Minced Garlic – Adds aromatic depth; garlic powder (1/4 tsp) is a convenient substitute.
- Sugar – Balances the flavors beautifully; feel free to use honey or agave syrup as an alternative.
For the Vegetables
- Onion – Sauté until tender to create a savory base; any color pepper works well, too.
- Bell Peppers – Adds sweetness and crunch; you can use shallots if you’re looking for a milder flavor.
- Kimchi – Provides a spicy, tangy kick; adjust the amount based on your spice preference or opt for mild kimchi.
For Assembly
- Sub Rolls or Hoagie Bread – Toast before filling to ensure that crunch; essential for a satisfying bite!
- Cheese (American, Mozzarella, etc.) – Melts beautifully over the beef; you can use pepper jack for an extra kick if desired.
Now that you have everything you need, it’s time to bring this mouth-watering Kimchi Bulgogi Cheesesteak to life!
Step‑by‑Step Instructions for Kimchi Bulgogi Cheesesteak
Step 1: Prepare Ingredients
Begin by slicing the beef sirloin into thin strips, aiming for uniformity to ensure even cooking. Next, chop the onions and bell peppers into bite-sized pieces. This prep work should take about 10 minutes. Gather your ingredients and have them ready; this will streamline your cooking process and create a more enjoyable experience as you assemble your Kimchi Bulgogi Cheesesteak.
Step 2: Marinate Beef
In a mixing bowl, combine soy sauce, sesame oil, minced garlic, and sugar to create the marinade. Add the sliced beef, ensuring it is well-coated. Allow the beef to marinate for at least 15 minutes at room temperature; this step is crucial for enhancing flavor and tenderness. You’ll know it’s ready when the beef absorbs that rich marinade and starts to glisten.
Step 3: Sauté Vegetables
Heat a skillet over medium-high heat, adding a splash of oil to coat the bottom. Once the oil shimmers, toss in the chopped onions and bell peppers. Sauté for about 5 minutes, or until the vegetables soften and begin to caramelize slightly, releasing their sweet aroma. They should be tender yet still have a bit of crunch, creating a perfect base for your cheesesteak.
Step 4: Cook Beef
Push the sautéed vegetables to one side of the skillet and add the marinated beef to the other side. Cook the beef for about 5 minutes, stirring occasionally until it’s browned and cooked through. Pay attention to the color changes; the beef should be a rich brown with no pink remaining, indicating it’s ready to mingle with the veggies in your tasty Kimchi Bulgogi Cheesesteak.
Step 5: Add Kimchi
Once the beef is browned, mix in the chopped kimchi and stir everything together. Let this cook for an additional 2 minutes, allowing the kimchi to warm through and its flavors to meld with the beef and vegetables. You’ll notice a delightful tangy aroma fill your kitchen, signaling that the filling for your cheesesteak is almost ready.
Step 6: Assemble Cheesesteaks
Take your toasted sub rolls and carefully spoon the bulgogi mixture inside, ensuring an even distribution. Top each filled roll generously with cheese of your choice. If you prefer a gooey, melty texture, place the assembled cheesesteaks under the broiler for about 2 minutes, or until the cheese is perfectly melted and bubbling, adding that indulgent touch to your Kimchi Bulgogi Cheesesteak.
Step 7: Serve
Once the cheese is melted and golden, remove from the oven and drizzle with additional soy sauce if desired. Plate the cheesesteaks while they’re piping hot, ready to be savored. This final step ensures that each bite is a mouthwatering experience filled with the rich flavors of beef, spicy kimchi, and gooey cheese. Enjoy every moment of this culinary journey!

Kimchi Bulgogi Cheesesteak Variations
Feel free to explore these tasty twists on the classic Kimchi Bulgogi Cheesesteak that will make every bite even more exciting!
- Chicken Option: Swap out beef for sliced chicken breast for a lighter, protein-packed version that’s equally delicious.
- Tofu Alternative: Use firm tofu, marinated and grilled, for a vegetarian take that absorbs all those vibrant flavors beautifully.
- Gouda Delight: Substitute traditional cheese with gouda for a creamy, smoky flavor that complements the bulgogi perfectly.
- Fresh Avocado: Add slices of avocado for a creamy texture that balances the spicy tang of the kimchi, creating a satisfying contrast.
- Extra Spice: For those who love heat, incorporate sliced jalapeños or a dash of sriracha into the mix for a fiery kick.
- Herb Infusion: Toss in fresh cilantro or green onions just before serving for a pop of color and an added layer of freshness.
- Sweet Twist: Drizzle a bit of honey over the finished cheesesteak for a sweet contrast that enhances the overall flavor profile.
- Mild Kimchi: If you’re sensitive to spice, use a milder variety of kimchi or even pickled vegetables for that necessary crunch without the heat.
Excited to try these variations? Don’t forget to check out our guide on customizable meal ideas for more inspiration!
What to Serve with Korean-Inspired Kimchi Bulgogi Cheesesteak
A vibrant meal is just a few delicious side dishes away, perfect to complement the unique flavors of savory beef and tangy kimchi.
- Crispy Sweet Potato Fries: A delightful contrast; their sweetness pairs beautifully with the savory cheesesteak while adding crunch.
- Light Cucumber Salad: Refreshing and acidic, this salad cuts through the richness of the cheesesteak, offering a palate-cleansing bite.
- Creamy Coleslaw: With its crisp cabbage and tangy dressing, coleslaw adds a cool, crunchy element that balances the warm flavors of the sandwich.
- Spicy Pickled Vegetables: These add a zesty kick, enhancing the overall Korean theme and providing an exciting complement to the cheesesteak.
- Steamed Edamame: Lightly salted and rich in protein, these pods are an easy snack that will keep the meal feeling fresh and vibrant.
- Cold Beer or Soju: A chilled beverage enhances the flavors; a light lager complements the dish perfectly, while soju brings an authentic Korean touch.
- Chocolate Mousse: For dessert, this creamy treat rounds out the meal; the richness contrasts nicely with the savory cheesesteak’s robust flavors.
Storage Tips for Kimchi Bulgogi Cheesesteak
Fridge: Store leftover Kimchi Bulgogi Cheesesteak in an airtight container for up to 3 days to maintain freshness and flavors.
Freezer: For long-term storage, wrap individual cheesesteaks tightly in plastic wrap and place them in a freezer-safe bag, where they can last up to 2 months.
Reheating: To enjoy your cheesesteak again, reheat it in the oven at 350°F for about 10 minutes to restore the crunch of the bread while melting the cheese.
Wrapping: If you’re planning to freeze your cheesesteaks, be sure to wrap them tightly to prevent freezer burn, keeping all those delicious flavors intact!
Make Ahead Options
These Korean-Inspired Kimchi Bulgogi Cheesesteaks are a fantastic choice for busy home cooks wanting to save time during the week! You can marinate the beef sirloin up to 24 hours in advance, allowing those bold flavors to meld beautifully. Additionally, the sautéed vegetables can be prepared and stored in an airtight container in the refrigerator for up to 3 days. When ready to serve, simply cook the marinated beef with the prepped veggies and add the kimchi to warm through—finish by broiling with cheese until melted. This way, you’ll have a restaurant-quality meal that’s just as delicious, with minimal effort on busy nights!
Expert Tips for Kimchi Bulgogi Cheesesteak
- Slicing Technique: Make sure to cut the beef sirloin thinly against the grain for maximum tenderness; this is key for a delicious Kimchi Bulgogi Cheesesteak.
- Marination Time: Don’t rush the marinating process; let the beef absorb flavors for at least 15 minutes at room temperature, ensuring each bite is packed with rich taste.
- Vegetable Crunch: Sauté vegetables just until tender but still crisp to maintain their texture. Overcooking can lead to a mushy filling, which you want to avoid!
- Toasting the Rolls: Always toast your sub rolls before filling them; this keeps them from becoming soggy and enhances the overall experience.
- Customize Wisely: Feel free to adjust the spice level of the kimchi, but remember to taste as you go—find your perfect balance!

Korean-Inspired Kimchi Bulgogi Cheesesteak Recipe FAQs
How do I select ripe kimchi for this recipe?
Absolutely! When choosing kimchi, look for vibrant colors and a crisp texture. Fresh kimchi should have a tangy smell but avoid ones with dark spots or a sour odor, as these indicate over-fermentation. If you prefer milder flavors, opt for a fresh batch rather than an aged one.
How should I store leftover Kimchi Bulgogi Cheesesteak?
Very easy! Place any leftover cheesesteaks in an airtight container in the fridge, where they’ll stay fresh for up to 3 days. Just make sure they are sealed well to keep out moisture.
Can I freeze my Kimchi Bulgogi Cheesesteaks?
Yes, you can! For freezing, wrap each cheesesteak tightly in plastic wrap and then place them in a freezer-safe bag. They’ll keep well for up to 2 months. When you’re ready to enjoy them again, simply reheat in the oven at 350°F for about 10 minutes to preserve that delightful crunch.
What if my beef isn’t tender after cooking?
No worries! If your beef turns out tough, it could be due to not slicing it thin enough or overcooking. Always slice against the grain into thin strips, and keep an eye on the cooking time—ideally around 5 minutes for quick browning. If it’s still chewy, try slow-cooking it next time with the marinade for added tenderness.
Are there any dietary considerations I should take into account?
Great question! If you have gluten sensitivities, substitute soy sauce with tamari to enjoy this flavorful Kimchi Bulgogi Cheesesteak without worry. Additionally, if you’re vegan, consider swapping beef for tofu or seitan, and using vegan cheese to keep this dish deliciously dairy-free.

Savor the Bold Kimchi Bulgogi Cheesesteak Delight
Ingredients
Equipment
Method
- Begin by slicing the beef sirloin into thin strips. Chop the onions and bell peppers into bite-sized pieces. This prep work should take about 10 minutes.
- Combine soy sauce, sesame oil, minced garlic, and sugar to create the marinade. Add the sliced beef and allow to marinate for at least 15 minutes.
- Heat a skillet over medium-high heat and add oil. Sauté the chopped onions and bell peppers for about 5 minutes until softened.
- Push the sautéed vegetables to one side of the skillet and add the marinated beef. Cook for about 5 minutes until browned.
- Mix in chopped kimchi and stir. Cook for an additional 2 minutes.
- Spoon the bulgogi mixture into toasted sub rolls and top with cheese. Optionally, broil for 2 minutes until cheese is melted.
- Serve hot, optionally drizzled with soy sauce.
Leave a Reply